How To DIY Pinch Pleat Drapes – No Sew Method
Disclosure: This post may contain affiliate links. As an Amazon Associate, I earn from qualifying purchases at no additional cost to you.
DIY pinch pleat drapes are an easy and inexpensive way to make plain curtain panels look luxurious and high end. No sewing is required with the method I will show you below.
Why Pinch Pleats?
One of the characteristics of designer high end window treatments is the fullness of the drapes which is usually helped by pinch pleats. Pinch pleats are permanent pleats sewn into the panel that creates that luxurious full look. They require extra fabric and are labor intensive which significantly increases the cost of the drapes. That’s why I was so ecstatic to discover my favorite Amazon Pinch Pleat drapes that I have used all over my home.
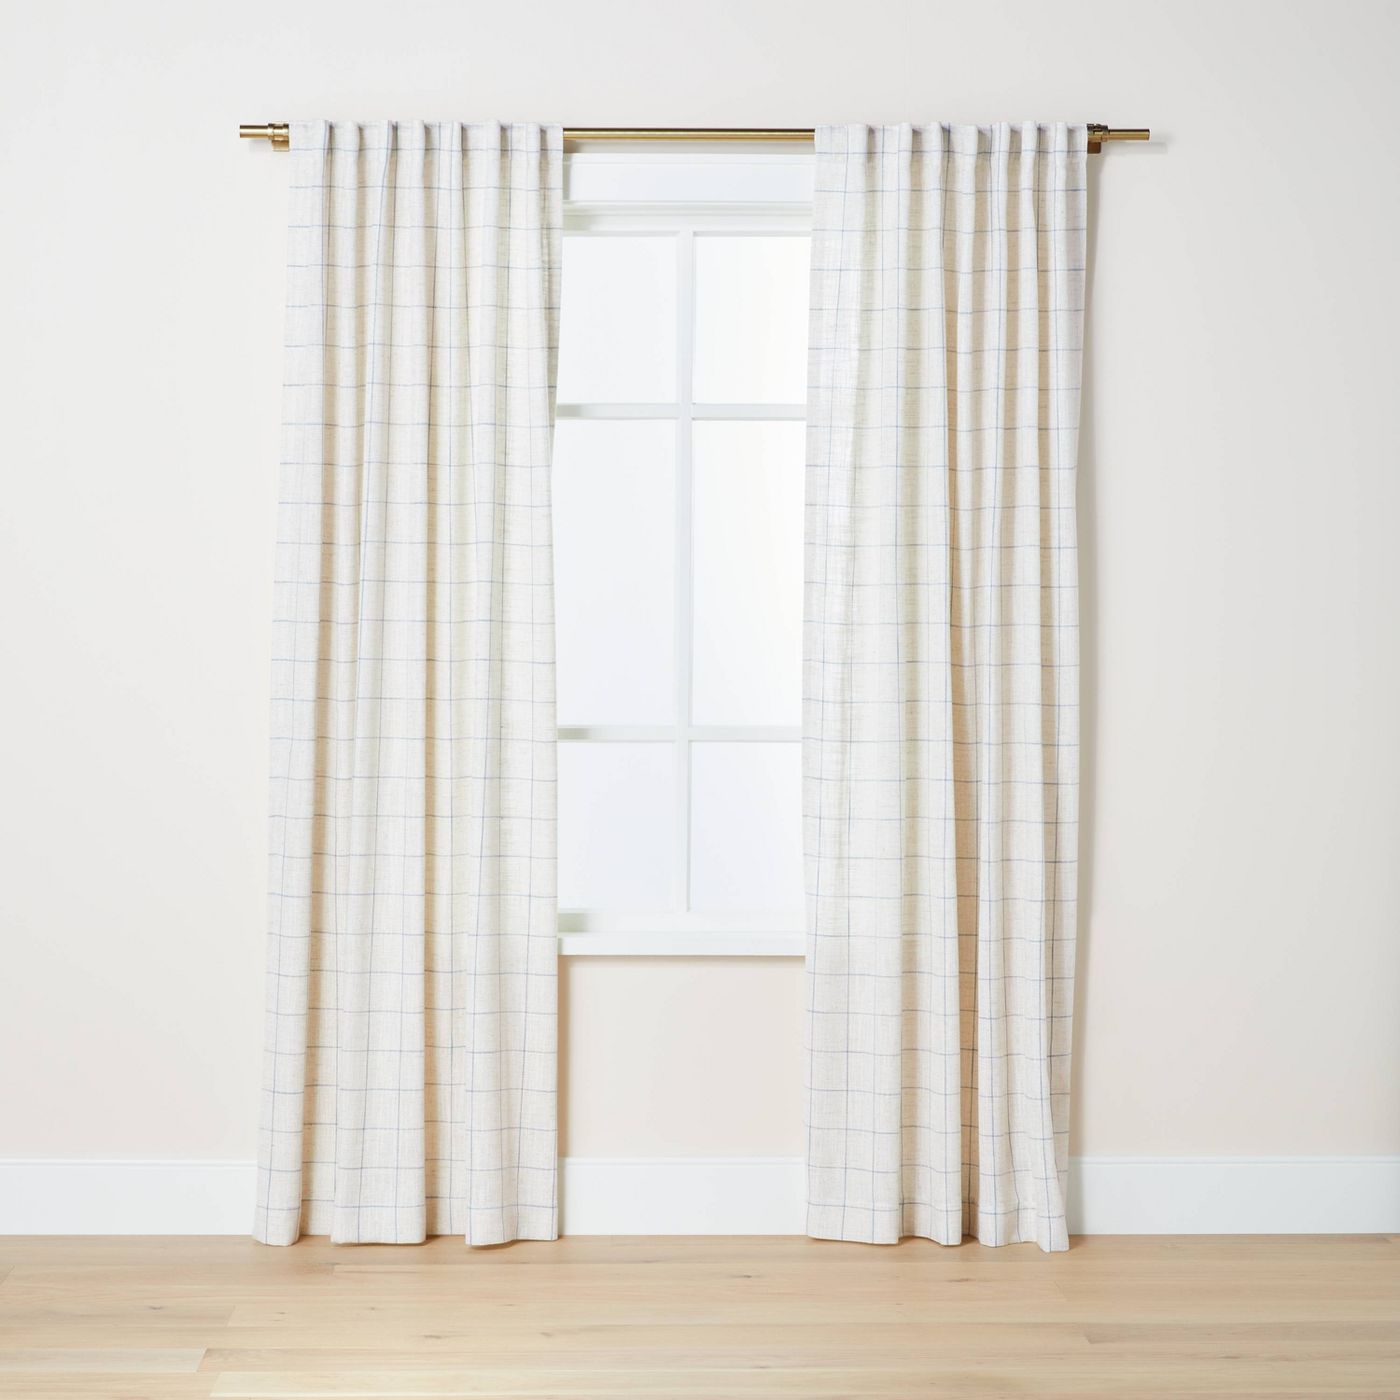
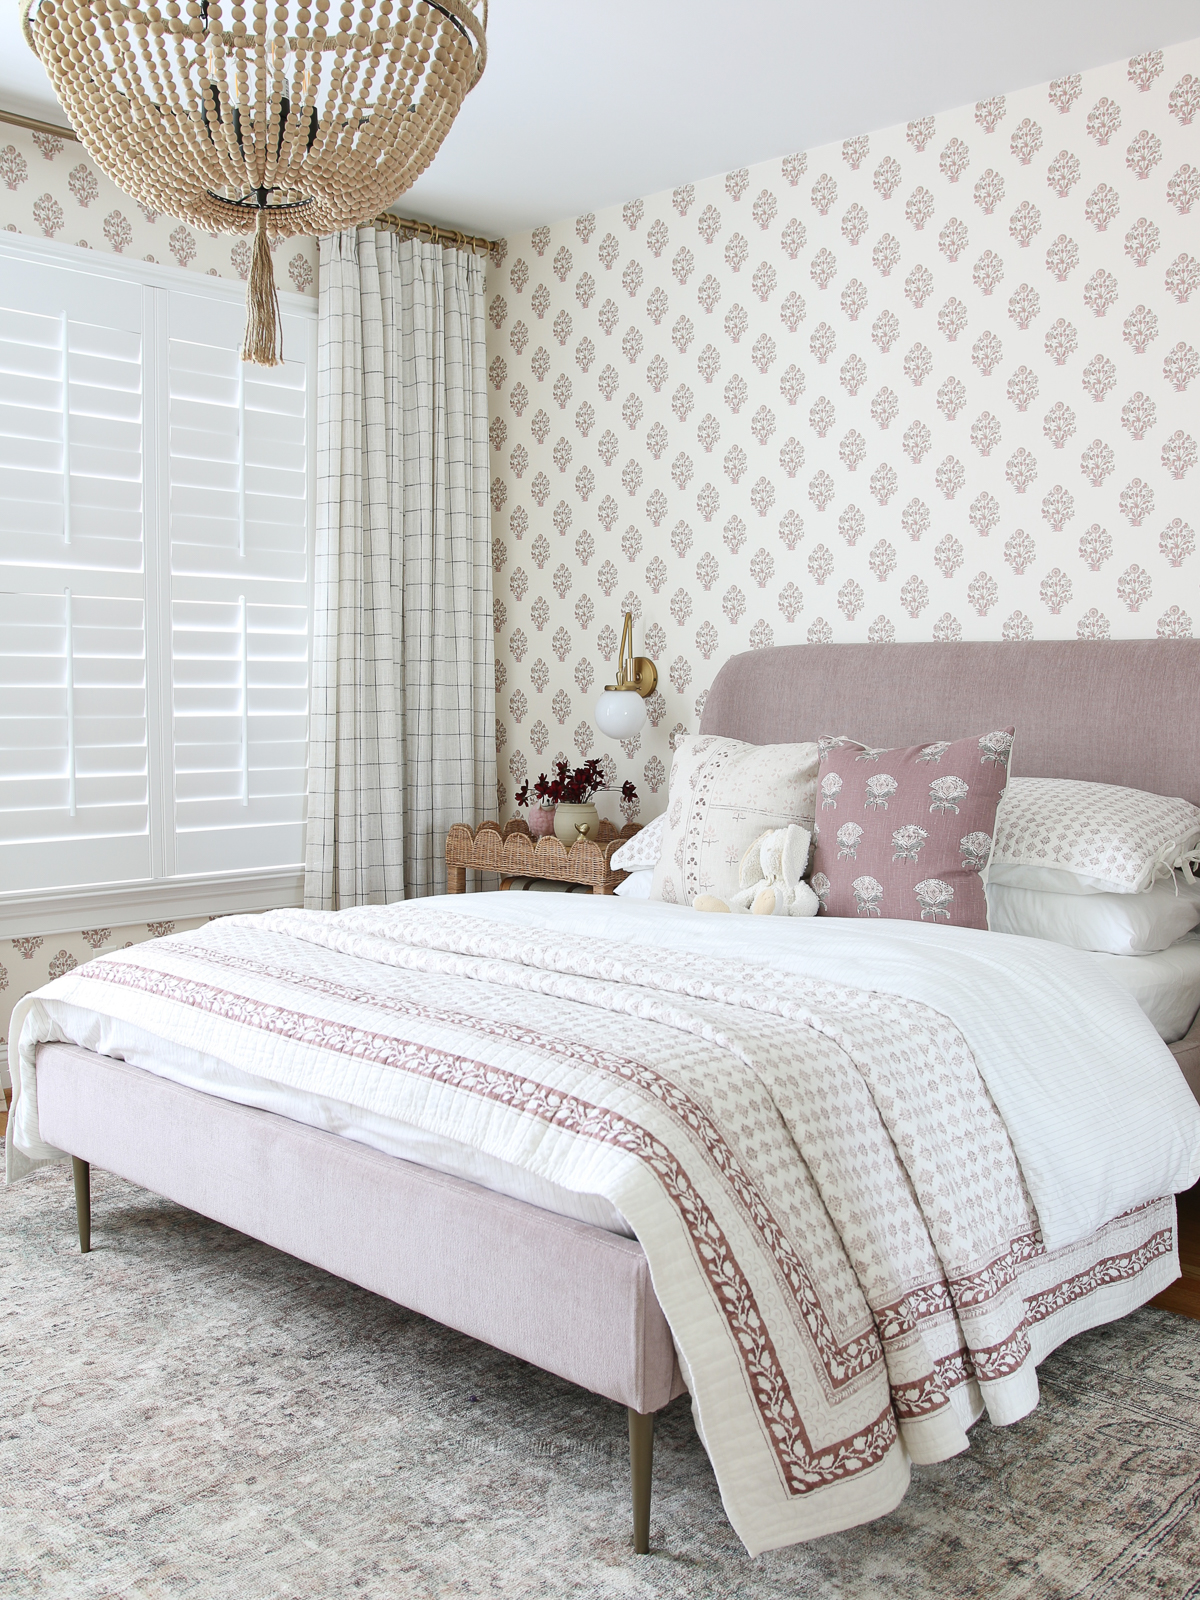
Unfortunately, the Amazon drapes only come in solid colors and I really wanted a print for Juliet’s bedroom. I fell in love with these simple windowpane pattern drapes from Target. They are very inexpensive and come with a pole top or tab top hanging option. I thought that I would buy a few panels and try to create the pinch pleat look myself.
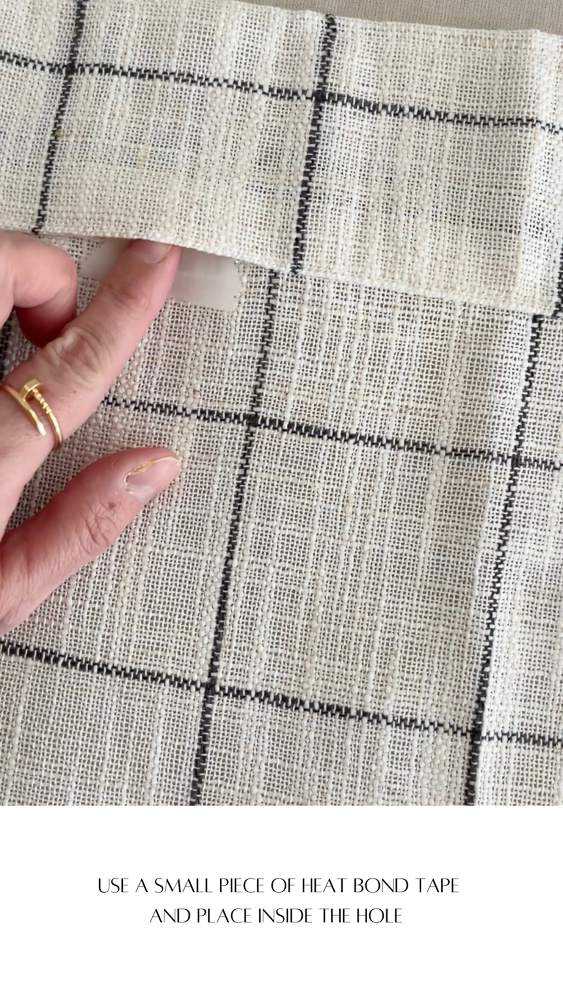
All you need to create DIY pinch pleat drapes is this tape and hooks that come as a kit. Depending on how many panels you have, you might have to order extra hooks. Typically, you’d sew the tape onto the panel header. I have done a lot of heavy-duty carpentry DIY in my life but I’m not very good with the sewing machine. I decided to try a no-sew method instead, using Heat Bond.
Heat Bond will fuse fabric together in a fairly permanent way just by pressing it with an iron. I have used it in the past to hem my boys’ dress pants. It shouldn’t come apart if it’s not subject to stress. In other words, if you pull on it, it might peel off but I’m very confident that it will hold the pleat tape on the drape because the weight is distributed across a long distance.
Supplies I Used for DIY Pinch Pleat Drapes

Instructions for DIY Pinch Pleat Drapes
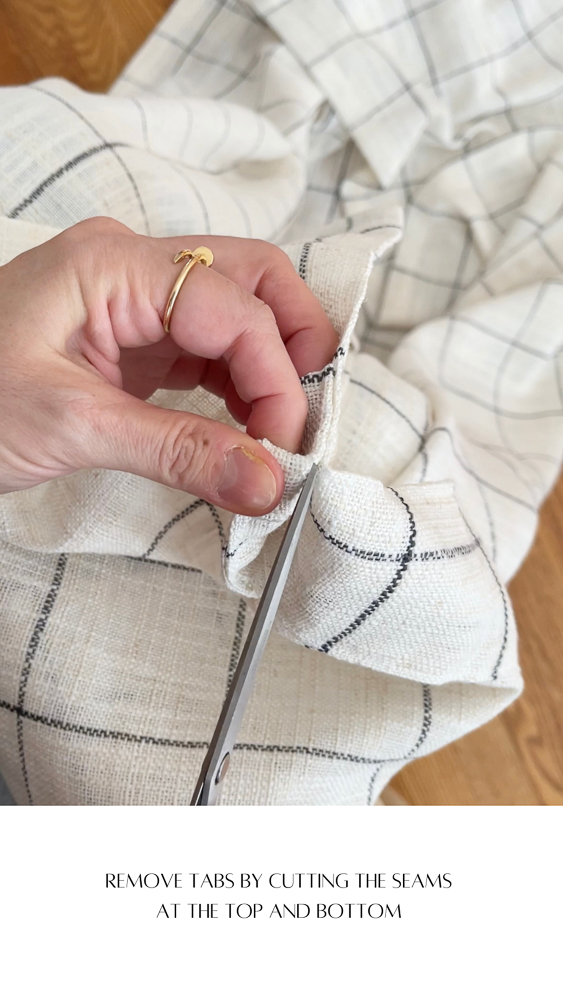
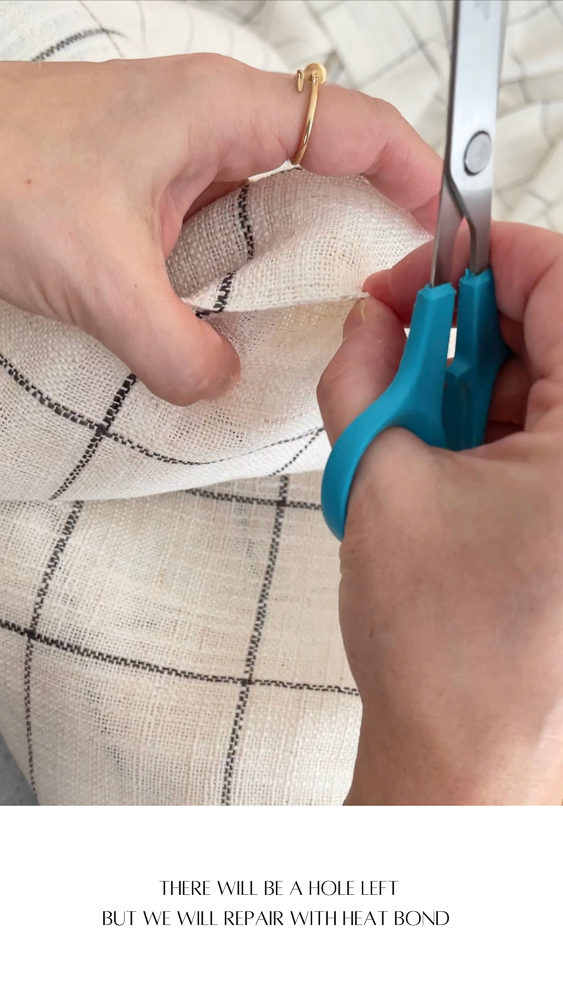
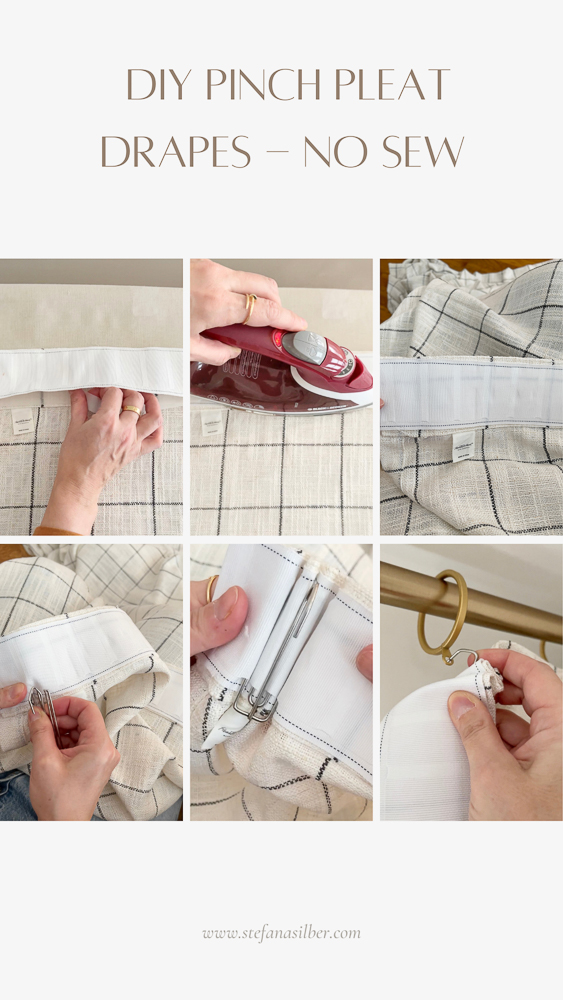
The first step entails removing the tabs. If your drape doesn’t have tabs – great, you can skip to the next step. You have to remove the tabs because if you attach the pleat tape on top of it, it will create many thick layers and it will be impossible to fold to insert the hooks.
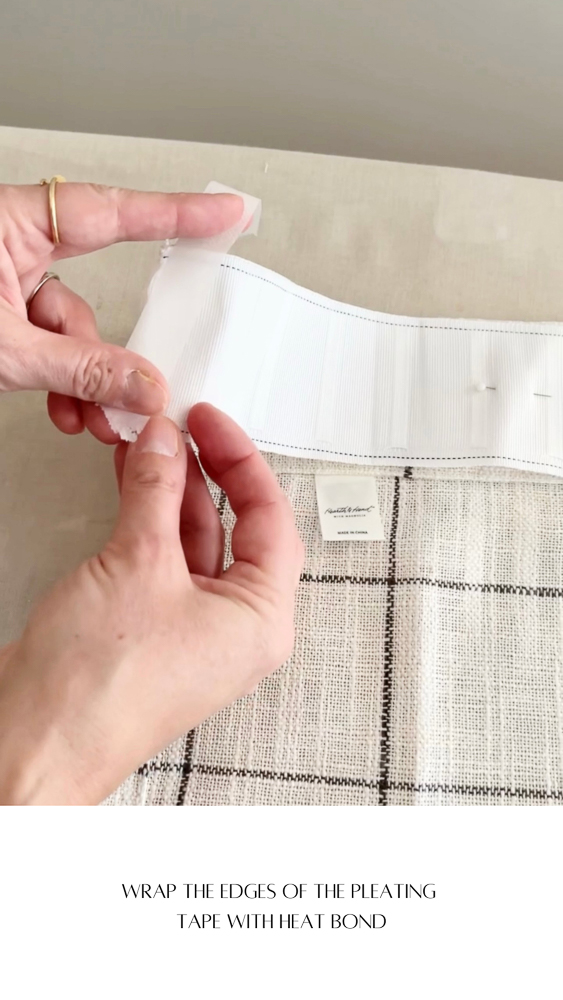
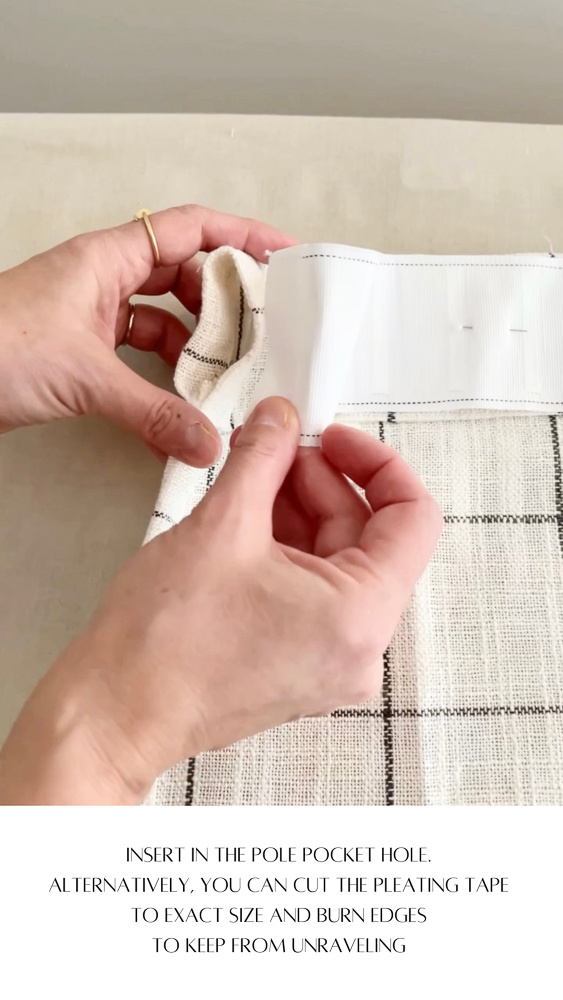
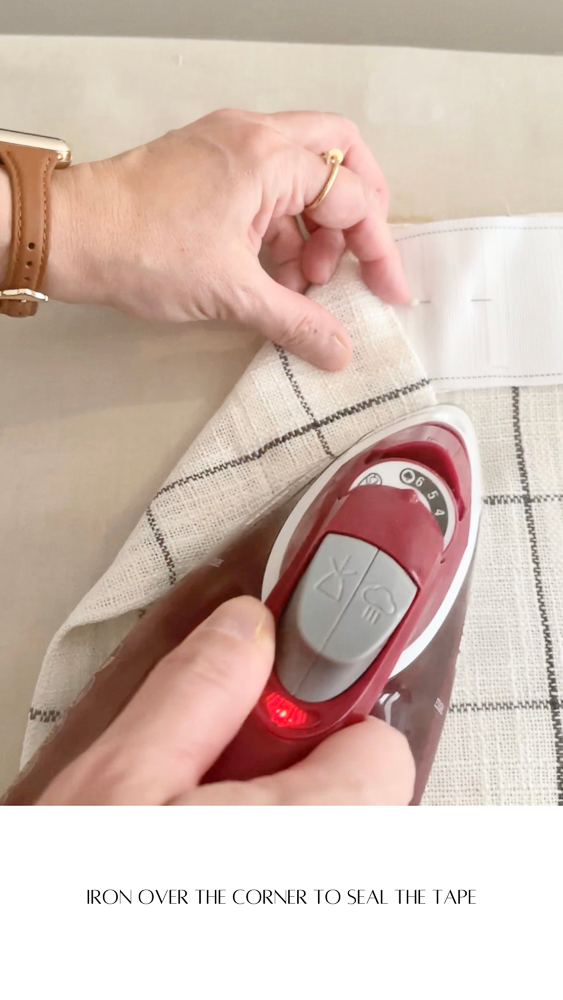
In this step, you are securing the edges of the tape to prevent fraying. You can wrap the edges with heat bond, tuck them in the pole pocket opening, and iron them. Make sure you cut the tap a couple of inches longer than your drape header to accommodate folding under. Or you can burn the edges to prevent fraying in which case cut the tape slightly shorter than the drape width.
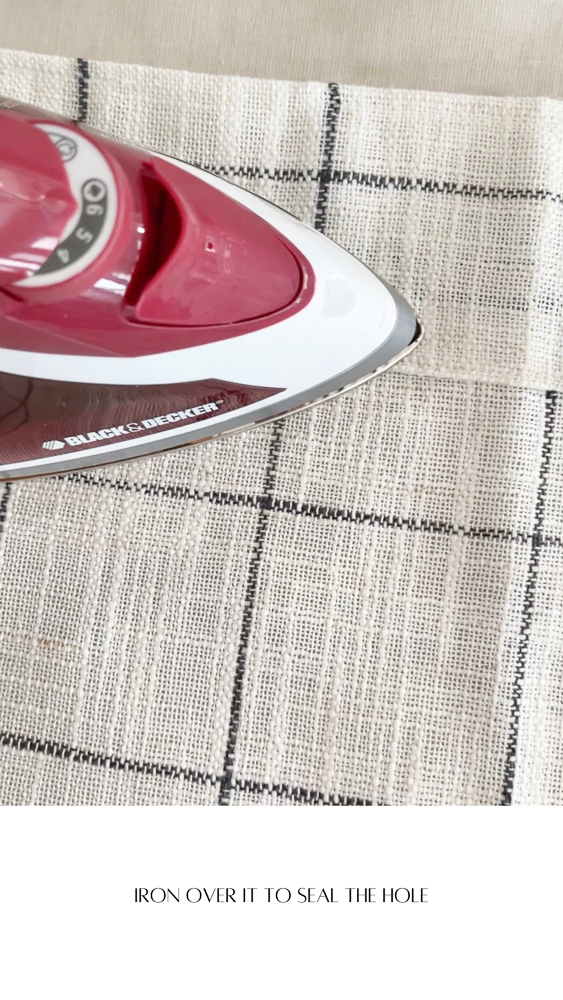
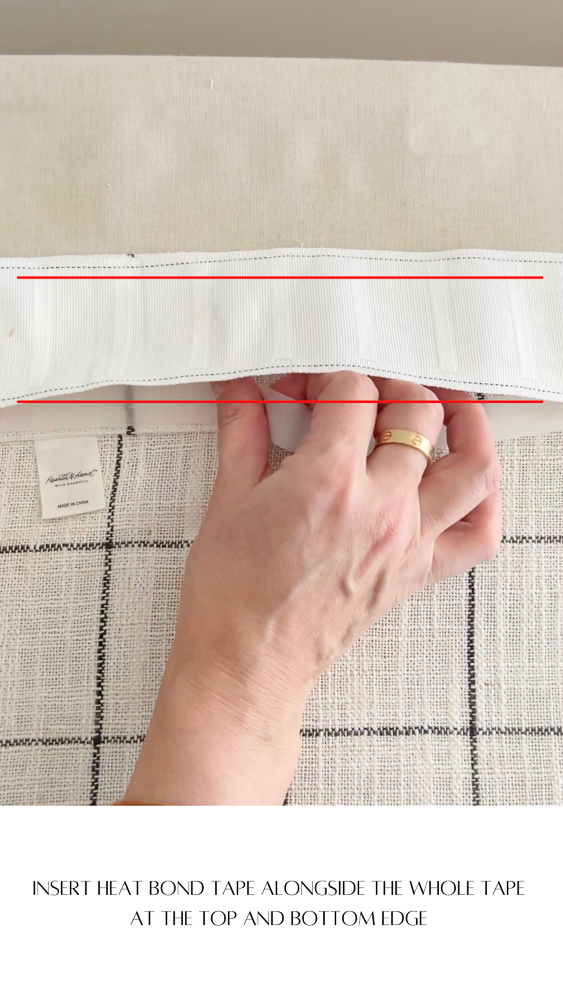
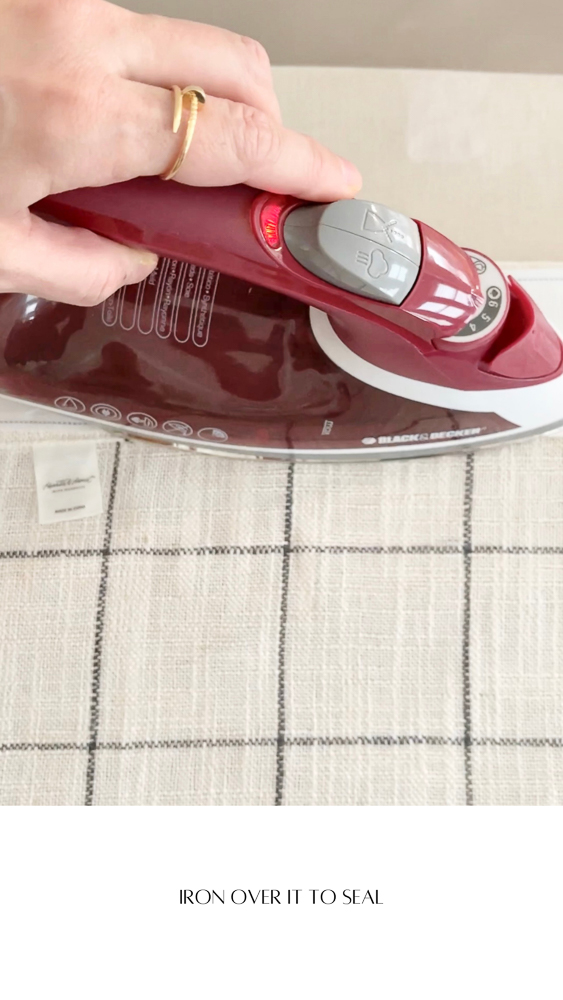
Now just add Heat Bond tape between your drape header and pleat tape on the top and bottom edge. I worked in small manageable section. Iron each section well to activate the adhesive.
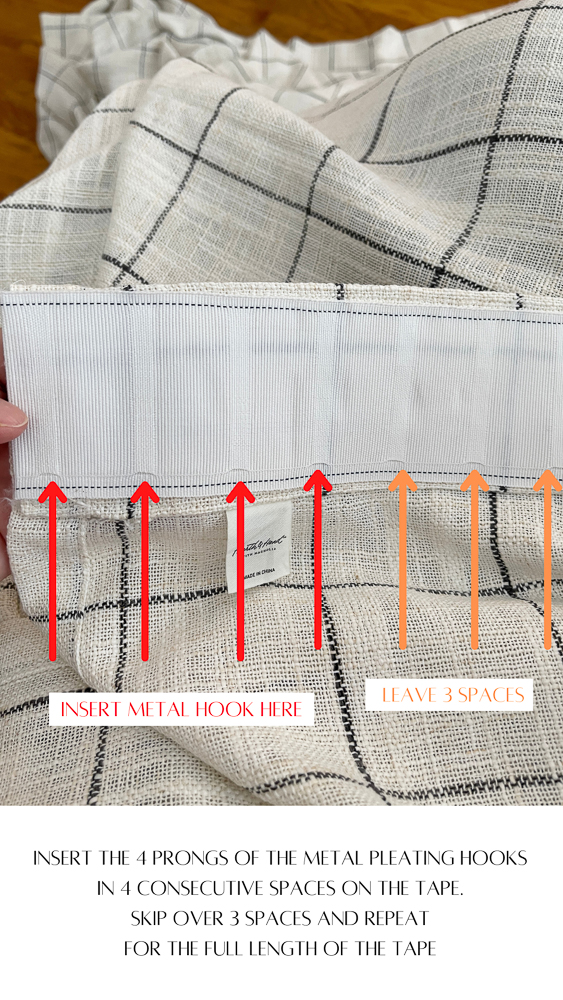
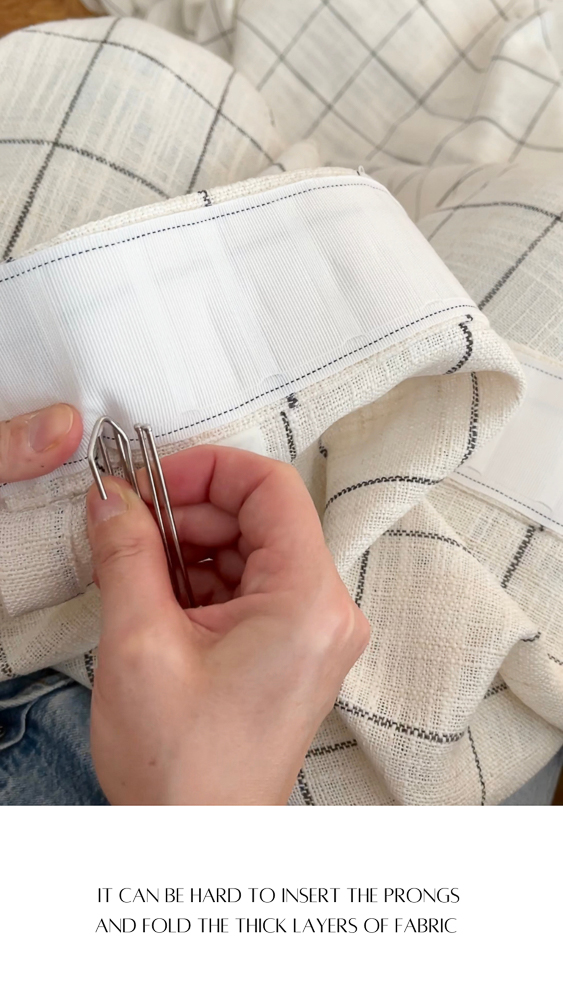
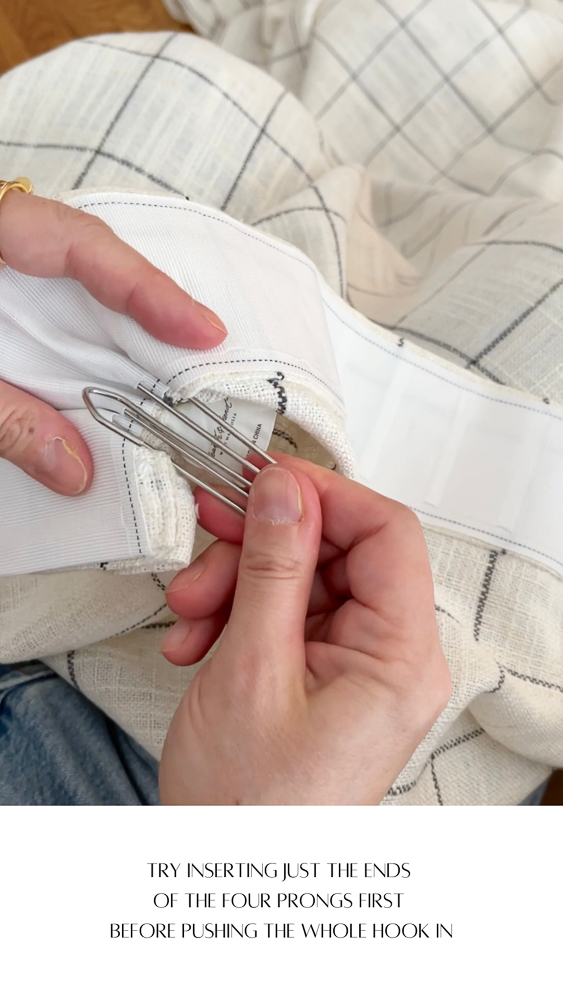
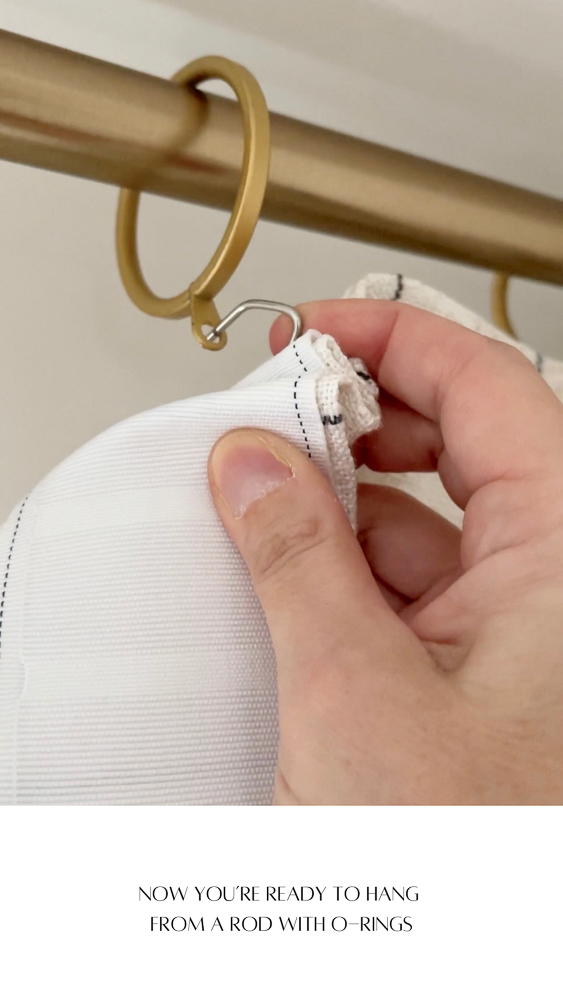
You can start inserting the hook with the very first space on the tape or skip one. The spacing between the pleats is also up to you. I chose to leave 3 spaces between each hook. The hooks have 4 prongs – each prong goes inside a space in the tape. It can be very hard to insert them so keep trying. You might have to fold and manipulate the fabric until all 4 prongs are in their slots, then push the hook in.
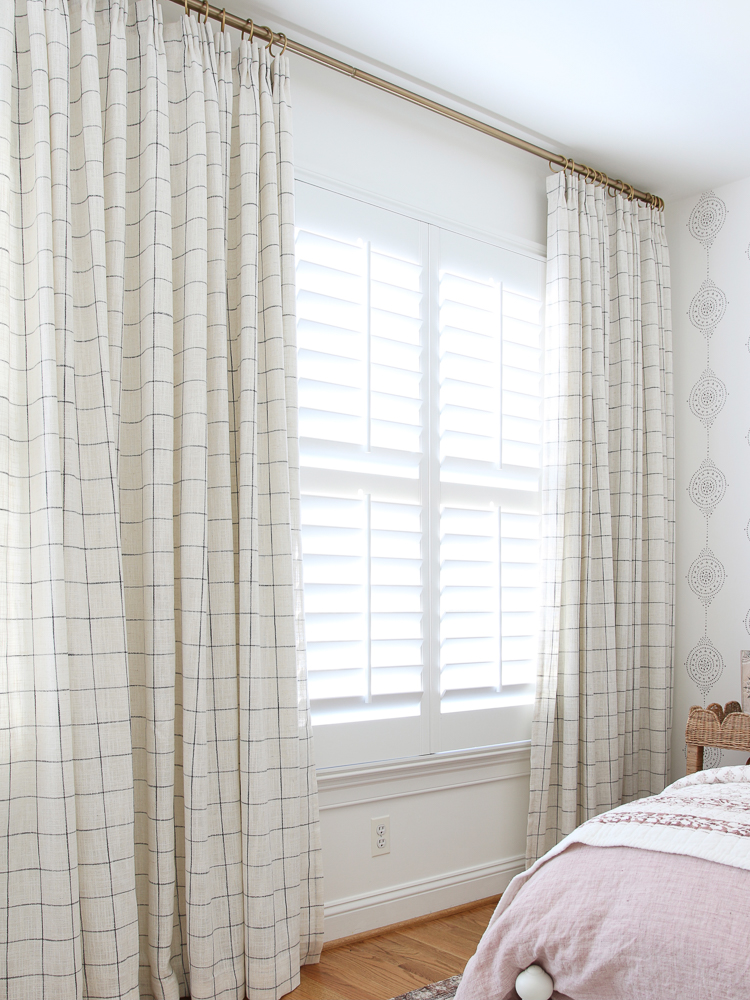
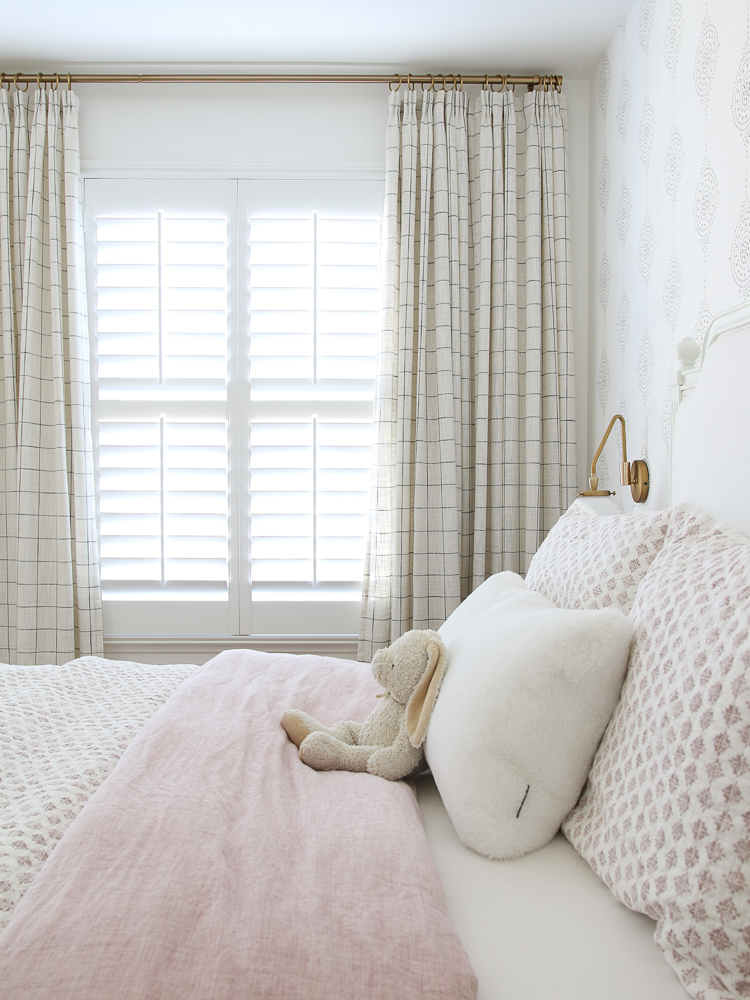
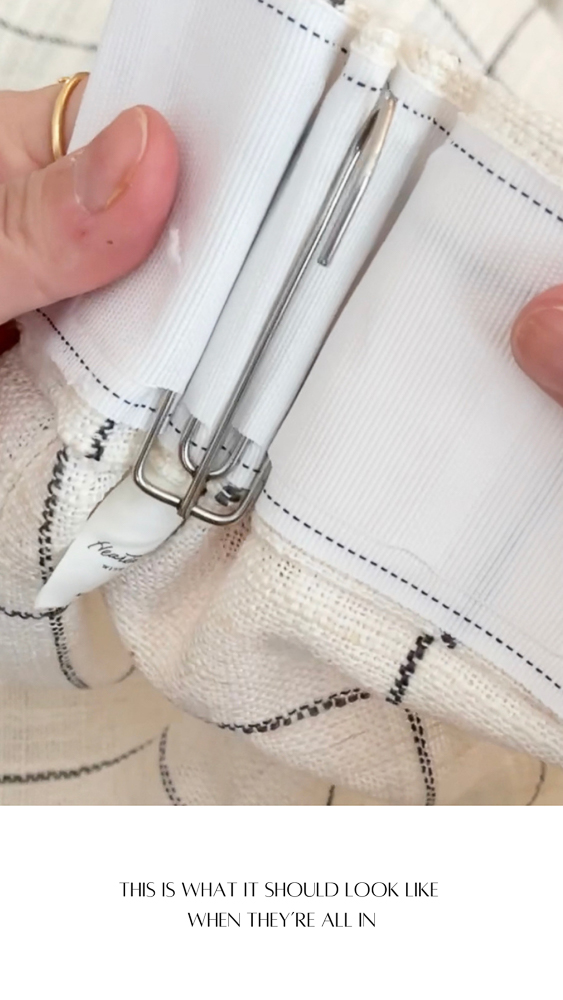
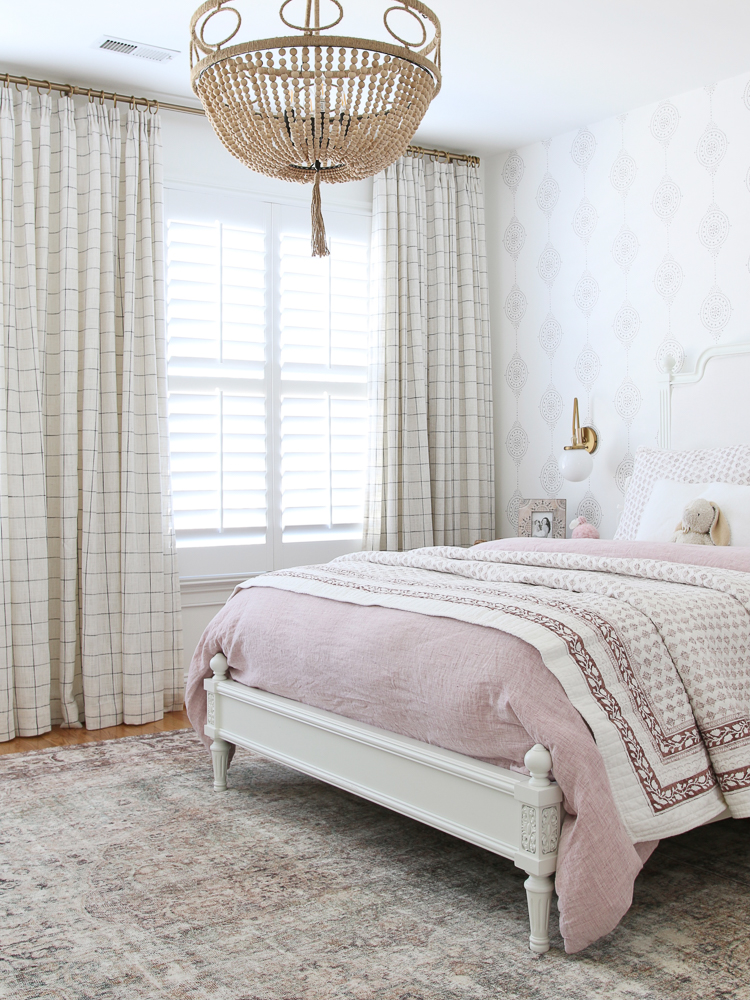
This is what it should look like when you’re done. Turn the fabric over and fix the pleats that face out so they are even. Then the hooks get attached to the o-rings on your rod. Voila! You just created expensive-looking drapes for very little money!
Important Notes
When you pleat your panels, their width will shrink. These drapes started out at 54″ wide but after pleating they are only 34″ wide. I recommend doubling up your panels to create the full look I have here. You can also use Heat Bond to connect your panels but even if you leave them next to each other not connected, you will still get the desired look.
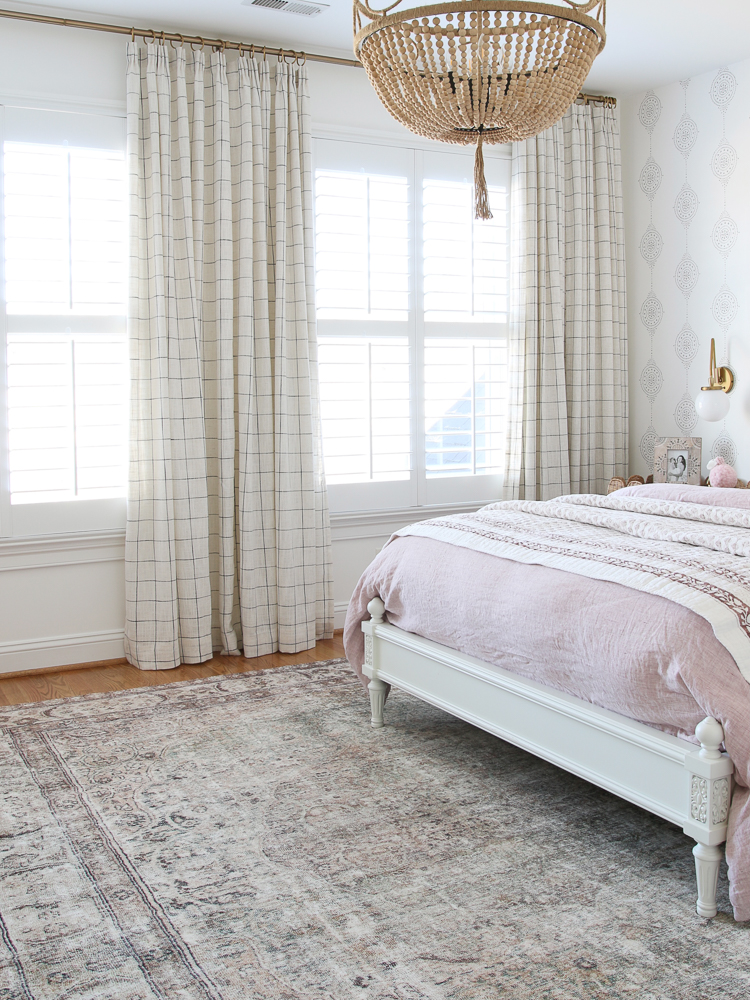
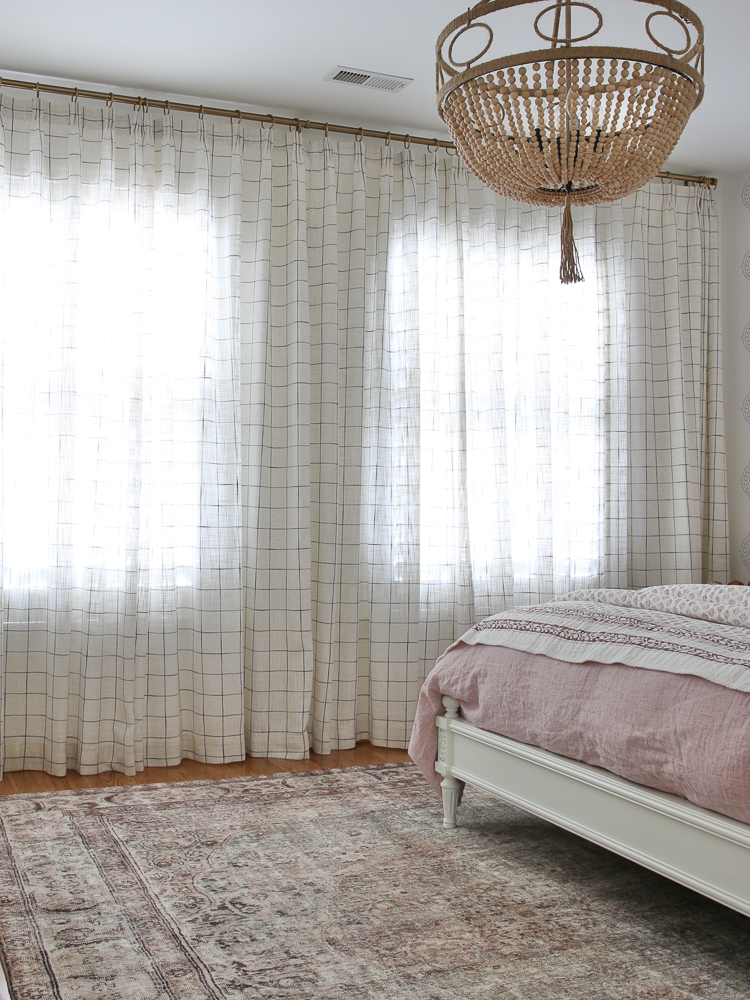
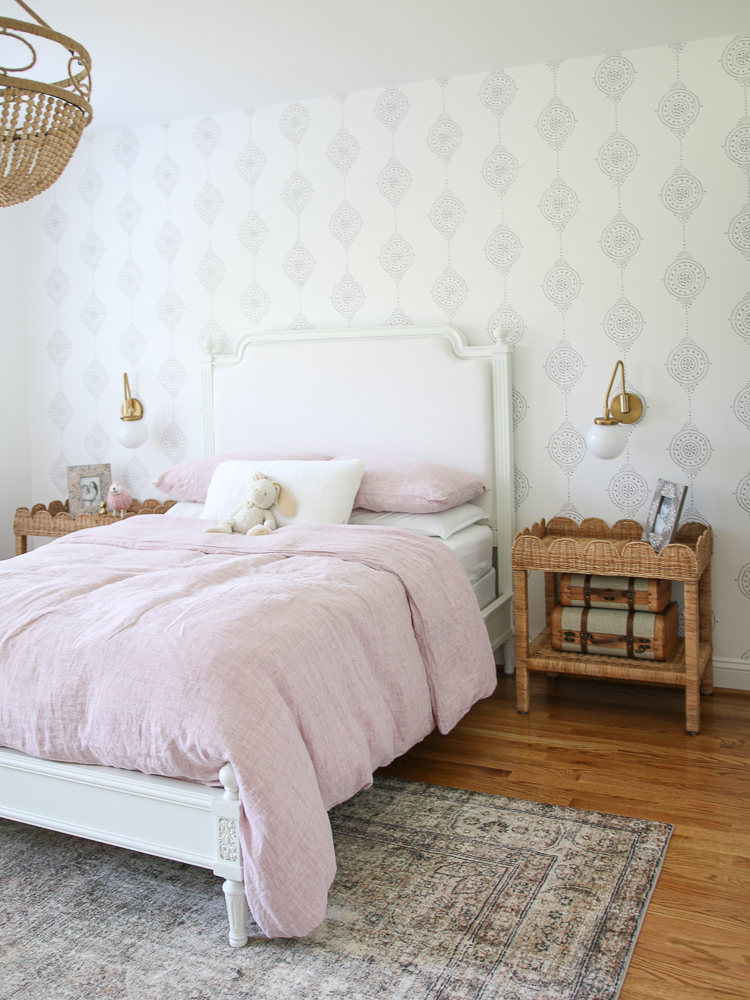
Room Sources
Here is what the drapes look like fully closed. The pleats create added fullness even when the panels are extended.
Pin the image below to save this post for future reference
Very well done!! I plan to do this on my bedroom drapes one of these days. Love your work!
Thank you so much!