How to Hide TV Wires in Your Wall
Disclosure: This post may contain affiliate links. As an Amazon Associate, I earn from qualifying purchases at no additional cost to you.
My goal has always been to help you create a timeless home with beautiful decor that reflects your style. One thing that can ruin a picture-perfect space is unsightly wires. That is a common challenge, so I’m sharing how to hide TV wires in wall spaces for any room. Don’t let those pesky wires ruin your vibe!
Hiding TV wires with a standard setup
Obviously, hiding TV wires in the wall is the easiest during a renovation before the drywall goes up. But that’s not always possible. In order to hide the wires, you’ll need to create an opening behind the TV for the cables to go in and one down below for them to come out.
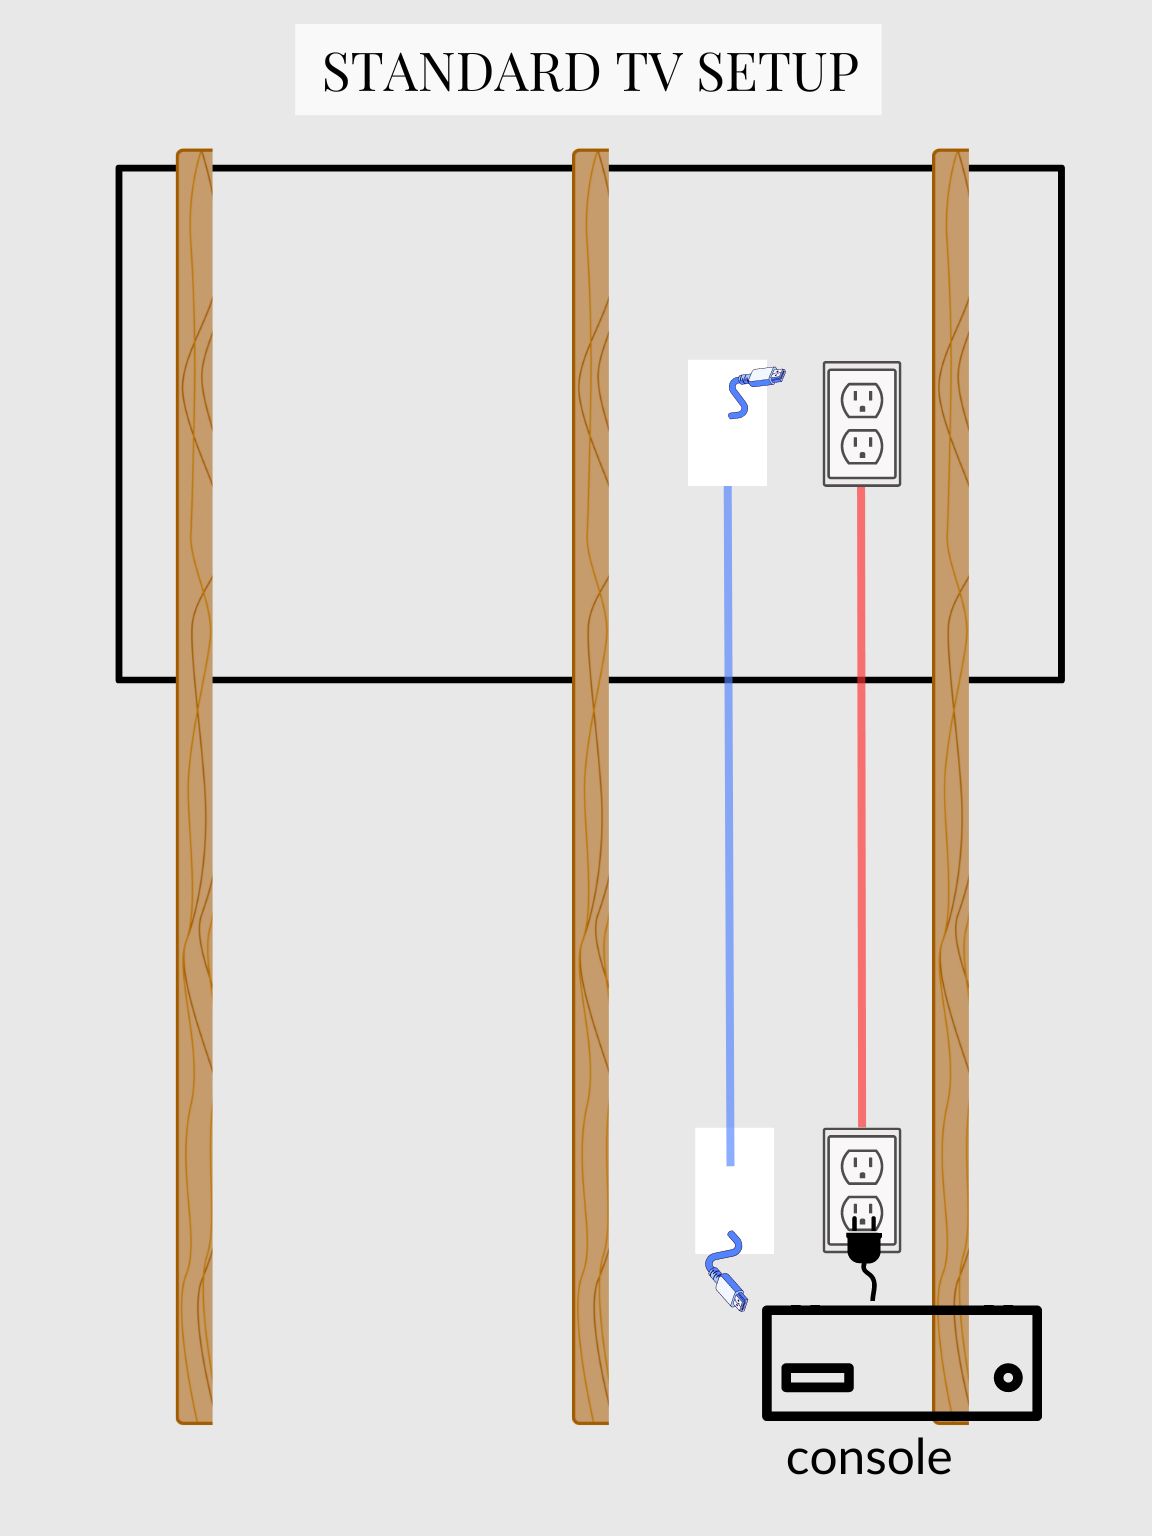
Check out the diagram above. It represents a standard TV setup where both the power and signal wires run between studs and straight down. There are no obstacles behind the wall to work around so it’s a straightforward job. Typically outlets are at the bottom of the wall. In order to plug in your TV, you’d need a licensed electrician to add an outlet behind the TV. It is an easy job without additional cutting into your wall required. It should be a small fee and is totally worth it.
Simple Materials Guide
Get this FREE GUIDE to different types of trim and molding materials for your every DIY need – from wall molding to cabinetry!
Warning!
Do NOT attempt to hardwire an outlet yourself. Hire a licensed electrician!
However, if you are the DIY type, you can avoid hiring an electrician by using this very easy and safe cable management kit sold on Amazon.
Tools you’ll need
This is a relatively easy DIY project if you have some basic knowledge of how power cables and data cables work. You need only a few tools and you likely already have them on hand. Here is what I’ve used that made the job a piece of cake.
- Stud finder – A magic little gadget that detects the studs behind the drywall. It’s simple to use and helps to prevent you from accidentally cutting into the drywall too close to a stud.
- Cutting tool – A jab saw or a simple box cutter with a razor blade will do the trick.
- Drill and drill bits – You’ll need these to attach the wall plates where the cables will go into and out of the wall.
- Tape measure – What DIY project doesn’t include measuring? Here you will need to accurately measure the openings in the drywall and mark the distance between the two.
Tap the images to check out these tools:


Check out my comprehensive list of essential DIY tools I use for all my projects!
Step-by-step instructions
These are the basic steps for this project. It shouldn’t be a task that requires several trips to the home improvement store. If you keep running into problems, maybe it’s better to give your electrician a call.
Safety check
This is a top priority! Head to the breaker panel of your home and turn off the corresponding switch to turn off the electricity. Some stud finders have a live-wire detection feature.
Measure & mark the wall
Use a stud finder to locate the studs and grab a pencil and mark the edges. They are typically around 16″ apart from center to center.
Next, use the pencil to map out the holes based on the measurements of the wall boxes you have. For this project, I used a dual power outlet in-wall cable management system with a built-in brush slot for the data cables.

Helpful tip: It should be pretty obvious, but if it looks close, measure the length of the cords you will be using before you cut into the drywall.
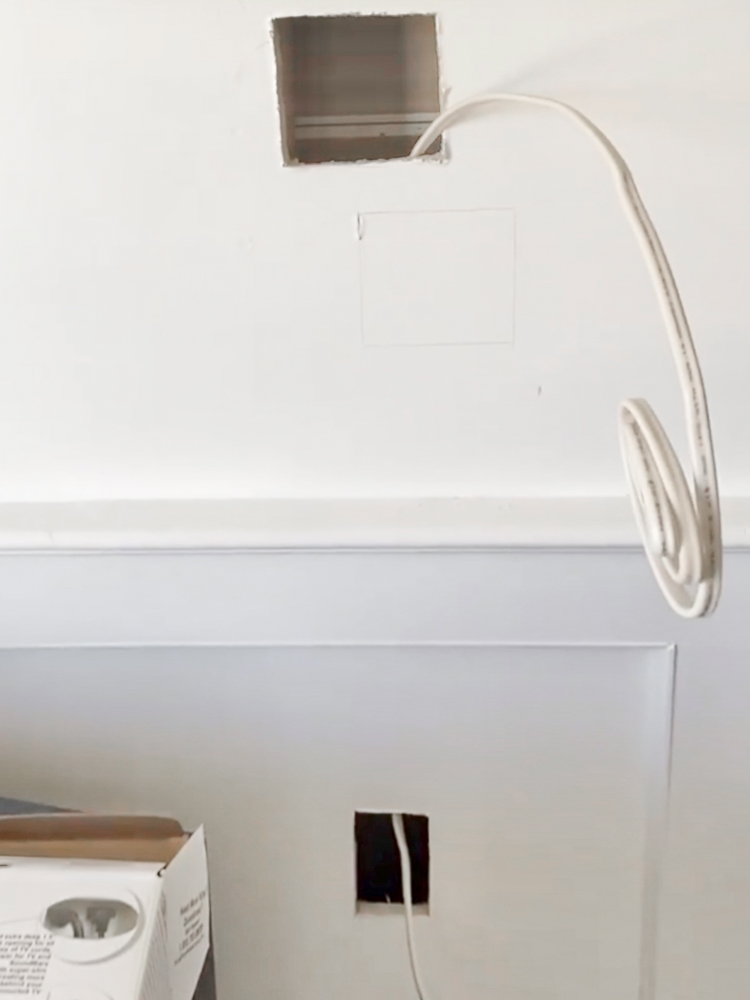
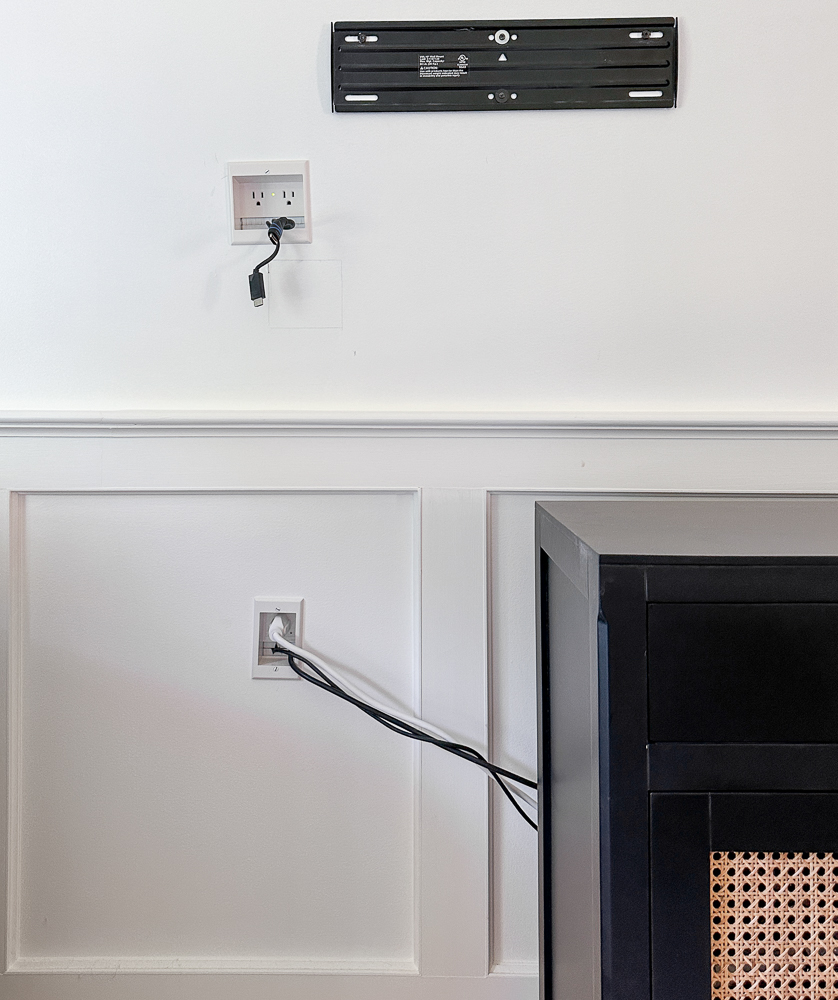
Cut holes, feed wires, and attach plates
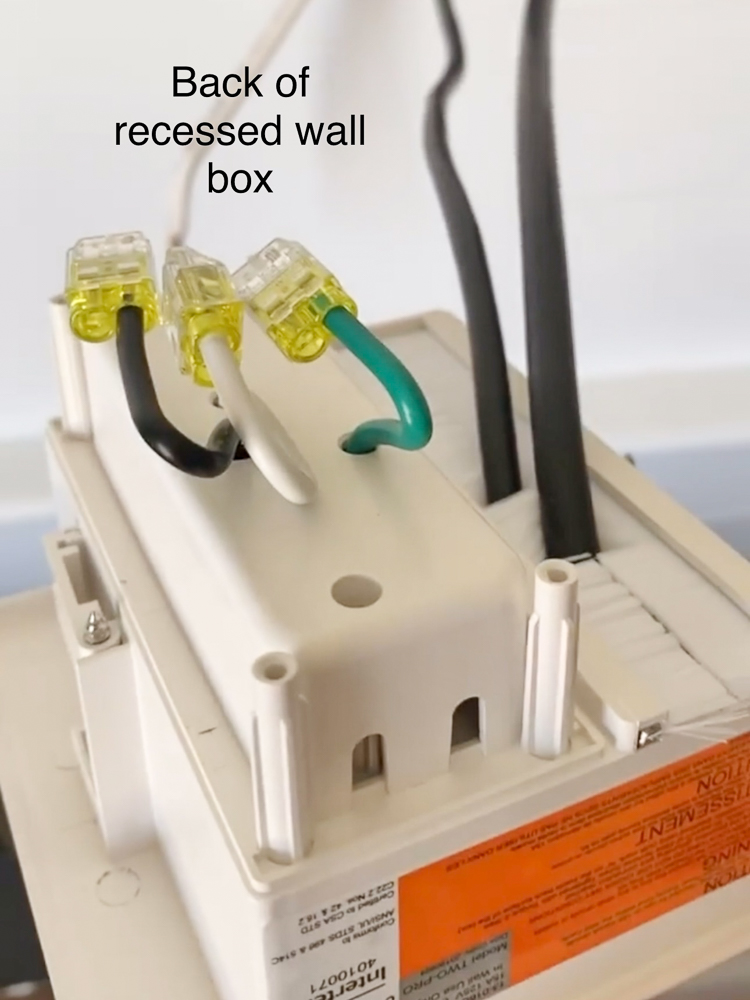
Cut along the outline you made for your boxes to make the holes. To feed the cable, start from the top hole and send the wire down to the bottom hole and pull it through. The Romex wire that comes with the kit doesn’t require a conduit and is rated to be safely run behind the wall. All you have to do is connect the ends of the Romex wire to the corresponding piece in the back of the recessed wall box – as seen below.
You will need your drill and bits to attach the boxes to the wall. When you turn the screws, the plastic tabs on the back of the box tighten against the drywall to hold the box in place.
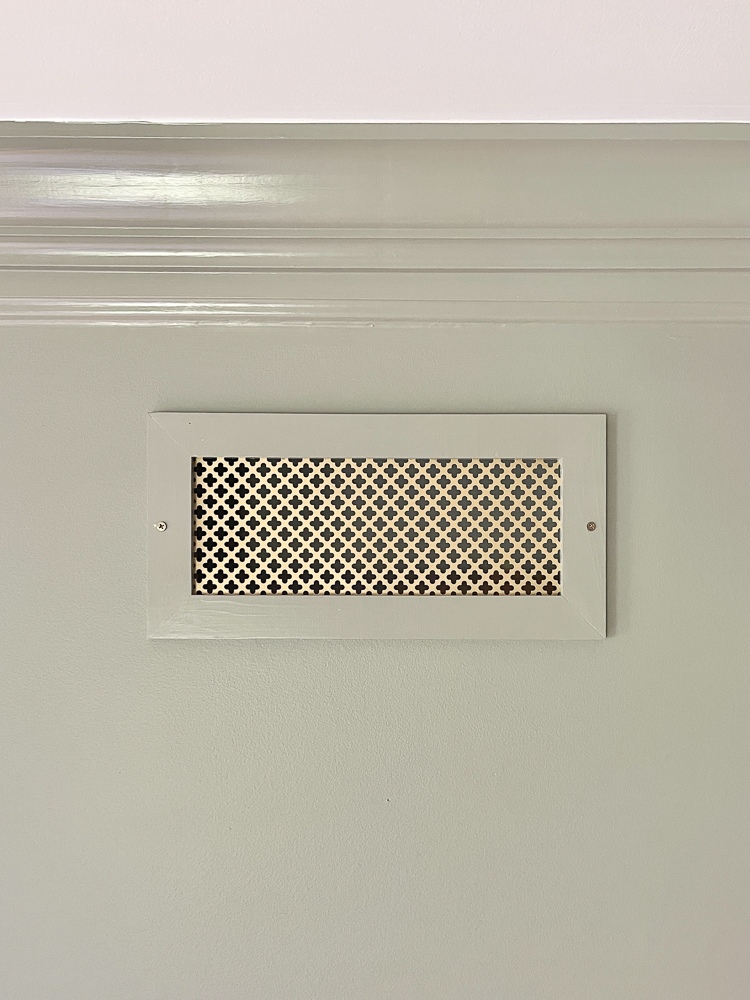
When you hide TV wires in wall spaces with this cable management kit, the recessed boxes that come with it help the TV sit as flush to the wall as the mount will allow it. The recessed outlet box is great for the tight space behind furniture and prevents cable pinching.
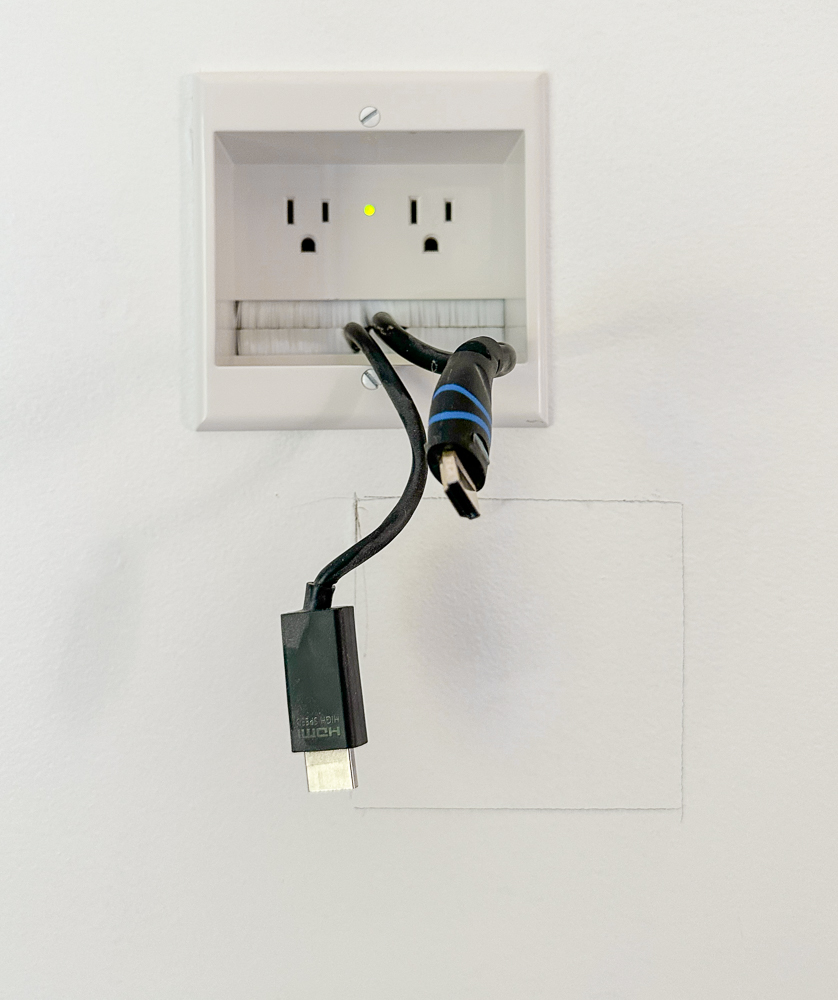
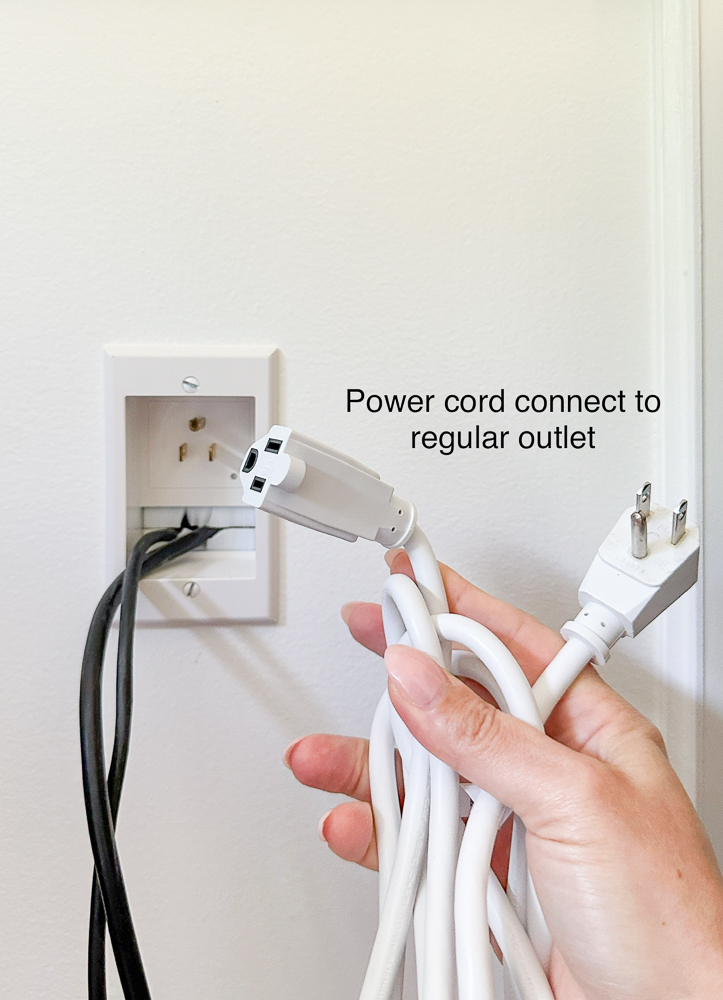
Connect plugs
At this point, you can connect the power cord from the inlet on the bottom to the regular outlet the TV was plugged into before.

Finishing up
Now all that’s left to do is to hang the TV back up, slide the console table back where it belongs, and turn the power back on. Don’t forget to clean up the mess left behind after cutting into the drywall!
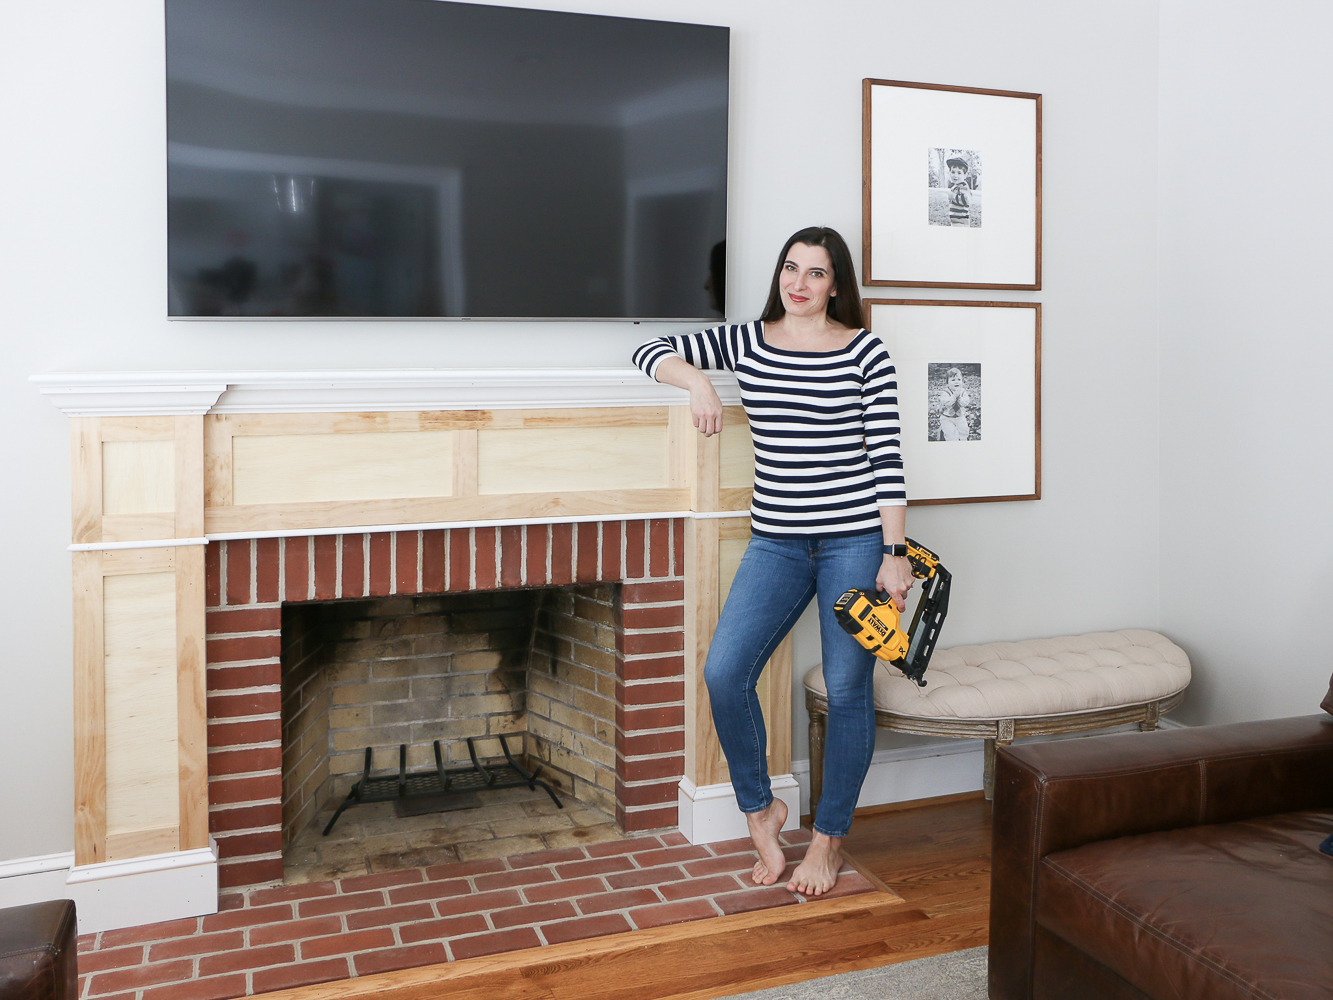
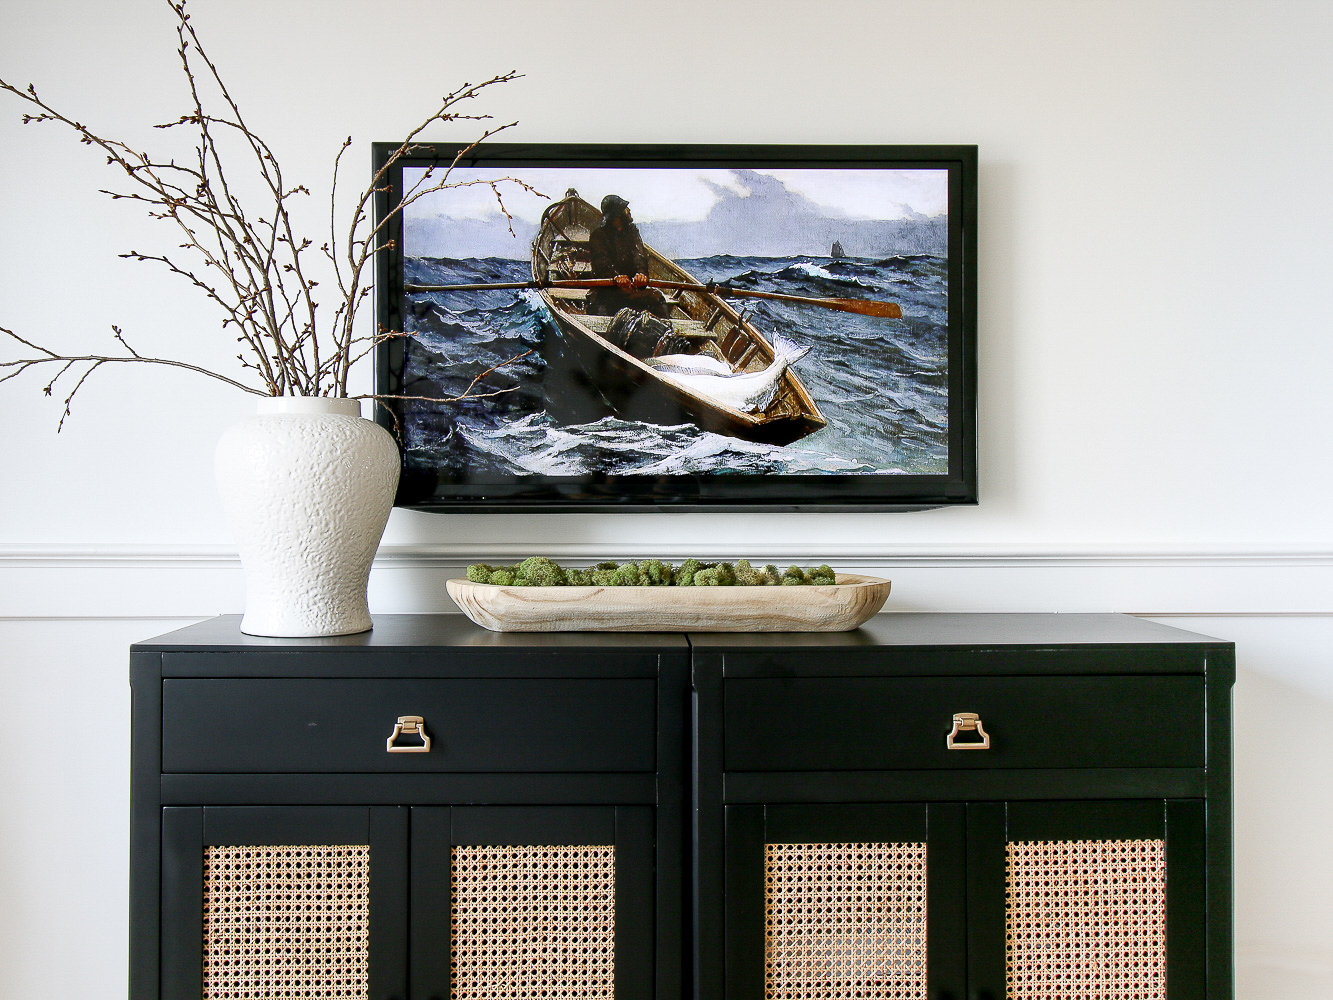
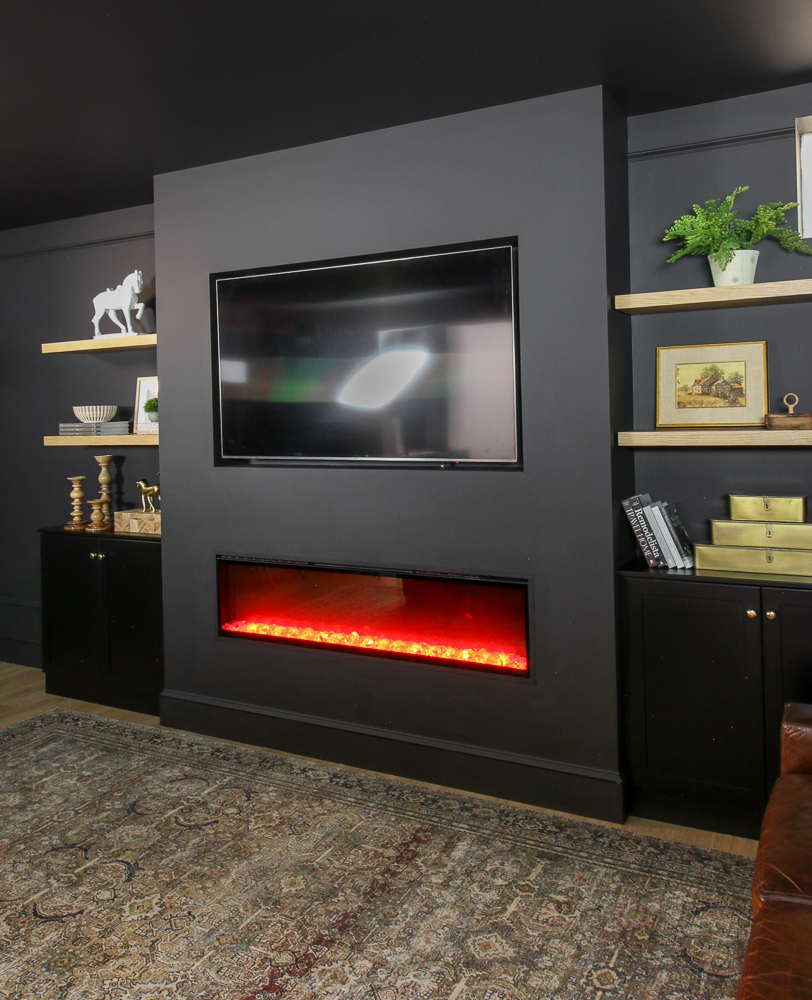
Hiding TV wires in the wall above a fireplace
There is nothing cozier than a room with a TV above a fireplace! Unfortunately, it’s a little more complicated as the fireplace creates an obstacle for the wiring. During our basement renovation, I knew I wanted to include this setup which allowed me to plan for it during the remodel.
Pre-construction setup
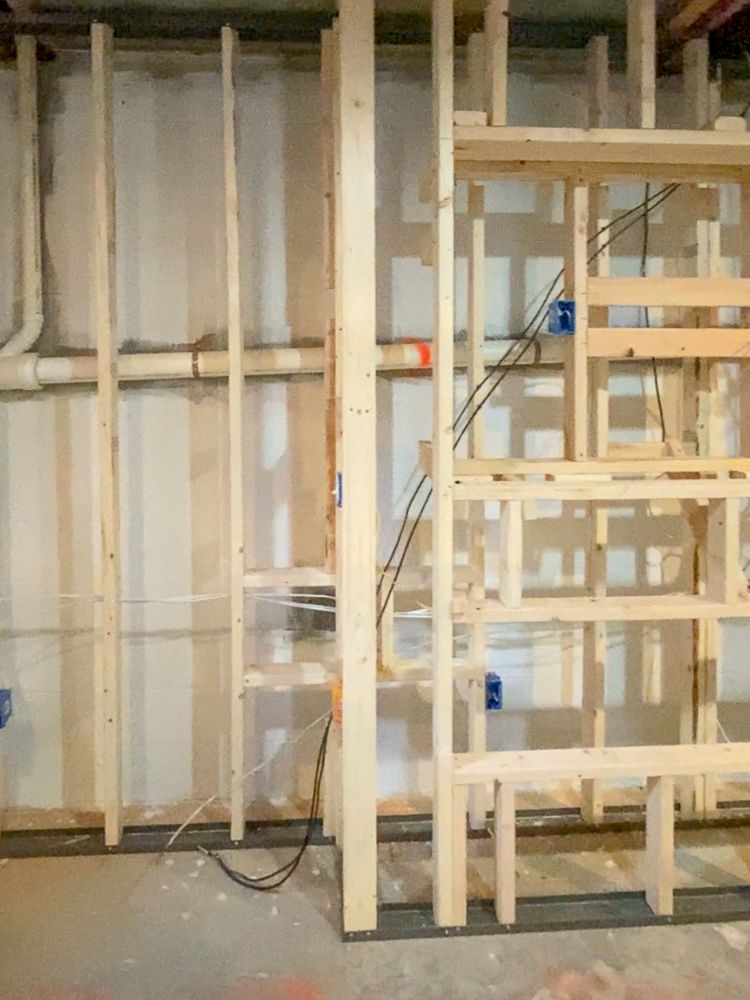
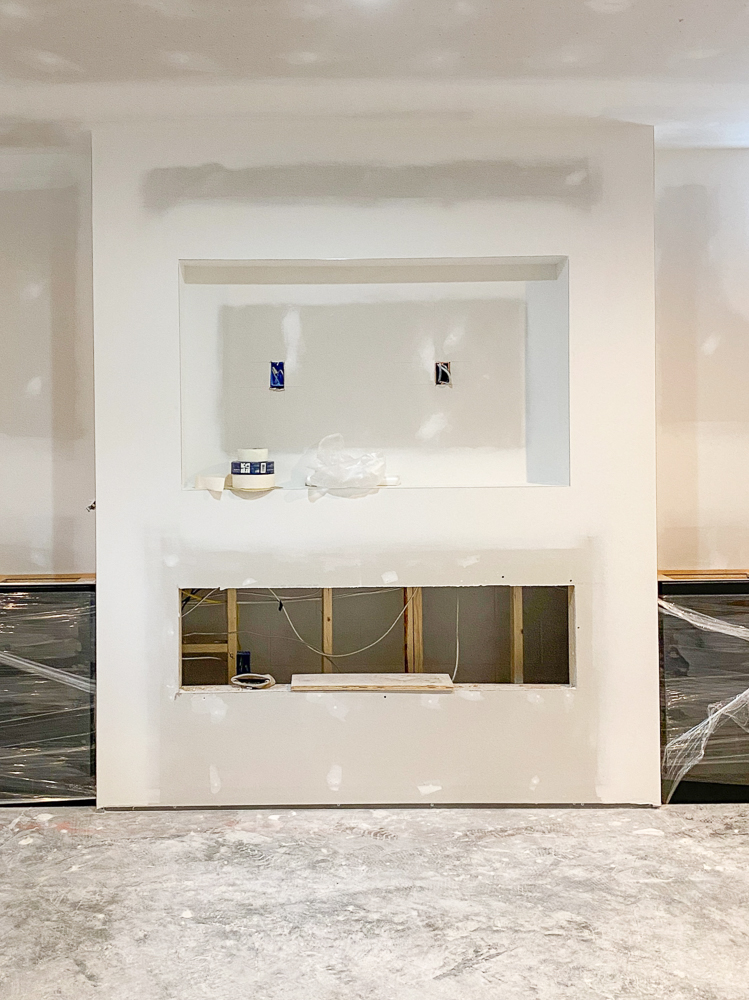
Before the drywall was hung, I made sure the electrician placed an outlet behind the TV. I also ran all the necessary wires (and some extra ones) to accommodate all our consoles and any future ones we decided to add. At this phase, you can also ad a large conduit pipe which will make future fishing of wires much easier.
White horse sculpture | Metal decorative boxes | Rug
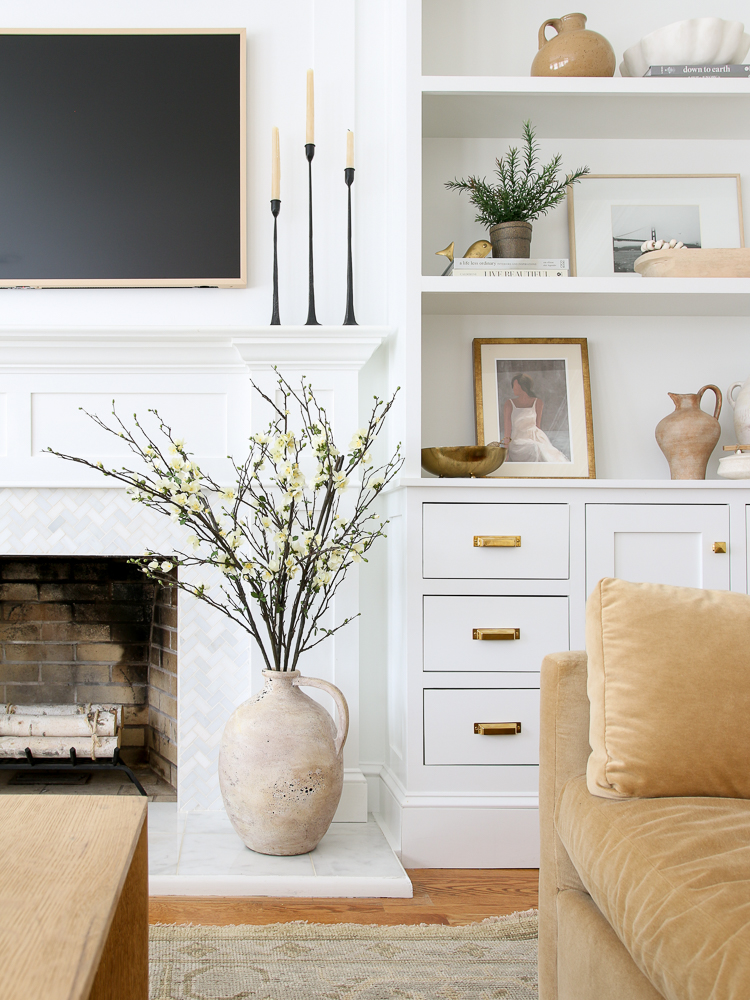
When I gave my living room fireplace a makeover, I didn’t know what my plans were going to be for the rest of that wall. But it didn’t take me long to figure out that built-in cabinets were the way to go. I have a post about that DIY project if you are interested in learning how to build your own.
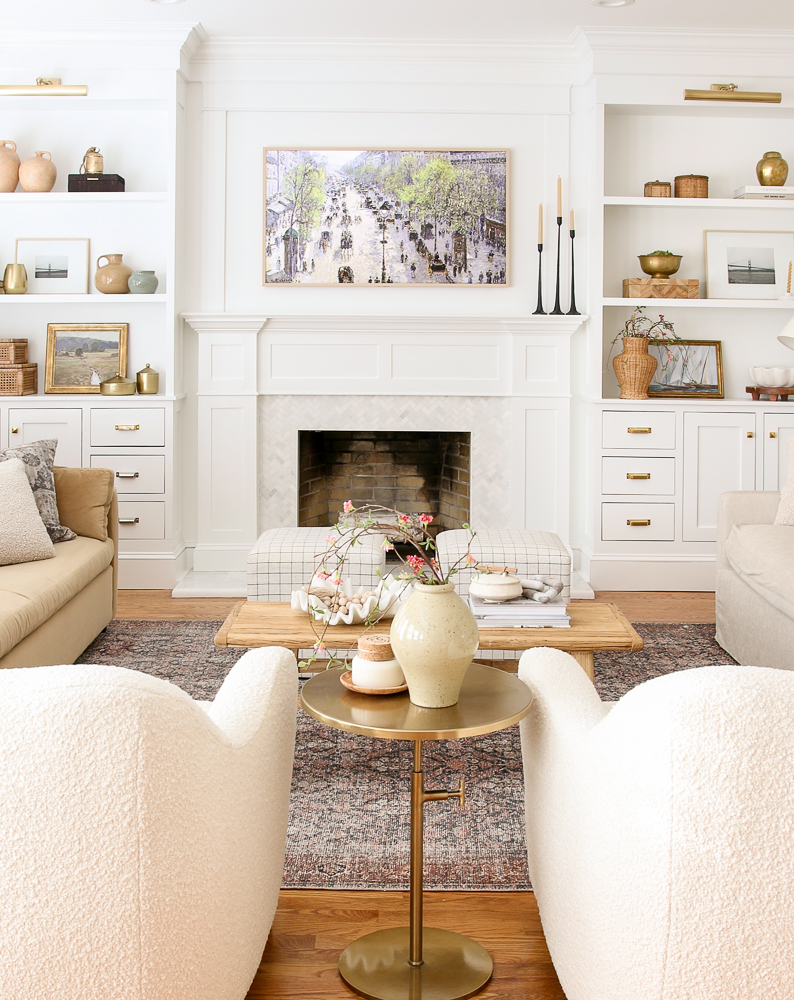
Frame TV | Tapered iron candlesticks | Velvet sofas | Boucle chairs | Rug | Brass accent table
Post-construction setup
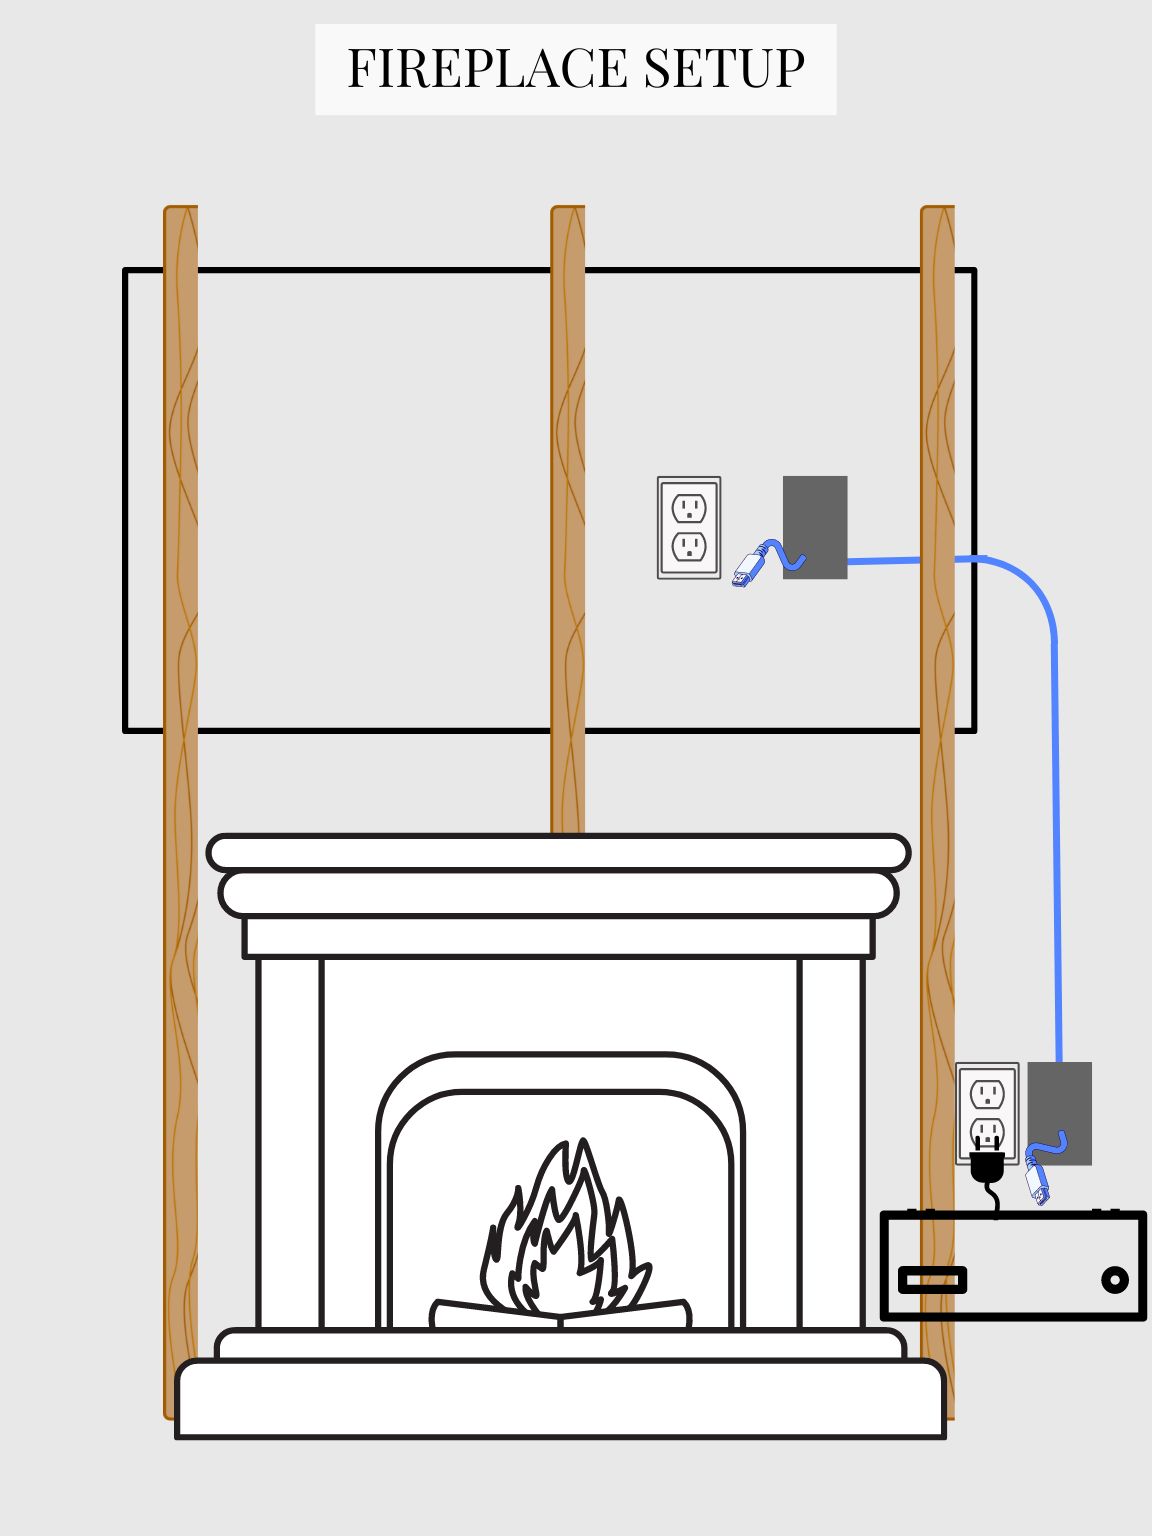
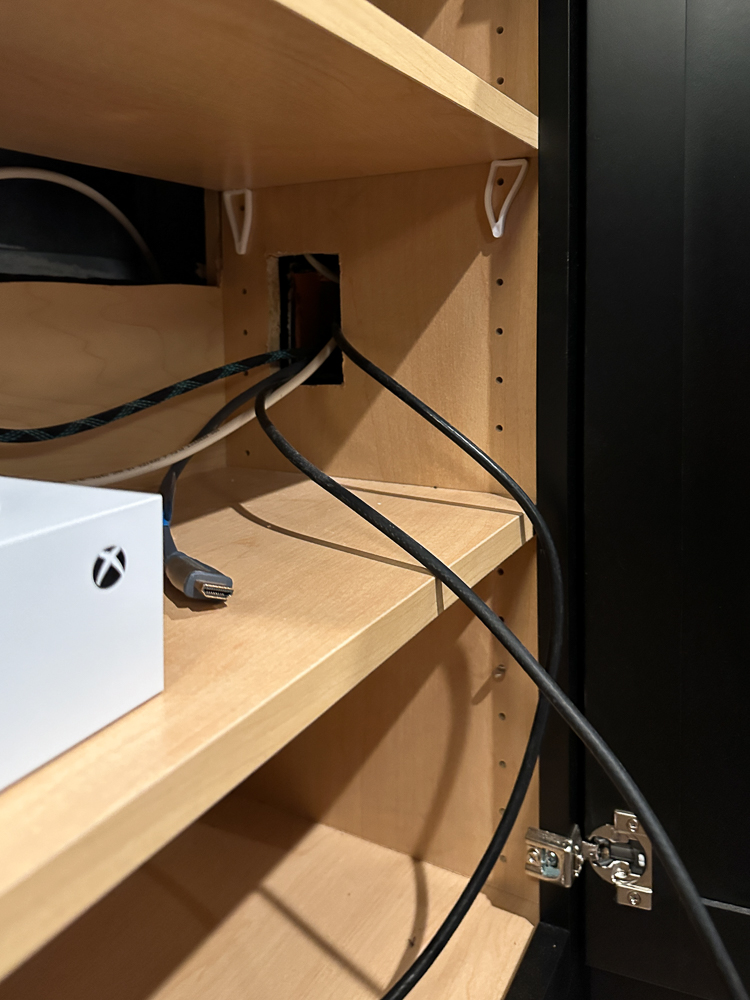
The diagram below demonstrates how to hide TV wires in wall spaces with a fireplace below the TV. As you can see, the path of the wires will have to be redirected around the fireplace insert. If your setup requires a new outlet, this is a job best left to the professionals. They are up to date on all the latest safety codes and know how to properly connect to your electricity source.
With traditionally framed fireplaces, you will likely need to cut additional holes in your wall in order to gain access to studs. We had to drill through a stud from the drywall hole access so we can fish the wires through. This is again best left to professionals. Cutting holes in exposed areas of your drywall sounds scary but a professional repair will make the patch invisible after painting. Or maybe you’re lucky and the TV will cover the patch.
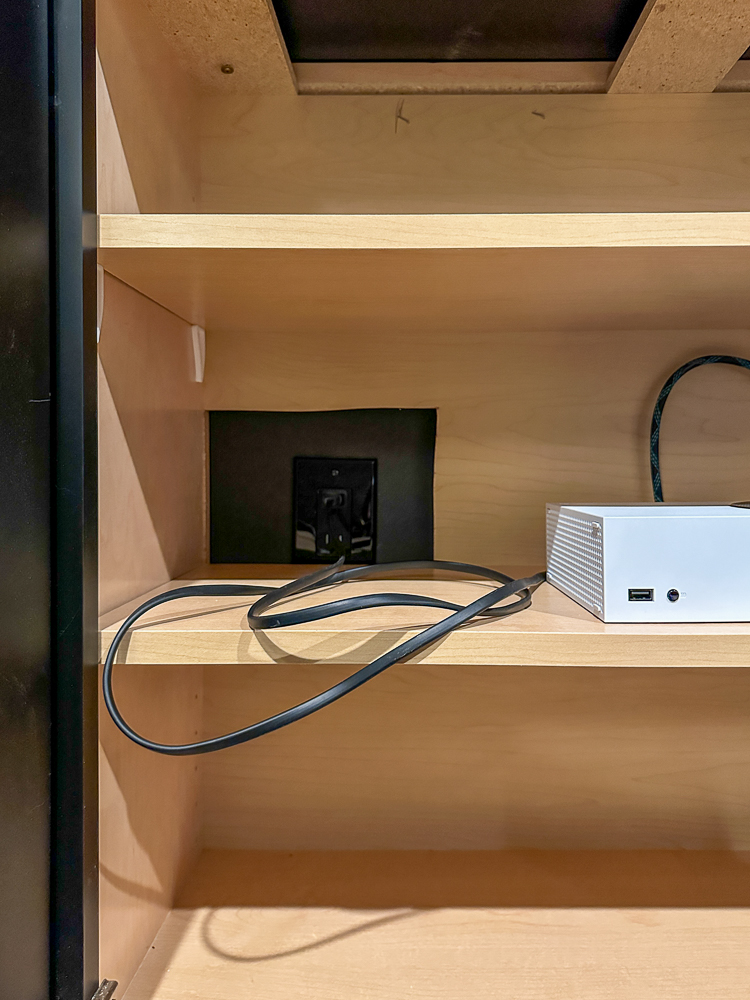
Here is a look inside the cabinet on the side of our basement fireplace. You can see the opening for the wires that come out of the back of the fireplace and the outlet where the console is plugged in.
It’s ok to cut into the back walls of your cabinets. Nobody can see them when the doors are closed and it won’t compromise the integrity of the cabinet box. Incorporating cabinetry around your fireplace is the perfect way to hide the TV wires. Modern devices can pick up the signal from the remote just fine without having to open the cabinet doors.
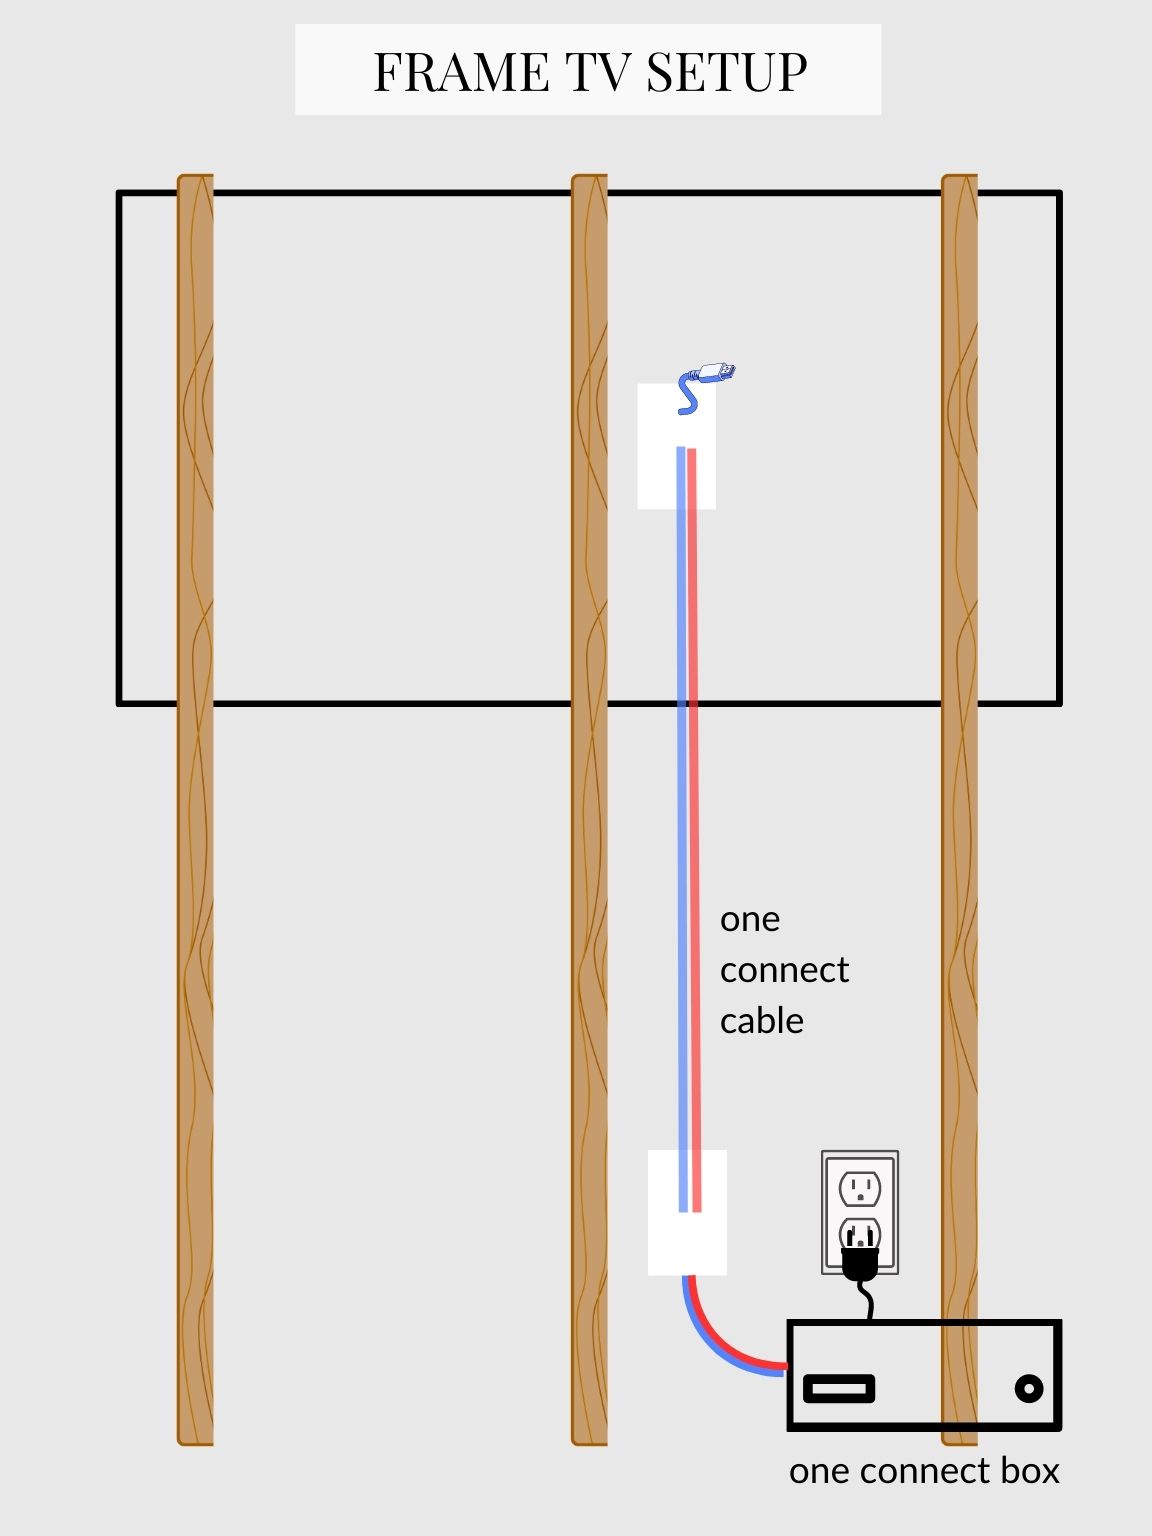
The Frame TV setup
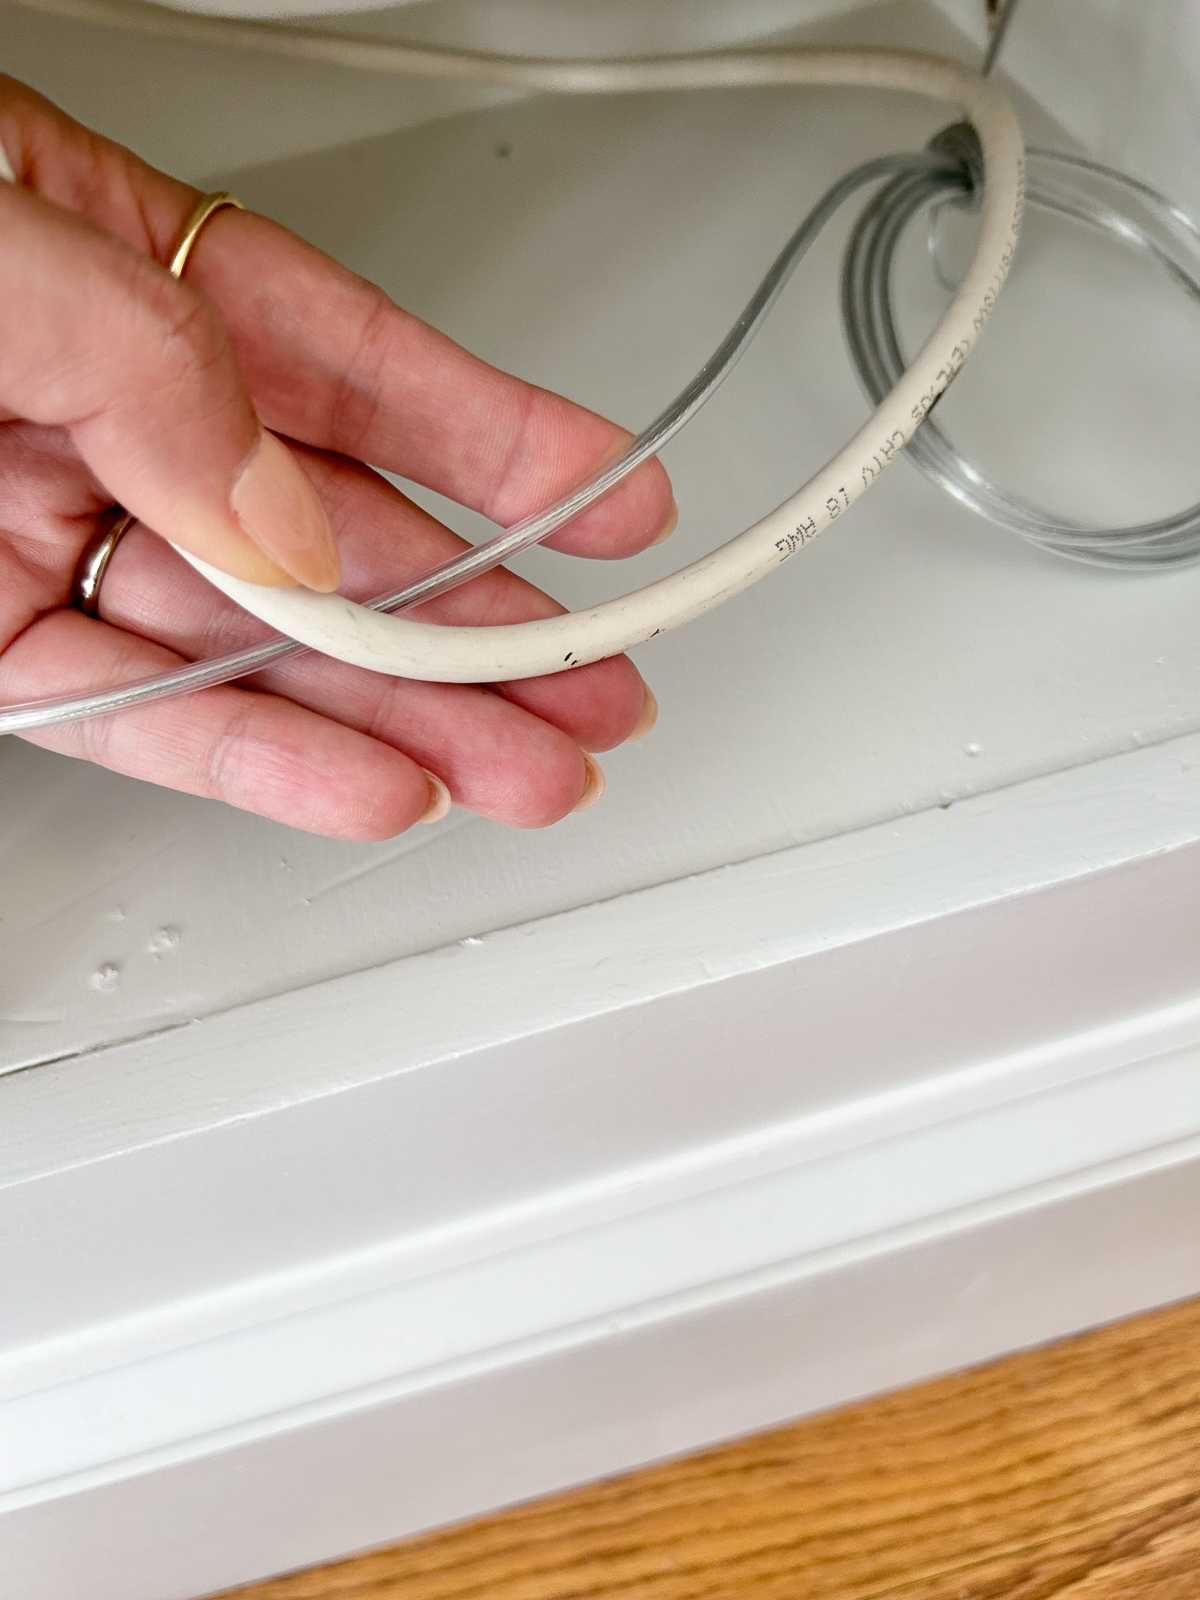
The Samsung Frame TV presents a unique challenge – and opportunity – when it comes to hiding its wire(s). I have a detailed review post on the Frame TV and its features. But for the purposes of installation, the Frame TV is different because it comes with its own One Connect box that plugs into a power outlet and coaxial cable (if you’re still using cable instead of streaming). The One Connect box then feeds both power and data signals to the TV through a very thin and transparent One Connect cable.

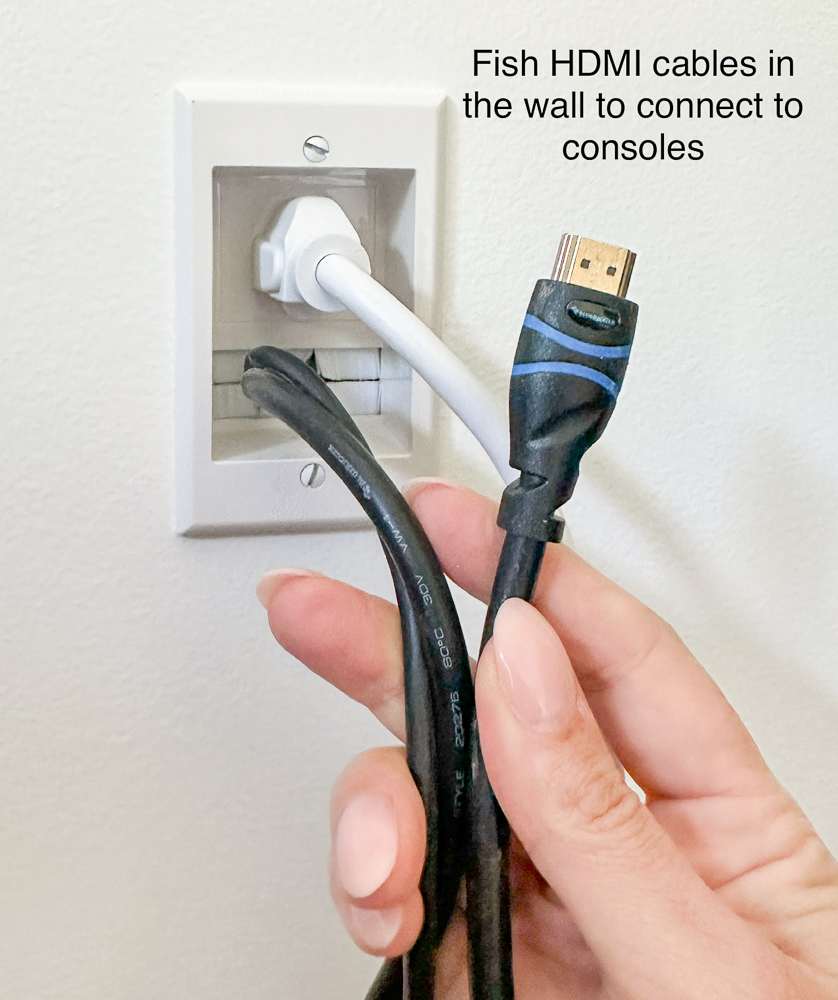
The challenge is that if you already have an existing fireplace setup from above, you can’t reuse it for the Frame TV. The HDMI cables are useless and there is no need for a power outlet behind the TV. You only have the single cord and have to figure out how to hide the box that it connects to.
Frame TVs were designed to be used anywhere so they come with a longer than normal cord length. The cable is “almost” imperceivable so in theory, you can just let the One Connect cable run down the wall to the box. This means you can easily hide the One Connect box in a nearby cabinet. But if you are a perfectionist like me, even that thin cable will bother you.
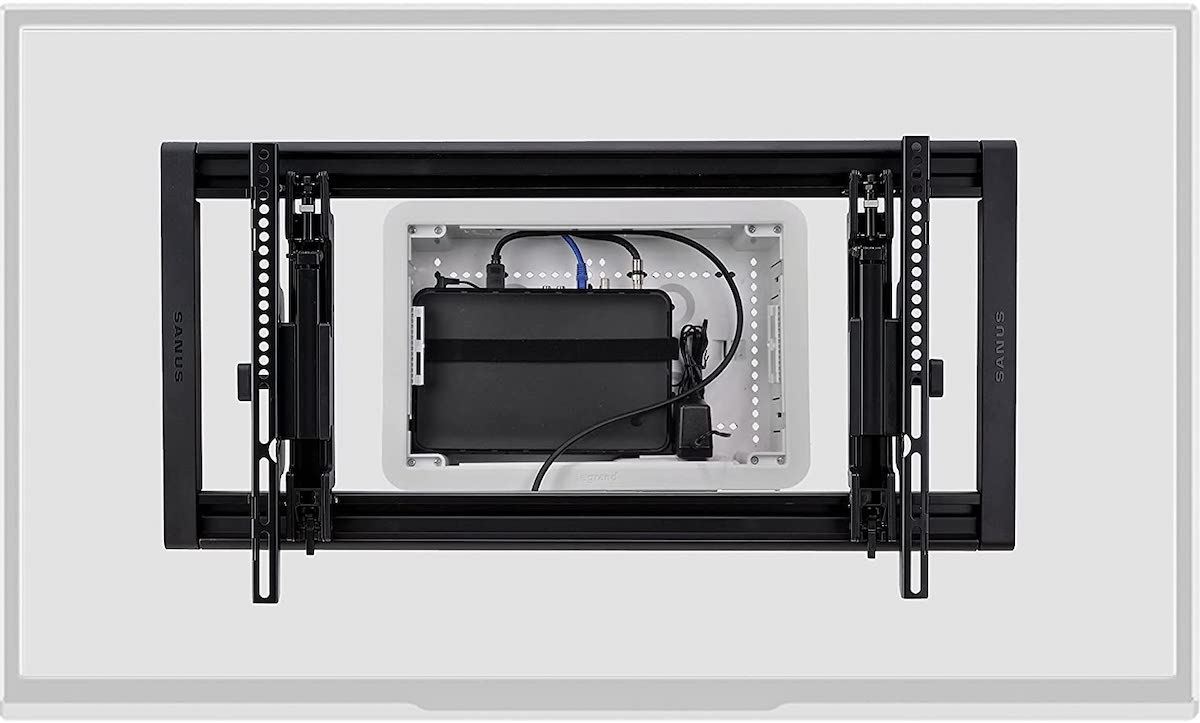
Alternatively, and with a little more work, you can hide the One Connect box directly behind the TV. You can buy a specialty housing box and install it in the recessed space between the studs. Many of them also have an integrated outlet or space for the outlet that’s already behind your TV. This will require cutting a large space in the wall provided there is no obstruction back there.
If you still want to hide the One Connect cable in the wall, I suggest you consult with an electrician about codes and regulations regarding this newer technology.
Frame TV | Tapered iron candlesticks | Velvet sofa | Vase | Rug | Brass pulls | Brass knobs