How To Paint A Bathroom Vanity For A Custom Look
Disclosure: This post may contain affiliate links. As an Amazon Associate, I earn from qualifying purchases at no additional cost to you.
Don’t be afraid to paint a bathroom vanity!
Maybe you have an existing vanity that you would like to repaint as a part of a bathroom facelift. Or you’re like me and bought a brand new vanity whose color you want to change. Either way, painting a bathroom vanity can be intimidating, especially when you consider all the steps you need to take or the tools you need to have to ensure successful results. It’s really not that hard.

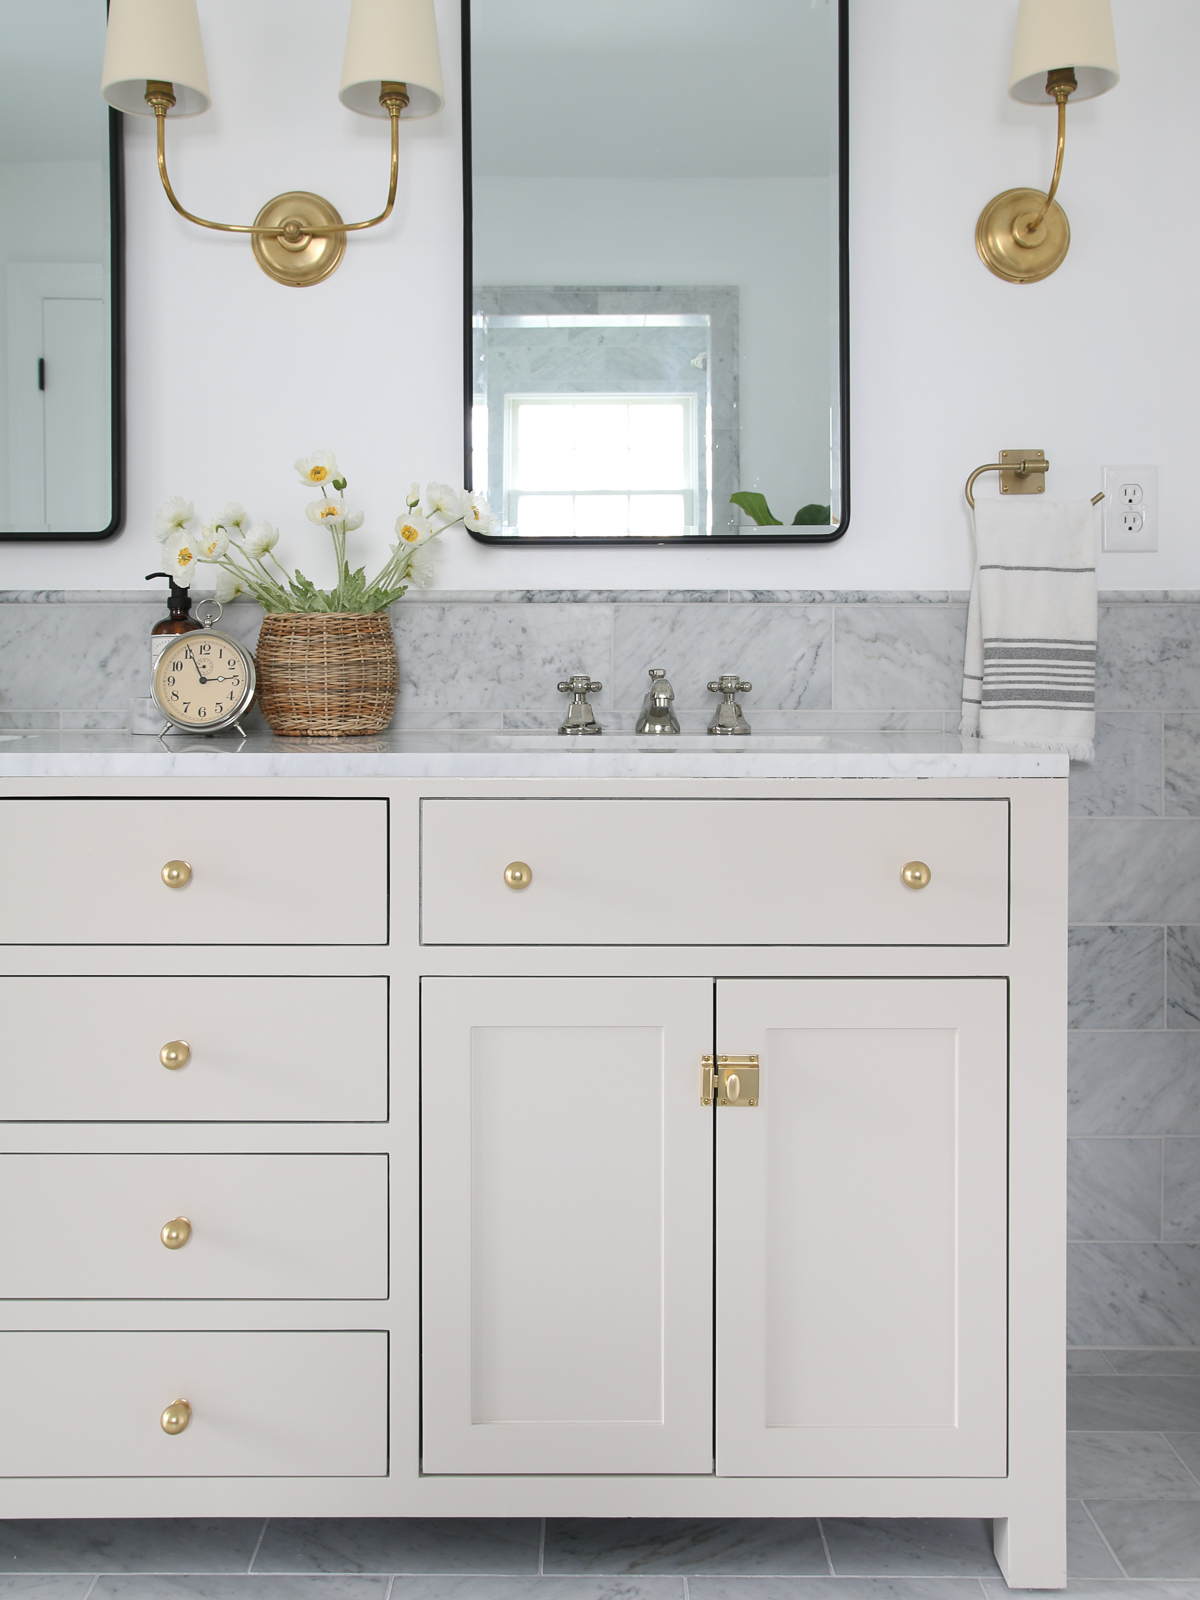
Vanity | Mirrored medicine cabinet | Single Sconce |Double Sconce | Faucet | Ball knob | Cabinet latch
I will share how I transformed the look of this brand-new vanity from Home Depot to take it from basic to custom. These tips work for any DIY projects that involve painting any cabinets – kitchen cabinets, bathroom cabinets, vanities, built-in cabinets, or even interior doors.

Why did I paint my brand-new bathroom vanity?
Most people paint their vanity to update their bathroom without a major renovation. In my case, I was already going through a big, down-to-the-studs, bathroom remodel. Why didn’t I get the vanity I wanted to begin with?
I tried finding a ready-made vanity that fit my design vision but quickly realized that it was impossible to find in retail stores. You can have one custom built but that would have cost me a lot more money and the turnaround was so long – it put delivery way past my remodel timeline.
Simple Materials Guide
Get this FREE GUIDE to different types of trim and molding materials for your every DIY need – from wall molding to cabinetry!
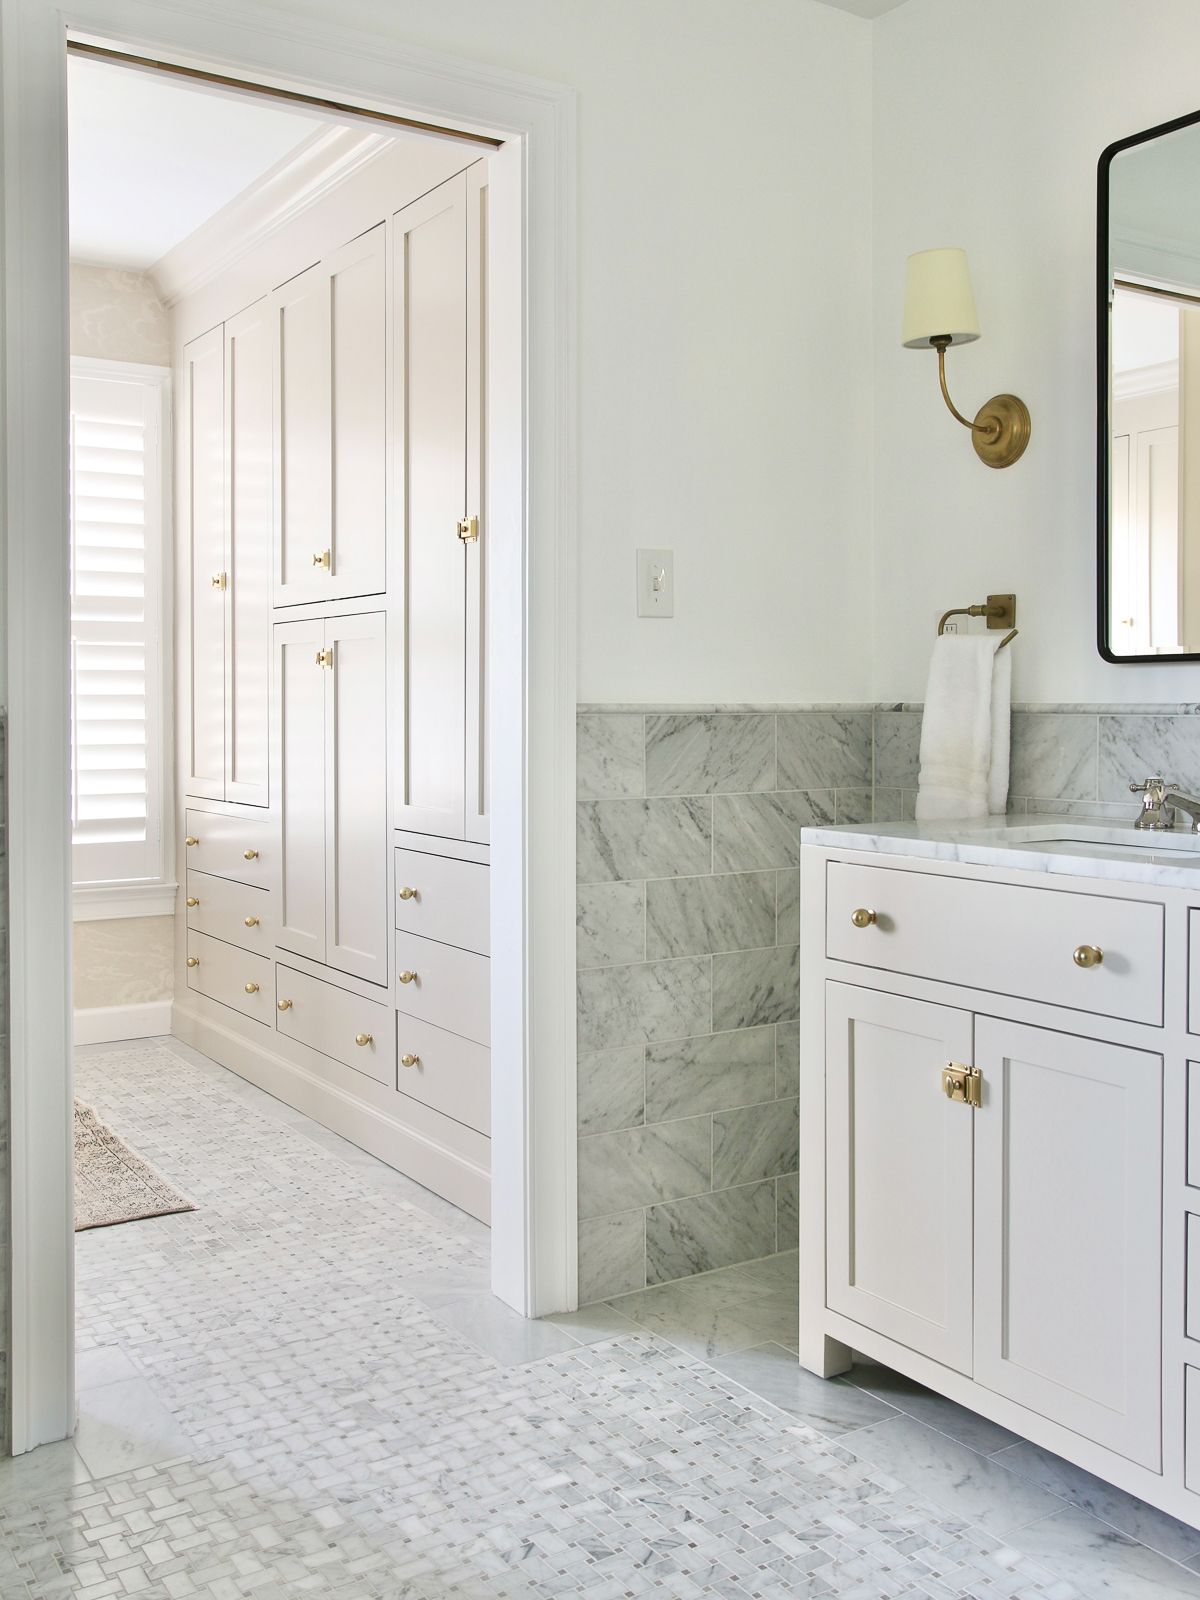
Another option is to have semi-custom bathroom cabinets ordered from a bath and kitchen manufacturer. That would require me to source countertops and sinks separately which adds to the cost. I also wanted a standalone furniture-like vanity – not kitchen-style cabinets.
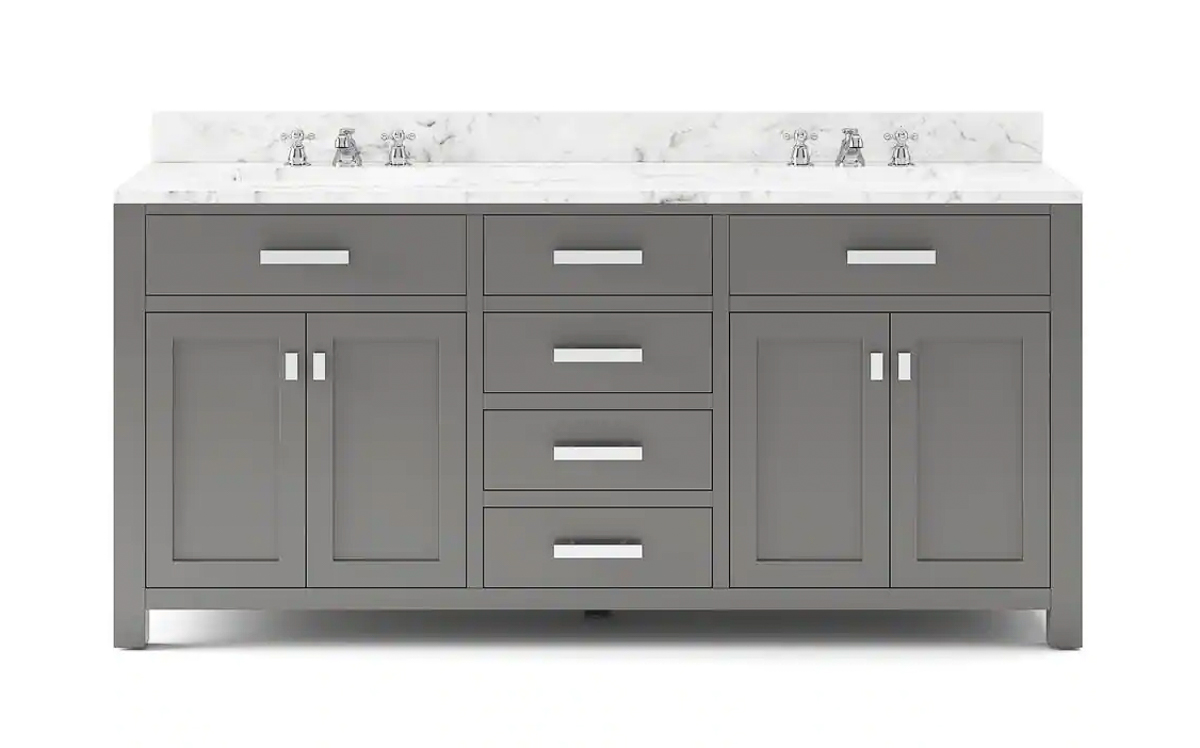
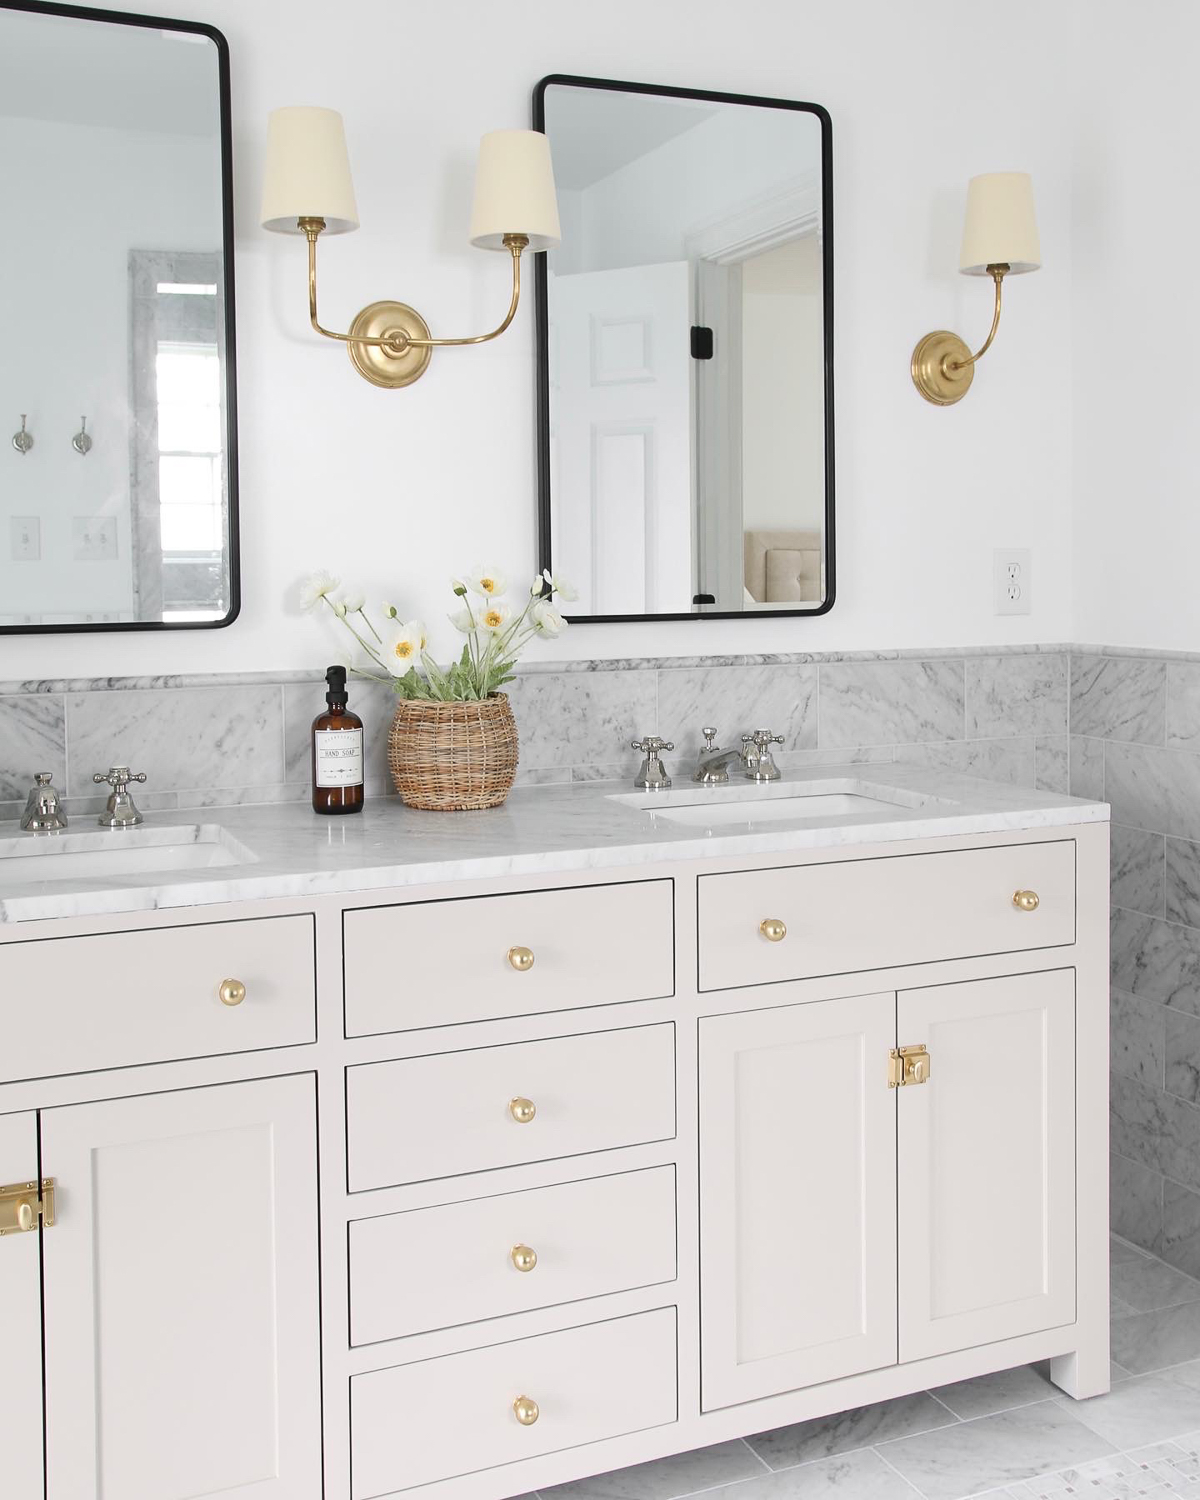
I found this perfect size and design vanity from Home Depot. It comes with a natural Carrara marble countertop (I am a huge marble lover) and sinks for a relatively low cost. However, I didn’t love the color or the hardware.
READ ALL ABOUT MY OTHER BATHROOM VANITIES!
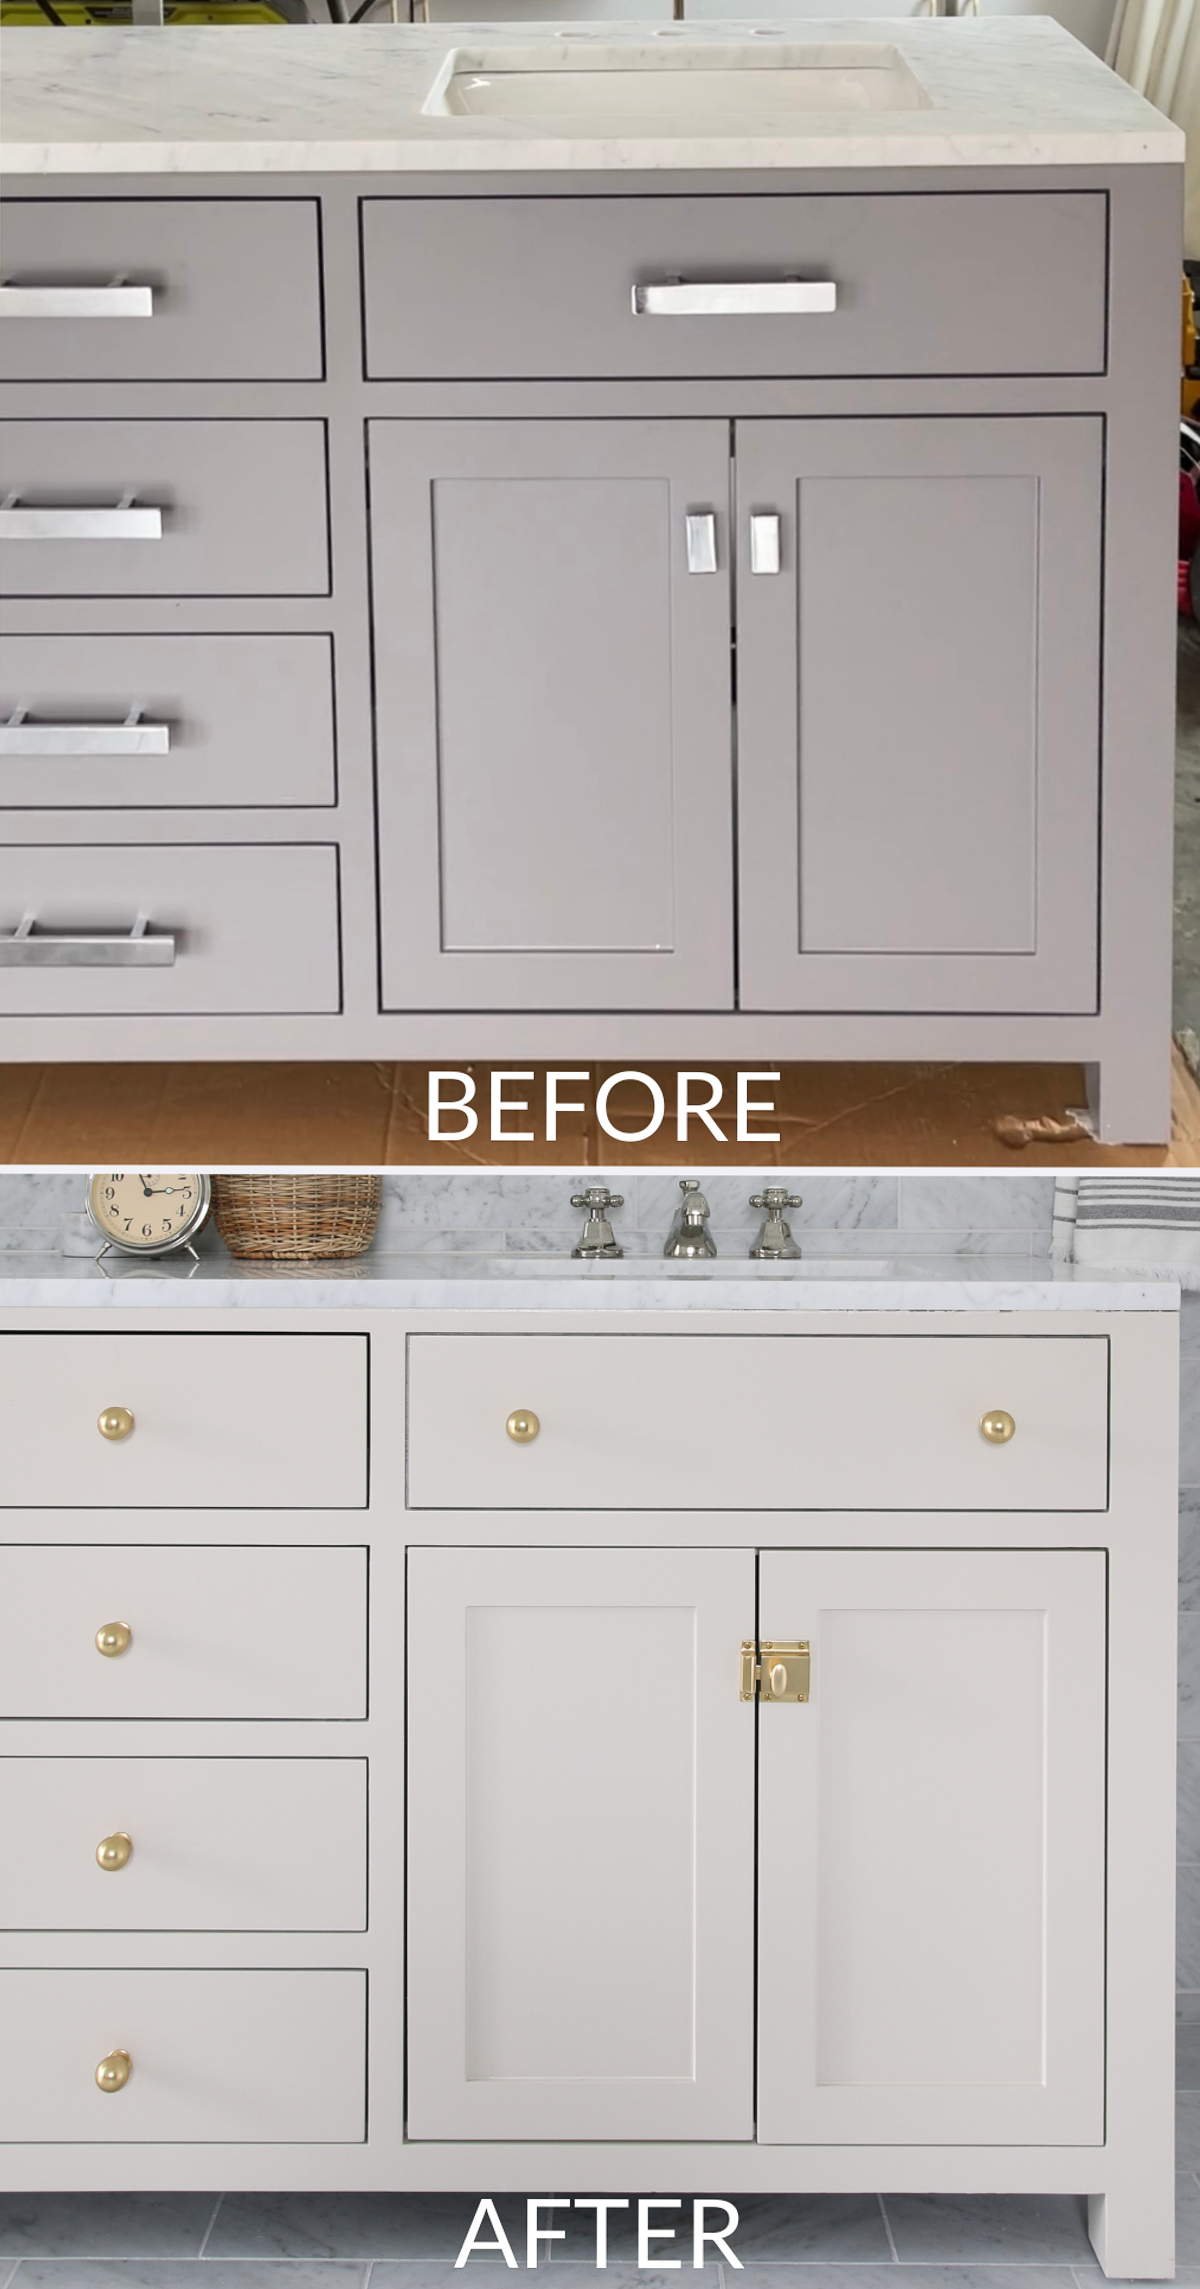
From basic to custom bathroom vanity
The two big features I didn’t love about the vanity were the paint color and hardware placement. I was hoping for a more warm tone grey (greige) judging from the listing photos but it turned out to be a true medium-tone grey in real life.
That color might have worked for a lot of people but I am honestly over the grey color for interiors. It has been very popular for the last decade and has flooded the market. But it’s also what made this vanity look basic and builder-grade.
I had in mind a warm tone beige color like accessible beige. Painting the vanity allowed me to pick exactly what I wanted and not compromise with my vision. Read all about the PAINT COLORS IN MY HOME for more ideas and inspiration!
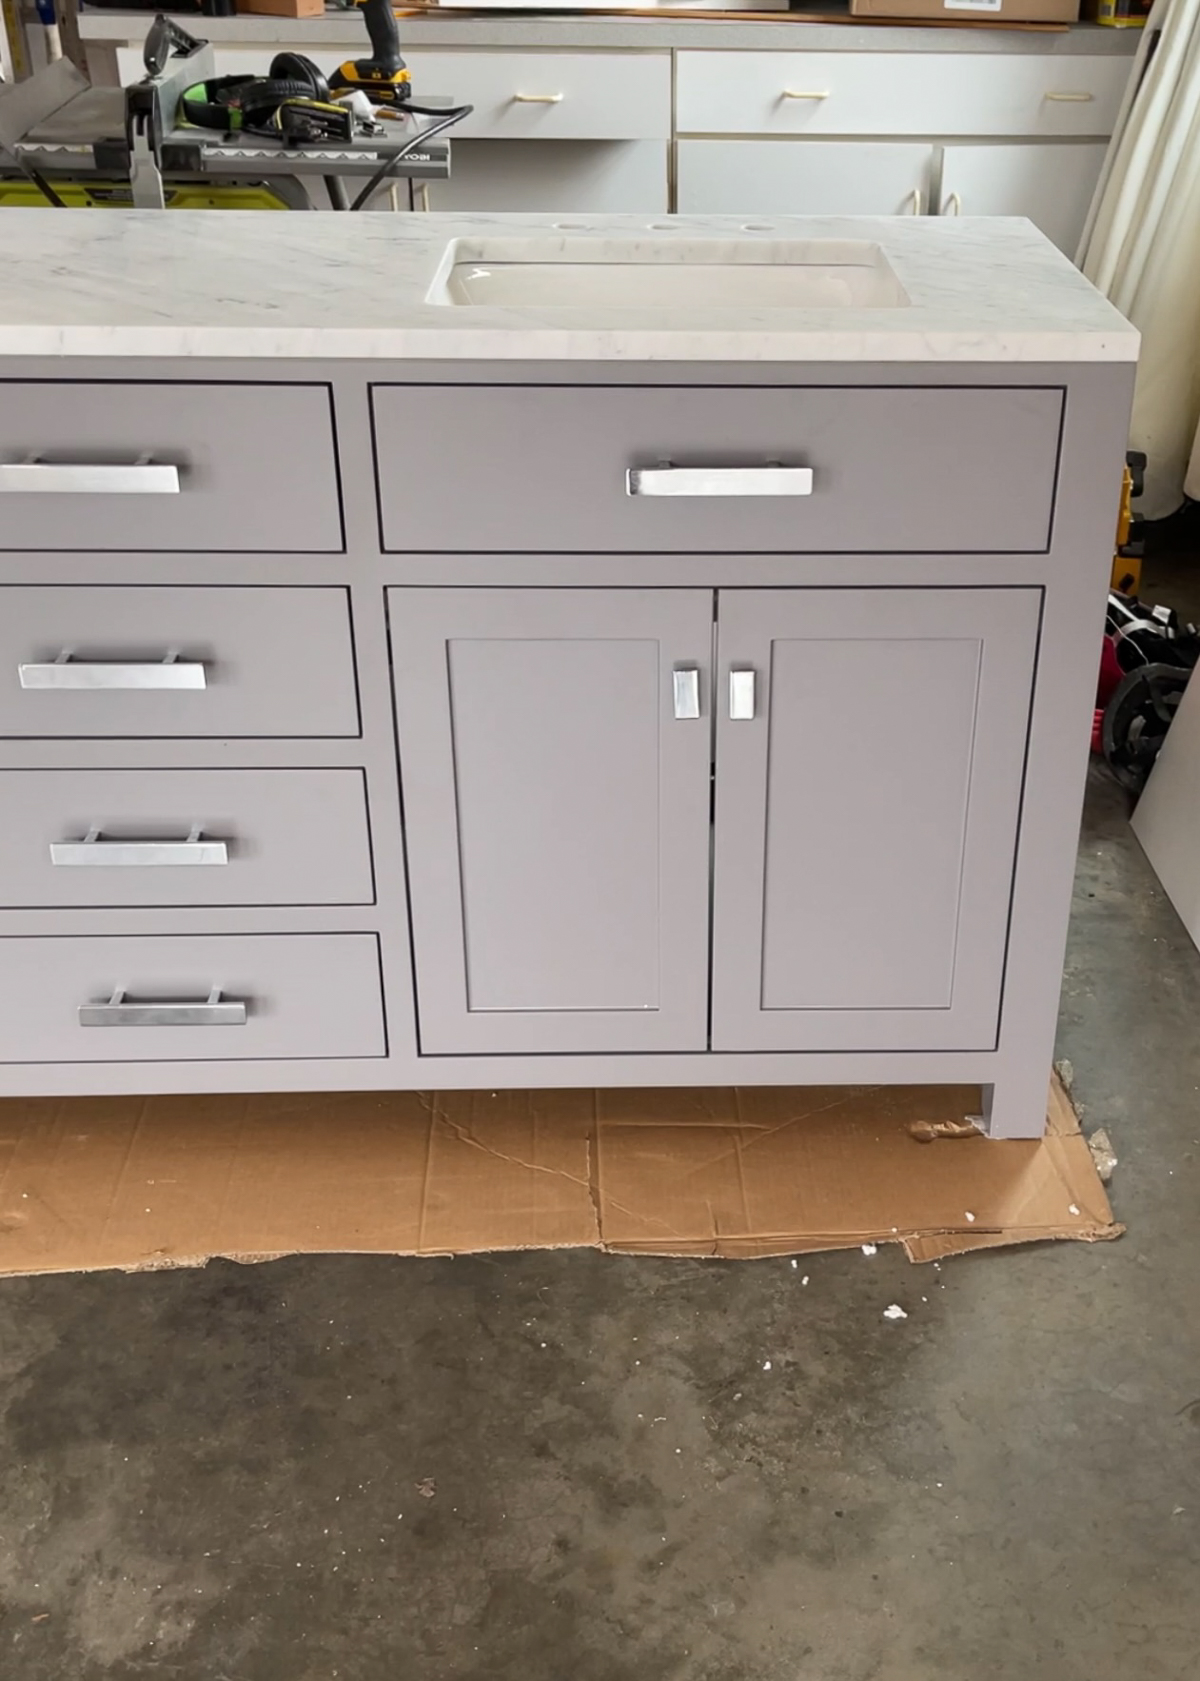
The hardware on the original vanity was the other feature that made it look basic. The interior design world – and my home – has moved away from brushed nickel/polished chrome and toward brass and mixed metal finishes. I replaced my kitchen cabinet hardware with unlacquered brass but chose aged brass for the upper level of our home.
Typically hardware is easy to change out but the placement of the pulls and knobs on this vanity made it impossible to replace with standard-sized hardware. Getting the cabinet hardware I wanted would have necessitated filling the existing holes and painting anyway.
How to prep the surface for paint?
There are a lot of articles on the internet that advise you on how to paint bathroom cabinets without sanding. This is not one of them. Unfortunately, if your goal is to have a professional-looking result that lasts, preparing your surface is crucial. That requires sanding.
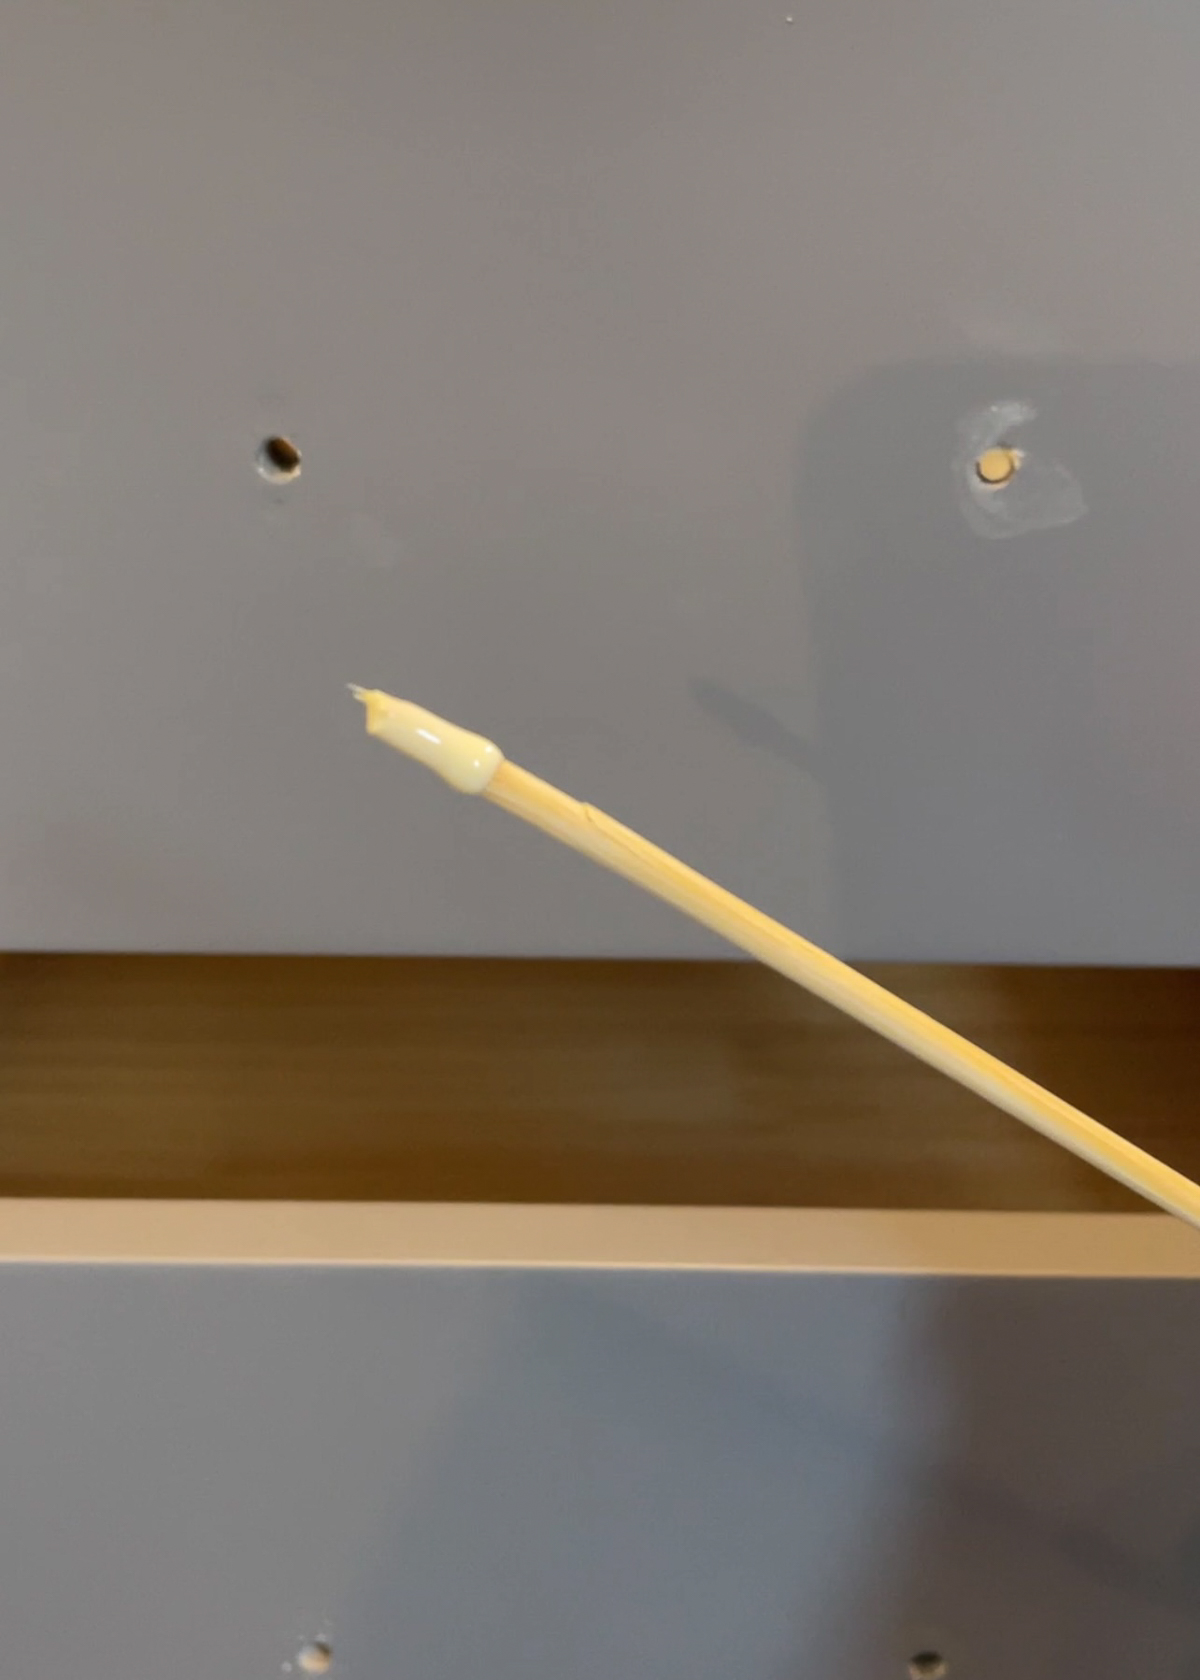
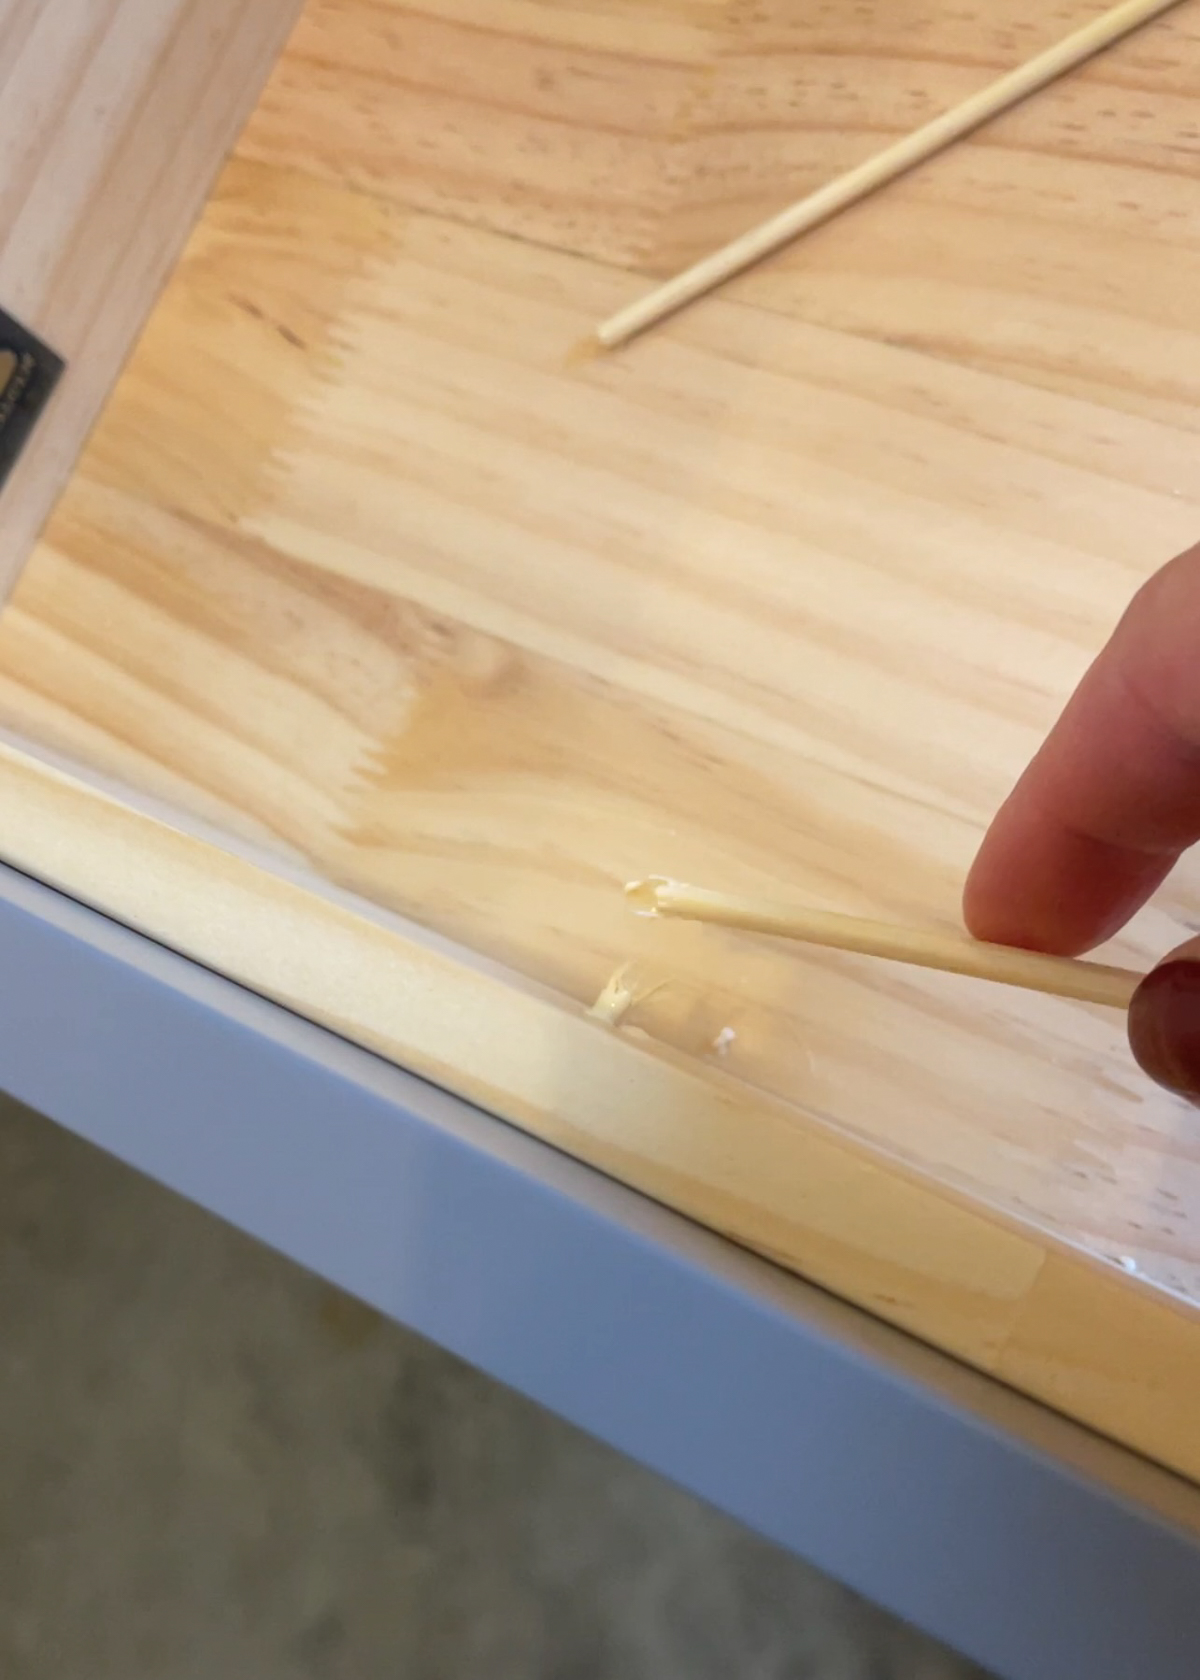
Fill old hardware holes
But before I sanded down the old paint, I had to fill the existing hardware holes. I did that using wood skewers dipped in wood glue and broke them off at the surface. You can also use a bunch of toothpicks. The goal is to fill the hole with wood and then add generous amounts of wood filler. Allow enough time for the wood glue and wood filler to dry before sanding down to a smooth finish. No one will know there used to be holes there.
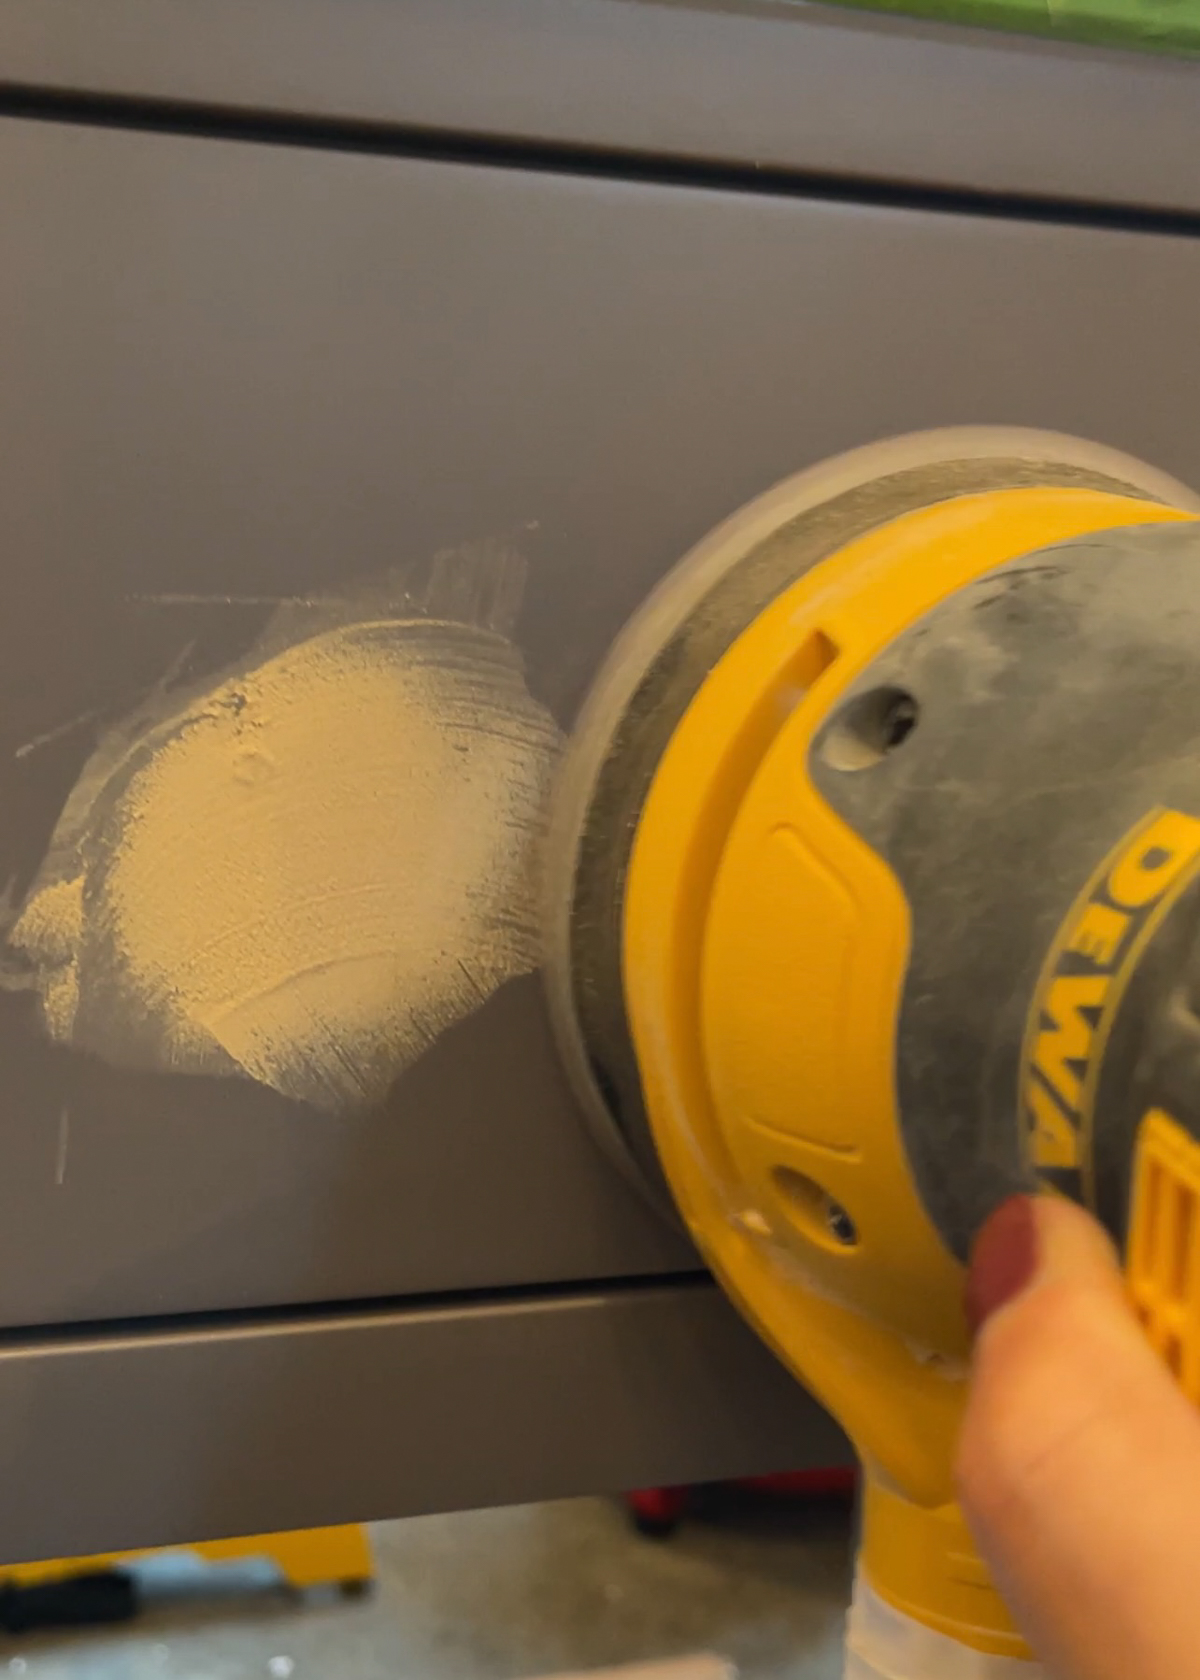
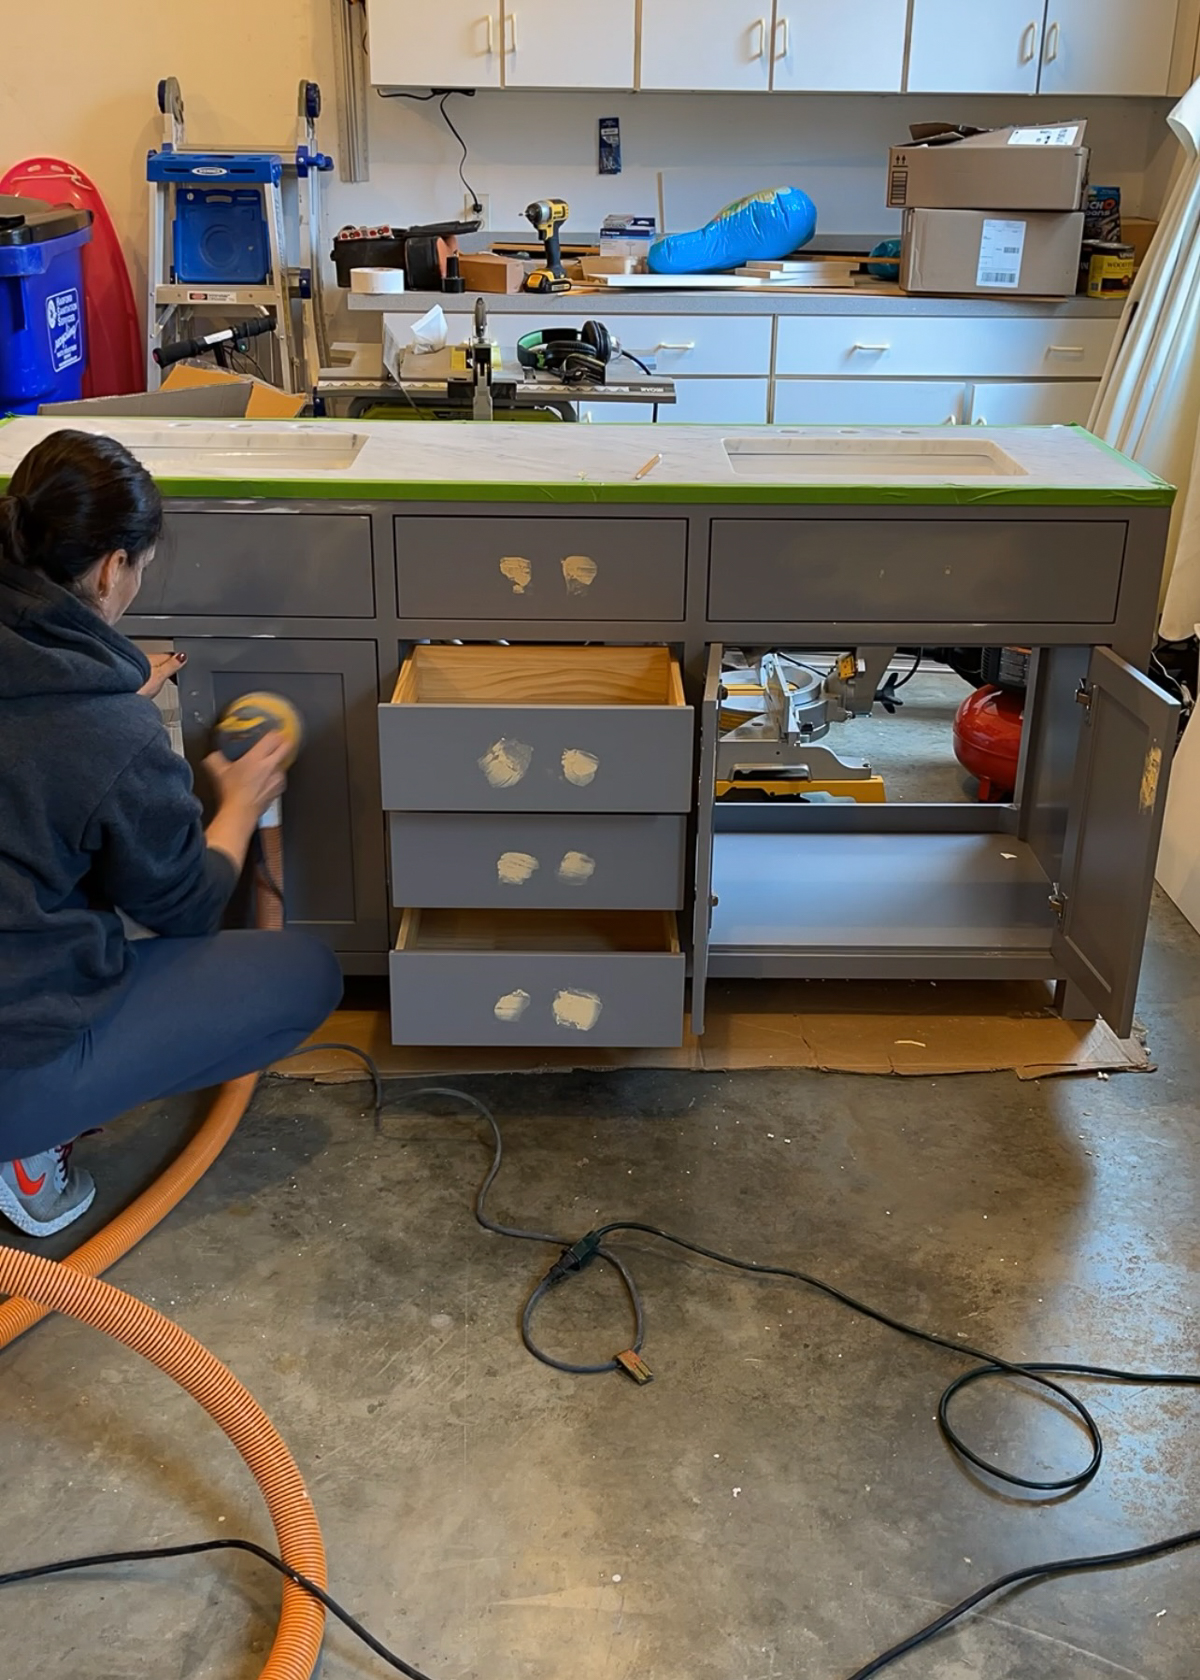
Sand down the old paint
The good news is that you don’t have to completely sand off the old paint down to the natural wood surface. All you need is to scuff the top protective shiny layer of paint. That will be enough for the new paint to adhere to it. I used an orbital sander with 120 grit sandpaper to take off the top finish. Then I followed up with 220 grit to smooth the surface. You will want to wipe down the vanity fully after sanding to remove any dust and debris.
This is also the extent of any power tools that you’d need (other than a drill for the new hardware holes).
Check out my comprehensive list of essential DIY tools I use for all my projects!
Do you have to prime before painting?
Even though most professionals recommend priming before a paint job, I have never done it and haven’t had adverse results. I usually paint raw wood and this project was the first pre-pained surface I did.
Many times priming is required if you want to avoid sanding the surface. Some primers are designed to adhere to the old paint and provide a grip for the new paint. Oftentimes primers can be hard to work with because of their texture and/or noxious fumes. I chose to sand the vanity instead of using a specialty primer. I trust the results from painting a sanded surface more than a primed, unsanded surface.
Do you need to remove the cabinet doors before painting?
For the most professional results, I recommend removing the cabinet doors and drawers before sanding and painting. Remove the hinges so you don’t have to sand around them and prevent paint from getting on them. I used painter’s tape to seal off the countertop and the drawer boxes.
I also removed the back of the cabinet. It’s a simple MDF board attached with screws. It allowed me access to the inside of the cabinet from both sides. It’s also easier to paint the back when it’s flat on the floor.
Hot Tip: Label your cabinet doors and drawers so you can put them back the same way. They may look identical but sometimes there are tiny differences in the placement of hinges and drawer slides.
How to paint cabinets without a paint sprayer?
I have built and painted a lot of cabinets in my time. I have sprayed some of them and used a brush and roller on others. Both methods of painting have their advantages and disadvantages. (Read for more info on how I built our home office builtins and window seat builtins.)
When to use a paint gun?
Using a paint gun to spray paint cabinets might sound like a fast and convenient way to go about it but it requires a lot of prep if you will do it indoors, or the perfect space and weather conditions if you do it outside. There are other considerations too that make spray painting not as efficient as many people think. I will only spray paint if I have to deal with very expansive surfaces – like my IKEA closet doors.
In the case of this bathroom vanity, the surface wasn’t large enough to warrant using a spray gun. However, I still wanted to achieve that smooth surface, no brush strokes or roll marks look that spraying delivers.
The best paint for cabinets
The solution is to use cabinet-grade paint like Sherwin Williams Emerald Urethane Trim Enamel. I have sung the praises of this paint many times – a self-leveling, hard-wearing, enamel-like finish that eliminates roller marks as it dries and cures. This is the best paint for any cabinet project but it is also the ideal bathroom vanity paint. It cures to a hard finish which is easy to wipe down, especially in semi-gloss – which is the sheen I recommend for cabinets and trim. I use the same product for painting interior doors too!
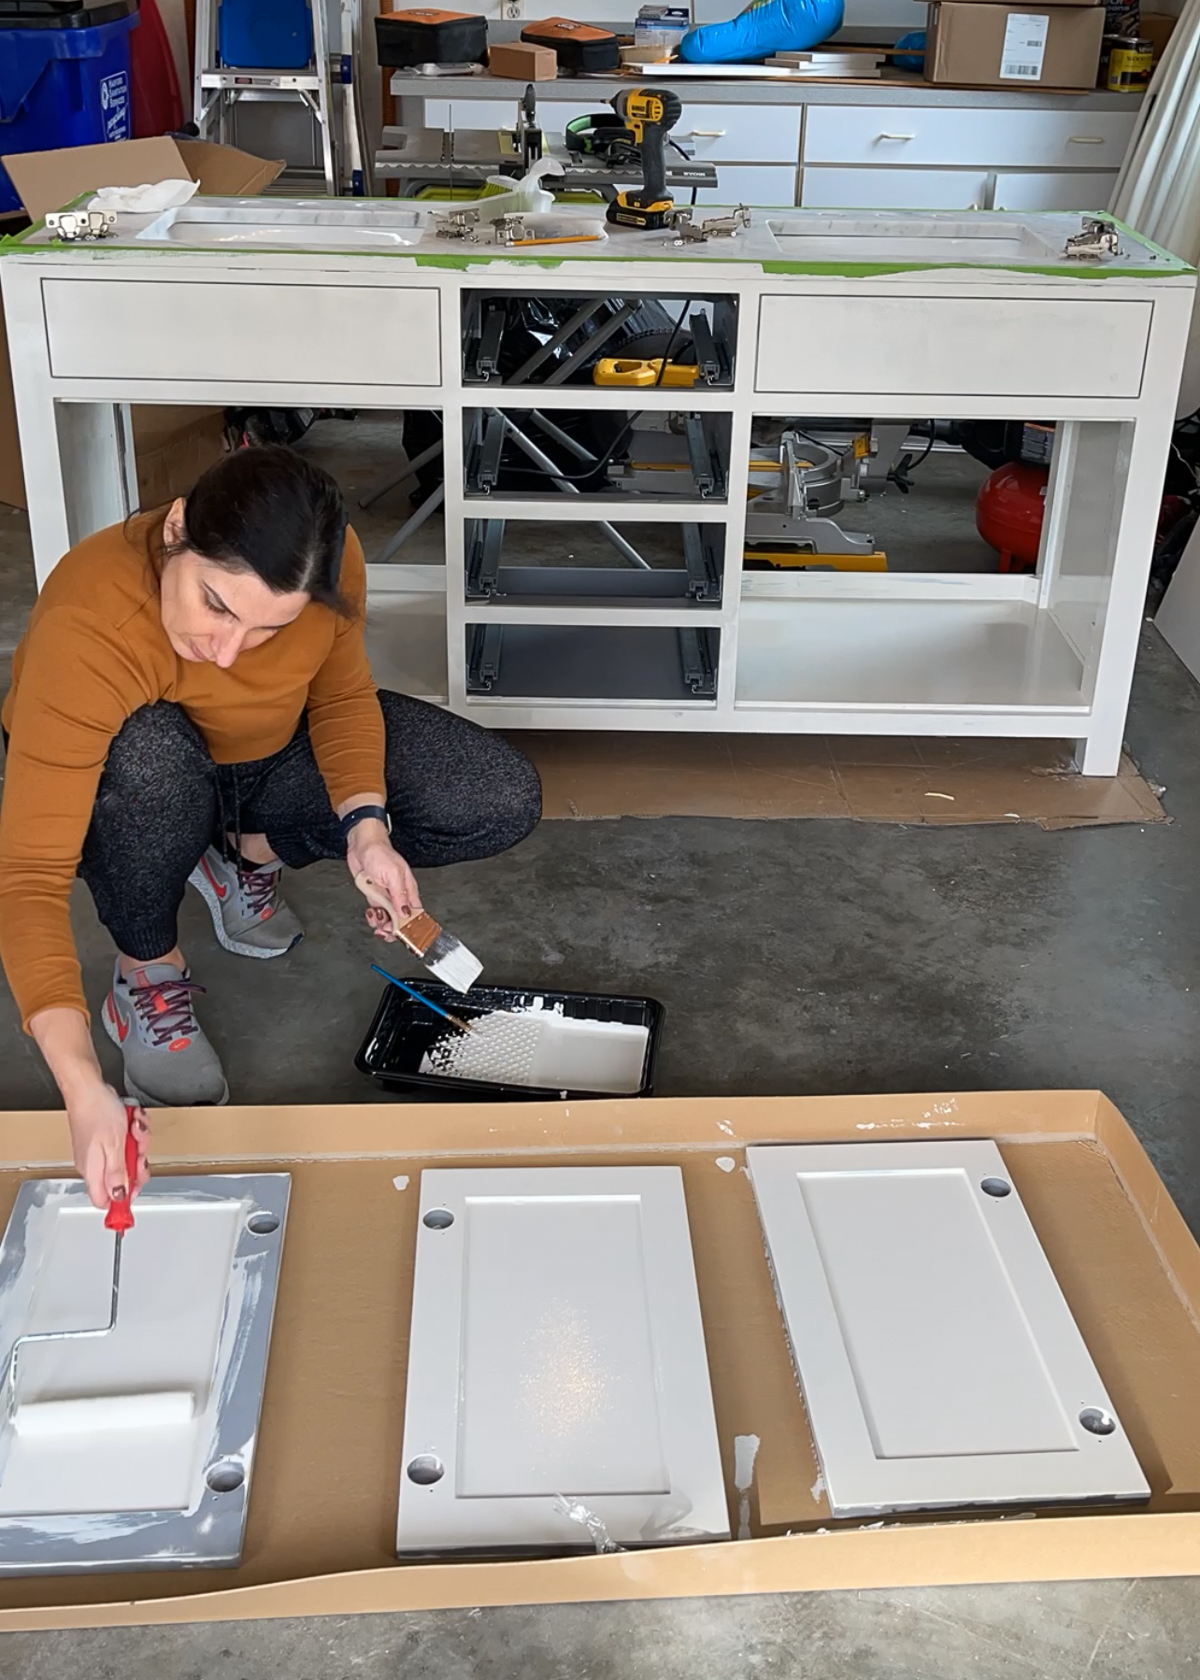
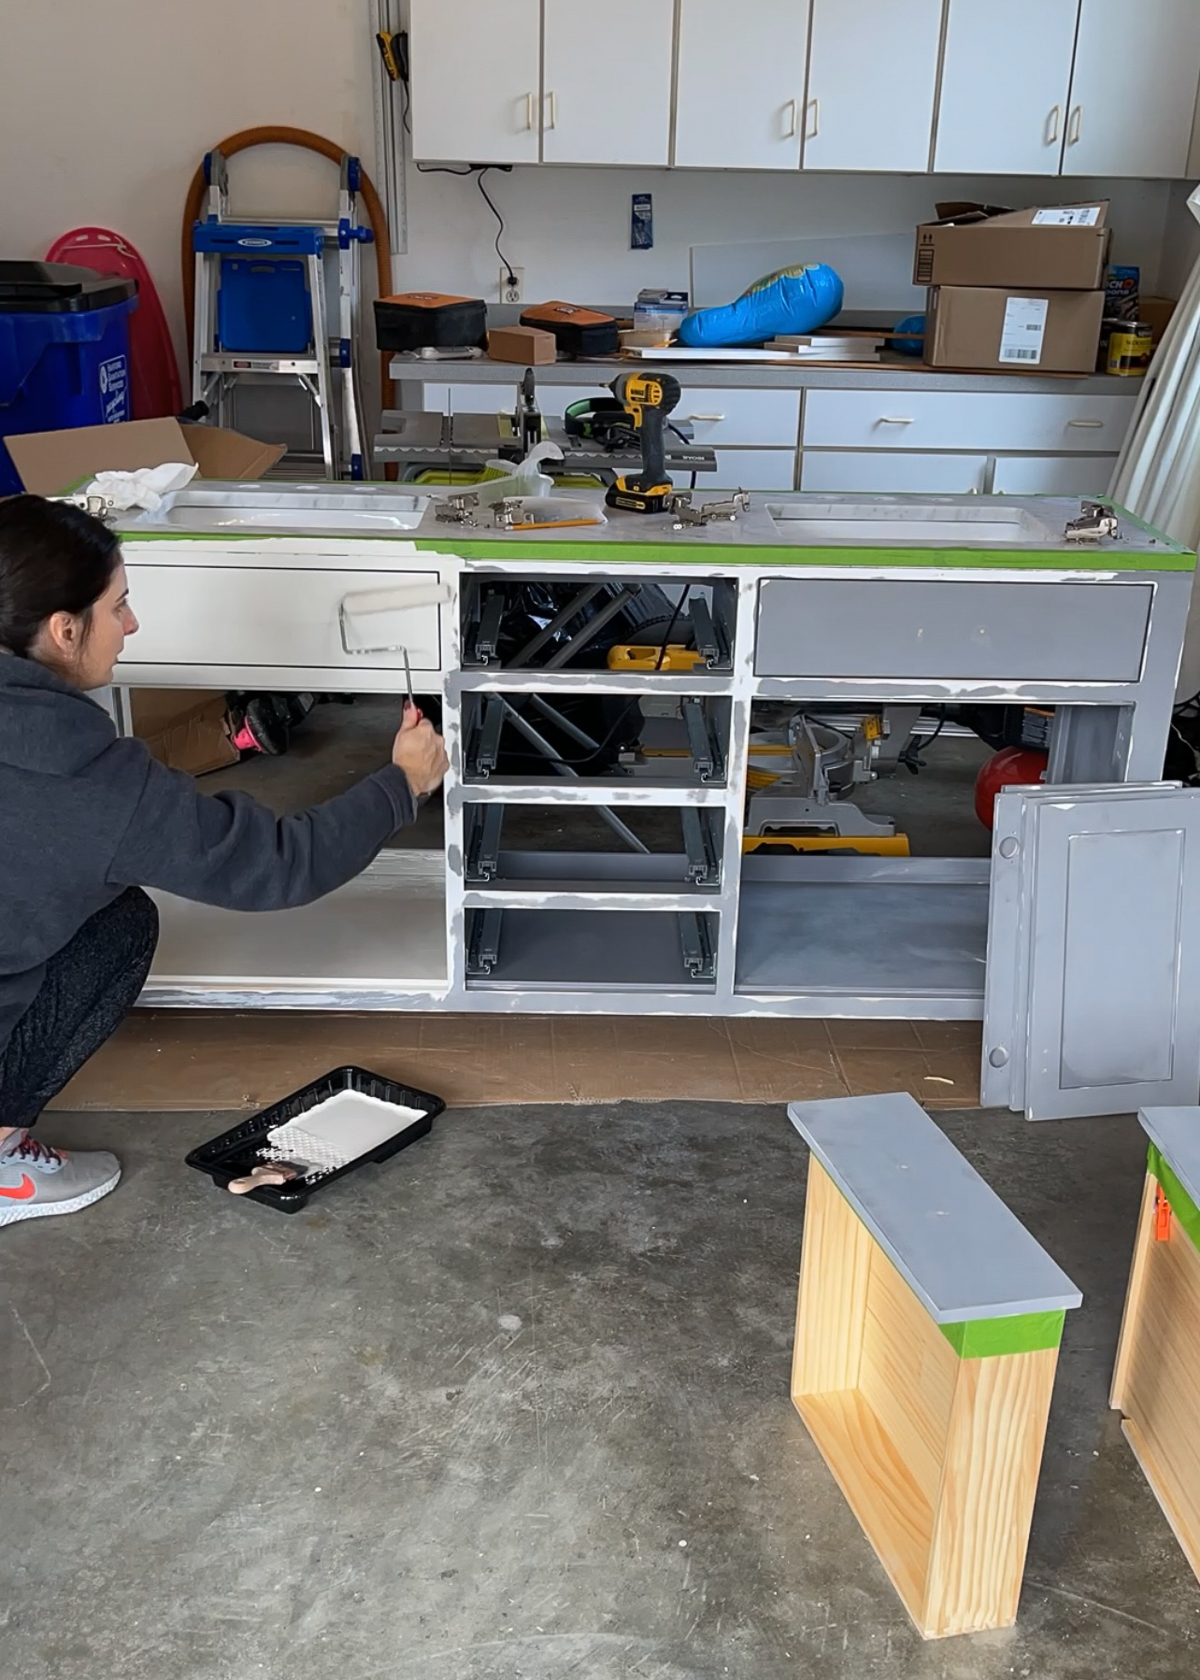
What type of roller to use?
It’s important to use a high-quality mini-roller but NOT a foam roller. Foam rollers leave a weird texture behind. My painter also recommends the woven kind. As long as it’s the high quality non-shed one. Don’t skimp on the roller!
Another very important step in the painting process is to lightly sand between coats. Most projects need only two coats. That means you paint the first coat, sand with 220 grit, then paint the second coat. No sanding after the last coat.
How to get factory smooth finish
The in-between sanding ensures a very smooth, factory finish to the painted cabinet. Sometimes paint can deposit tiny specks that feel rough to the touch. Sanding after the first coat will eliminate them and any other imperfections. This step doesn’t take long. It’s best to use a sanding block and lightly sand manually. If you use an orbital sander, you run the risk of taking off too much paint.
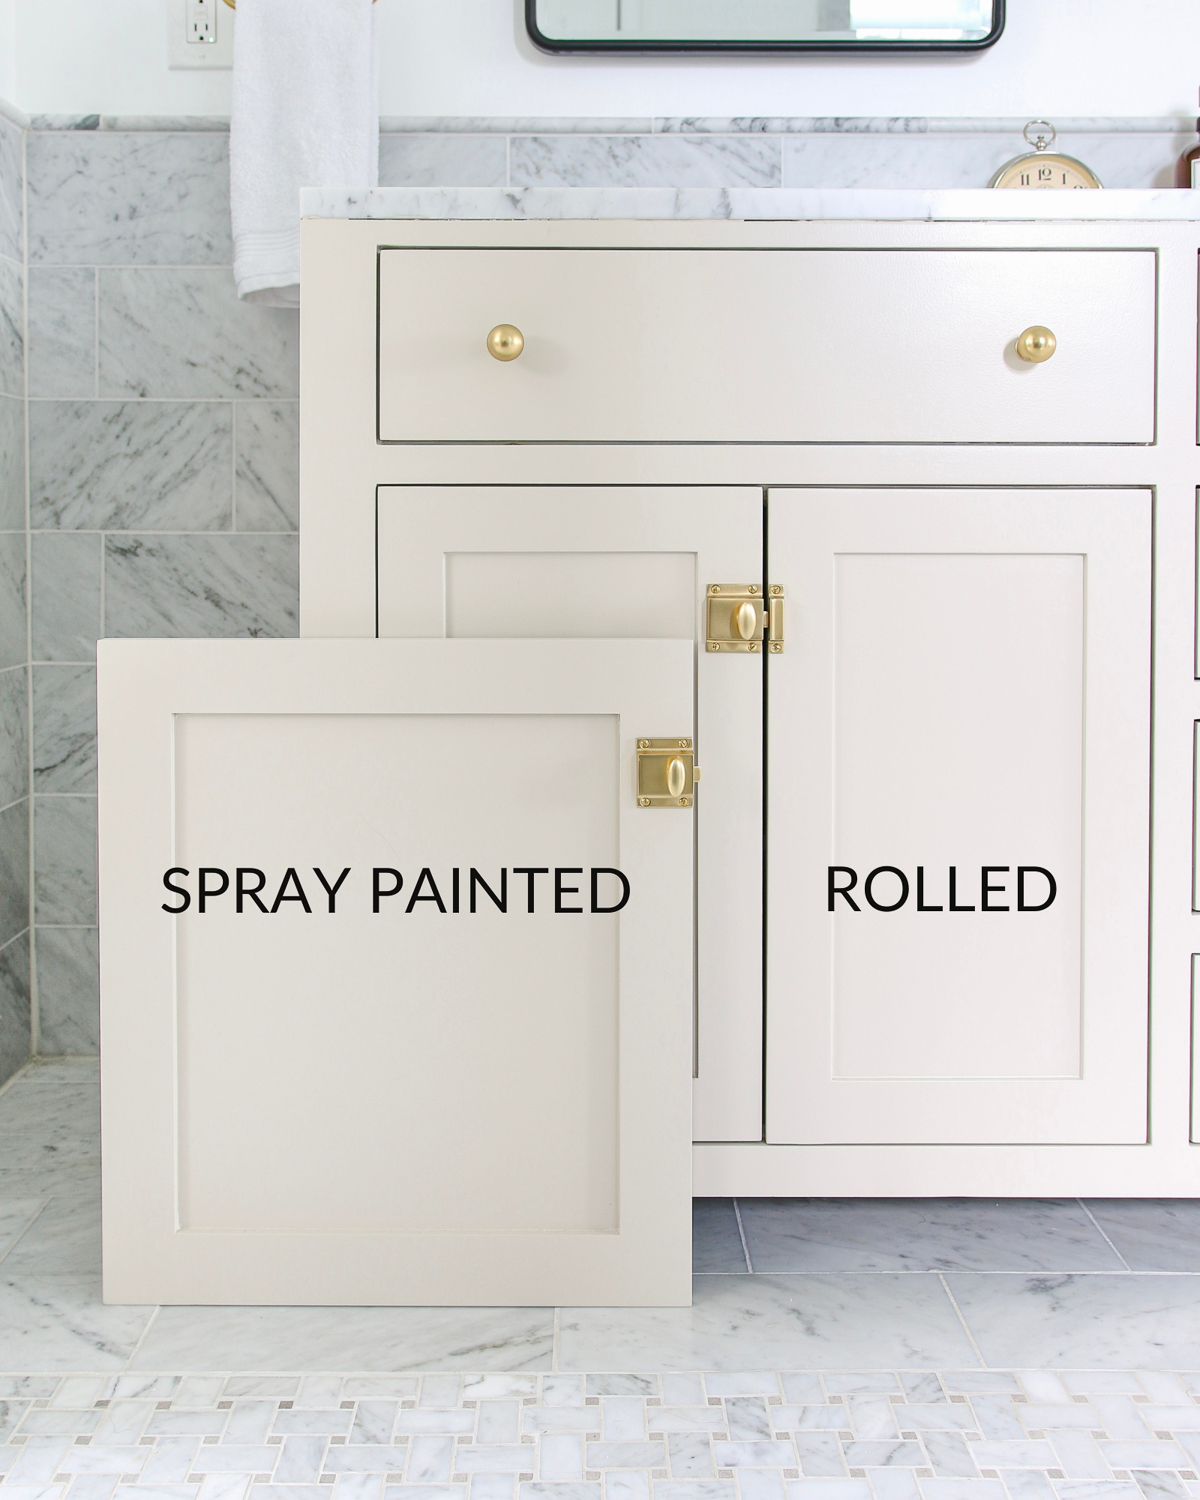
I promise you that the end result of painting bathroom cabinets with a roller is indistinguishable from the sprayed version. I opted to spray paint the doors in the adjacent closet because there were enough of them to warrant that. When you hold them side by side, you cannot tell the difference between the sprayed and rolled doors.
Do you need a protective top coat?
I have never used a protective top coat for painted cabinets. Polyurethane is usually necessary to protect stained finishes on furniture, but not paint. The SW Emerald Enamel paint cures to a very strong lacquer-like finish and no protective coat is necessary. The paint dries to the touch within hours but it takes a few days to fully cure. Make sure to wait that time period before placing objects on your painted bathroom cabinets.
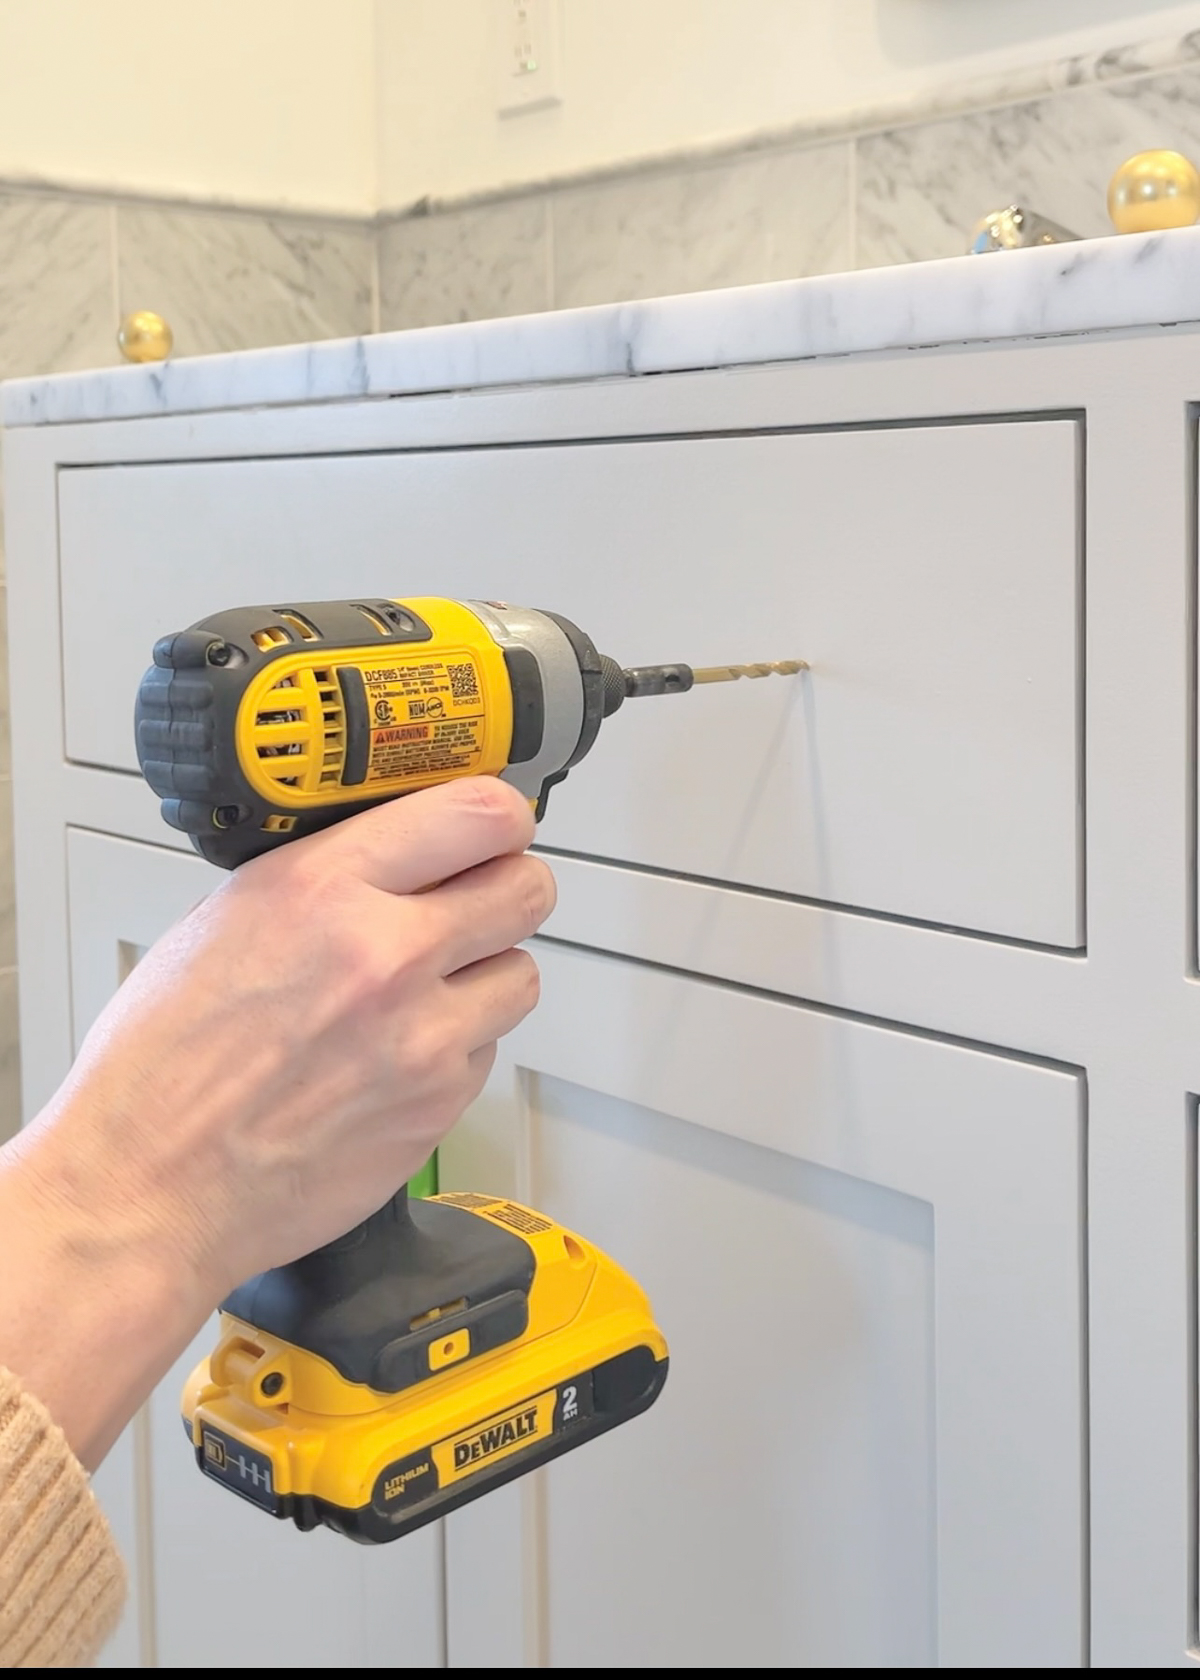
Attach the new hardware
After painting the bathroom cabinets, the final step is attaching the new hardware. I mentioned that the old hardware wasn’t the right style and finish for me. In case you’re wondering, even though I recommend repainting your bathroom cabinets or vanity, I am not a proponent of using spray paint to transform hardware.
It may seem like a good idea initially but eventually, the spray paint will end up peeling and wearing off in the most frequently used spots. And we open and close bathroom cabinet doors and drawers all the time. Save yourself the trouble and invest in good quality cabinet hardware.
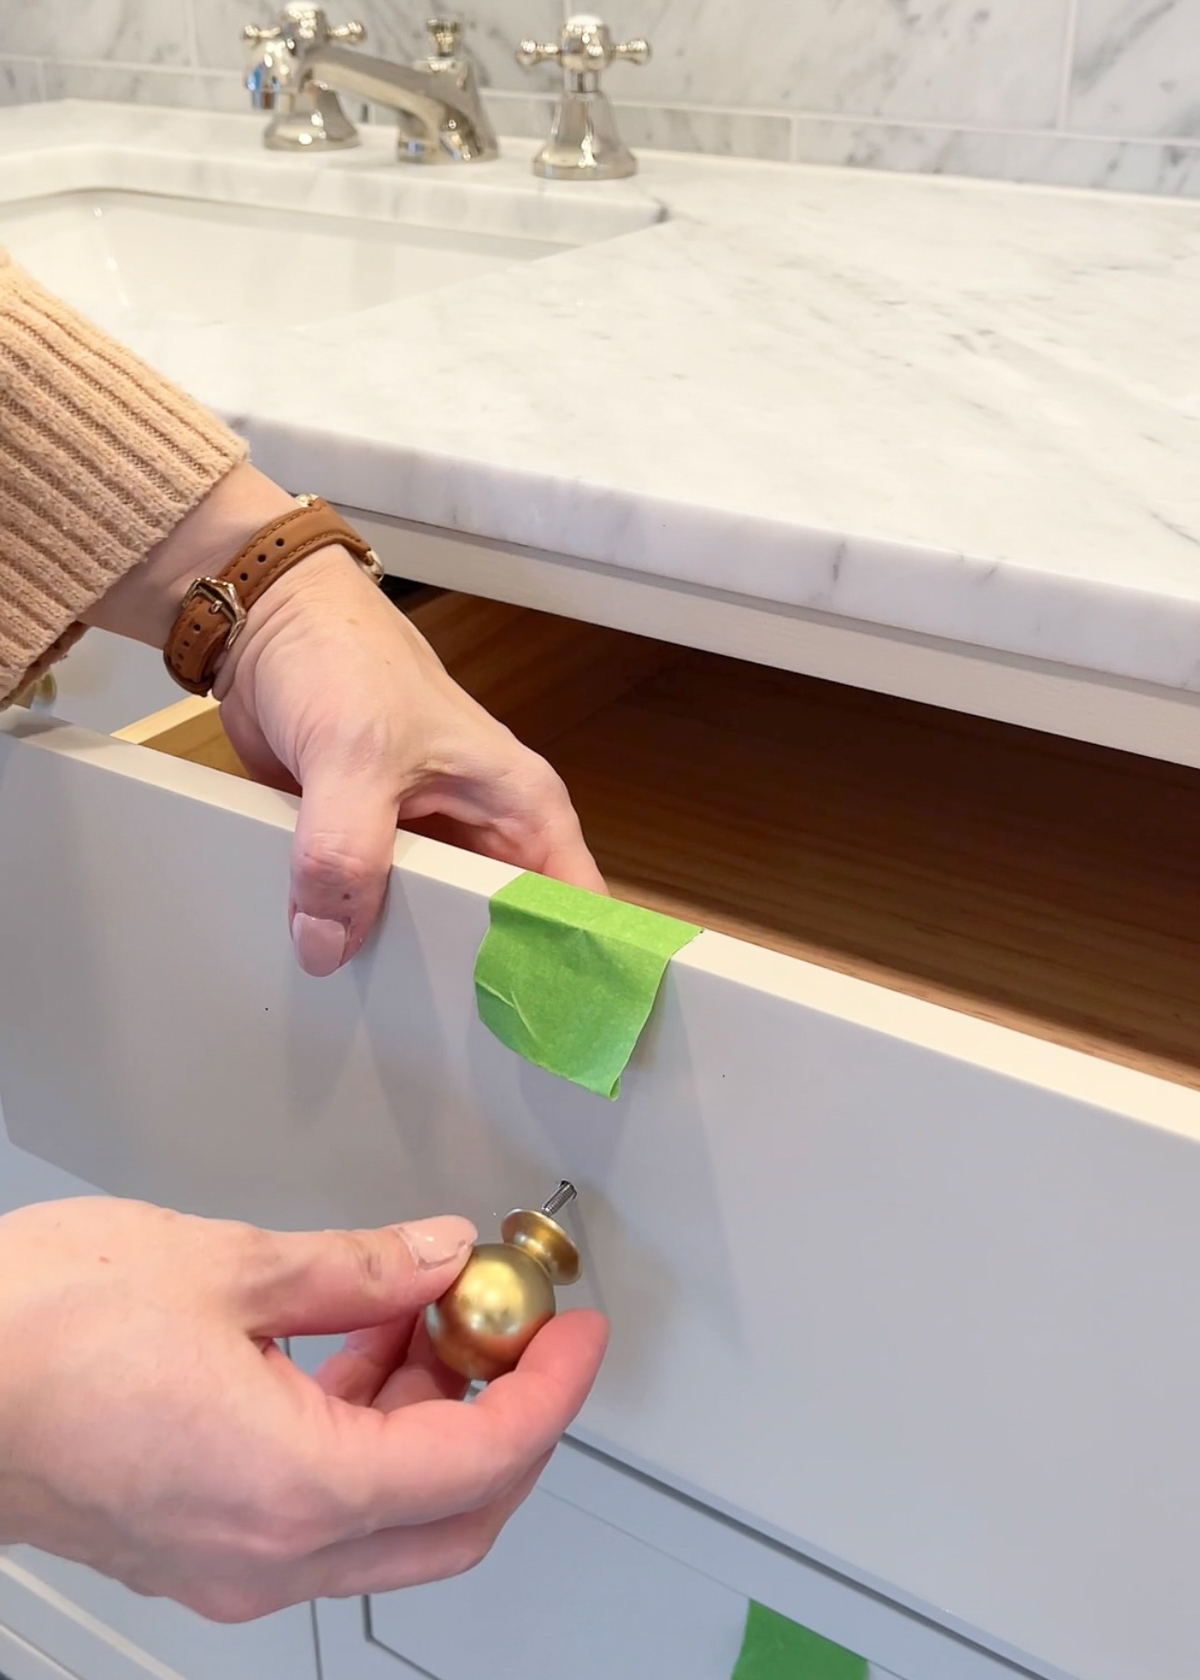
Hardware is the “jewelry” and finishing touch of any DIY cabinet project. It’s what sets it apart and makes it look like a custom cabinet, instead of retail builder grade.
Summary
Let’s recap the steps to take to paint a bathroom vanity or any cabinet with existing paint:
- Remove hardware, cabinet door and drawers, and hinges
- Fill hardware holes or any damage/imperfections with wood filler
- Sand off the top layer of paint using 120-grit sandpaper
- Smooth the surface with 220-grit sandpaper
- Clean the surface well with a tack cloth
- Tape off the countertop and drawer boxes
- Use a drop cloth to protect the floors
- Paint using good quality roller and brush
- Sand lightly with 220 grit sand block
- Apply the final coat
- Reattach doors and drawers after the paint is dry
- Drill holes and install new hardware
For more details and sources of my primary bathroom, check out my full bathroom makeover post.
RELATED POST: DESIGNING A LUXURY BATHROOM: MUST-HAVE UPGRADES