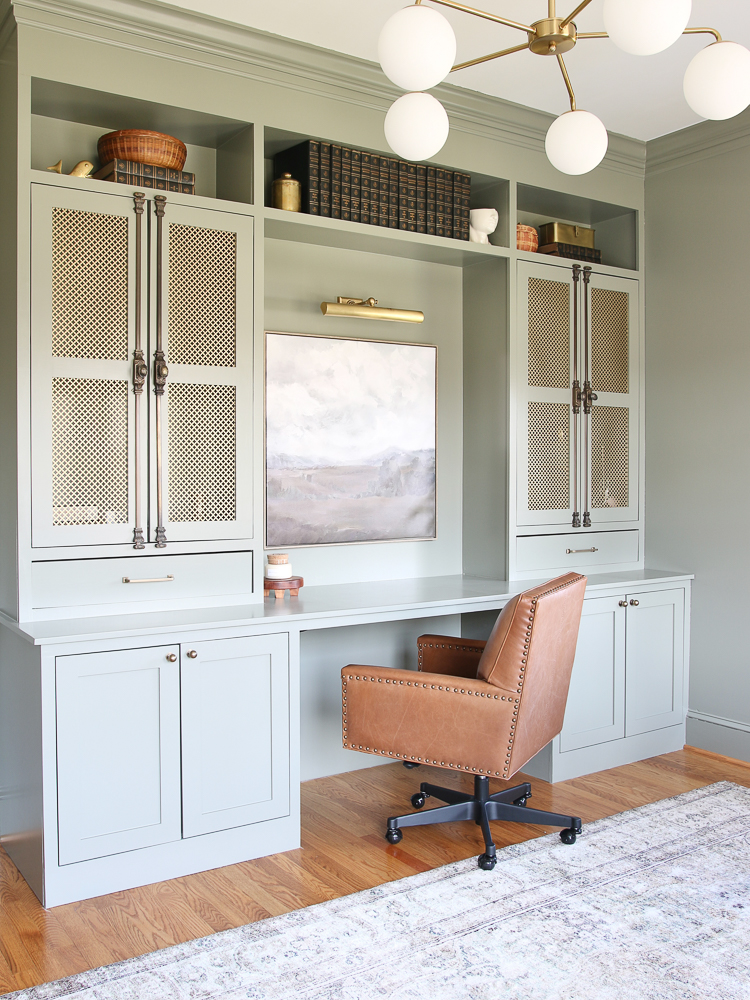
How To DIY Built In Cabinets For Home Office
Disclosure: This post may contain affiliate links. As an Amazon Associate, I earn from qualifying purchases at no additional cost to you.
The design of the built in cabinets
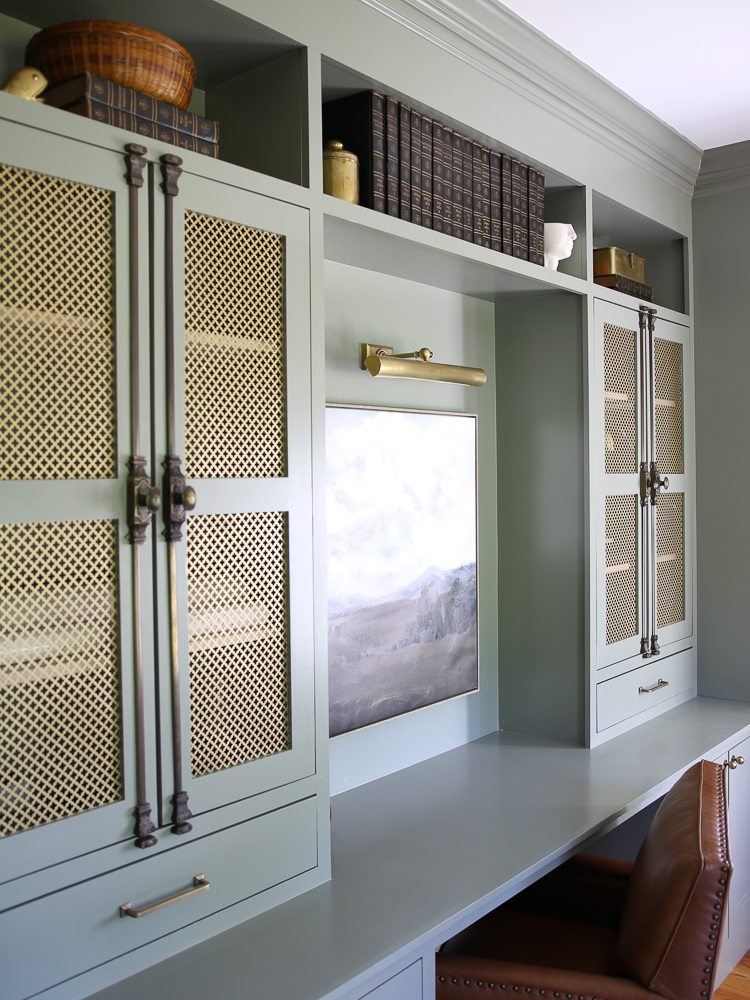
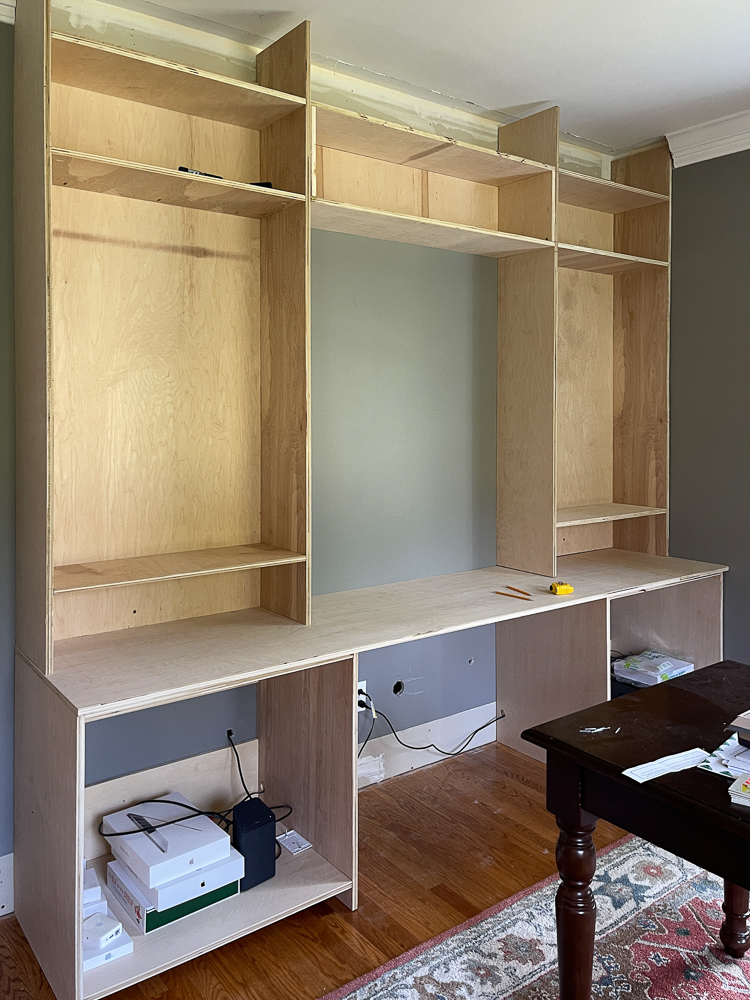
The cabinets in our home office are the fourth built in cabinets I have made. (For the rest, check out my living room builtins, loft built-ins, and boys’ room desks and dressers.) Our home office is on the first level of our house and is the only fully closed room with doors. This means that I could get creative with the design and maybe go outside of my comfort zone regarding the paint color. I knew I wanted desk space, hidden storage (cabinets with doors), and very little display space. My other built in cabinets have plenty of open shelf opportunities for decor so I wanted these cabinets to be more functional for an office setting.
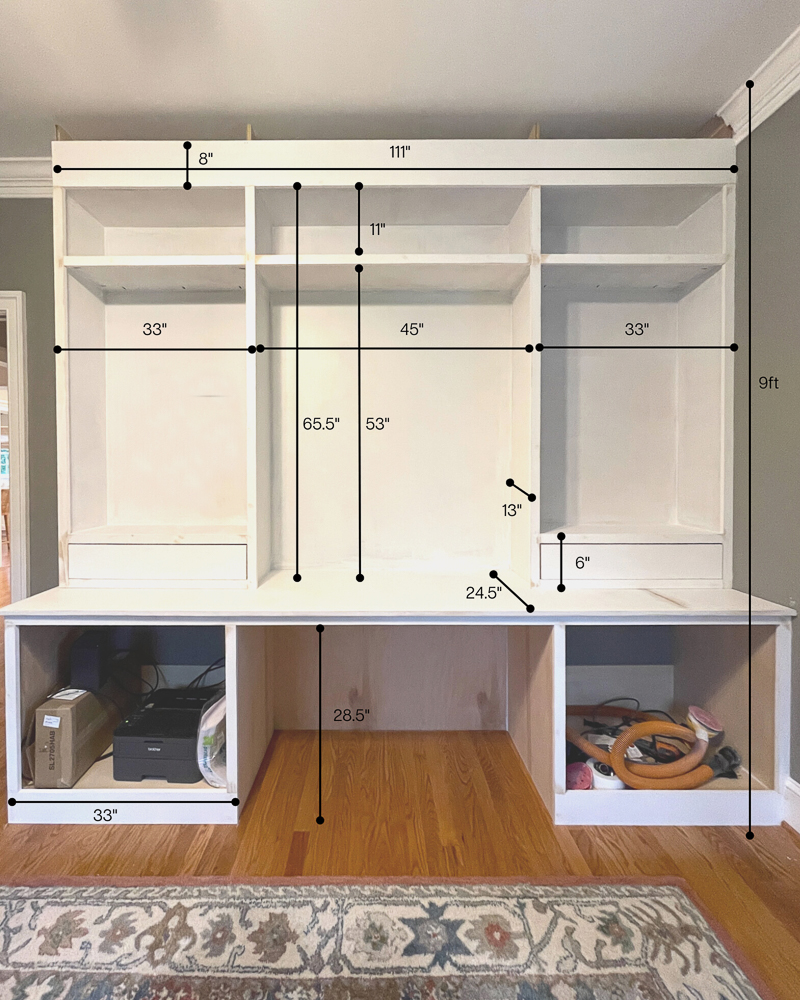
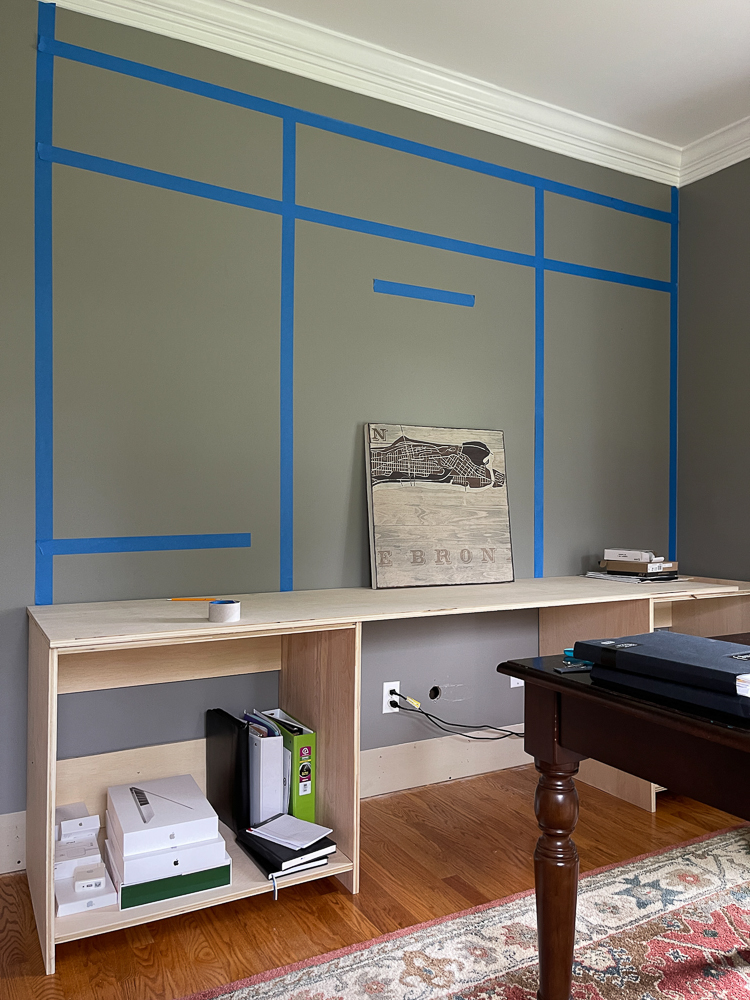
I always recommend visualizing the design in your head on paper or even onto the wall itself to make sure the scale is right and that you love it. You can use pen and paper or design software l like Photoshop, SketchUp, or Canva. Here is what I did using painter’s tape to visualize the scale of the cabinets:
Materials and tools
- 3/4 Plywood – the body, or the cabinet box, is constructed from standard 3/4 Sande plywood
- 1×1 Trim Board – this piece covered the raw edge of the desktop
- 1×2 Primed Pine Trim Boards – the raw edges of the boxes are covered with these trim boards
- 1×3 Primed Pine Boards – for the door frames of the upper cabinet doors
- 1×6 Primed Pine Board – for the base of the cabinet trim – ripped down to 4.5″ wide
- 1×8 Primed Pine Board – for the header at the top of the cabinets
- Crown molding – I got the two-piece crown and base trim that matches my existing crown
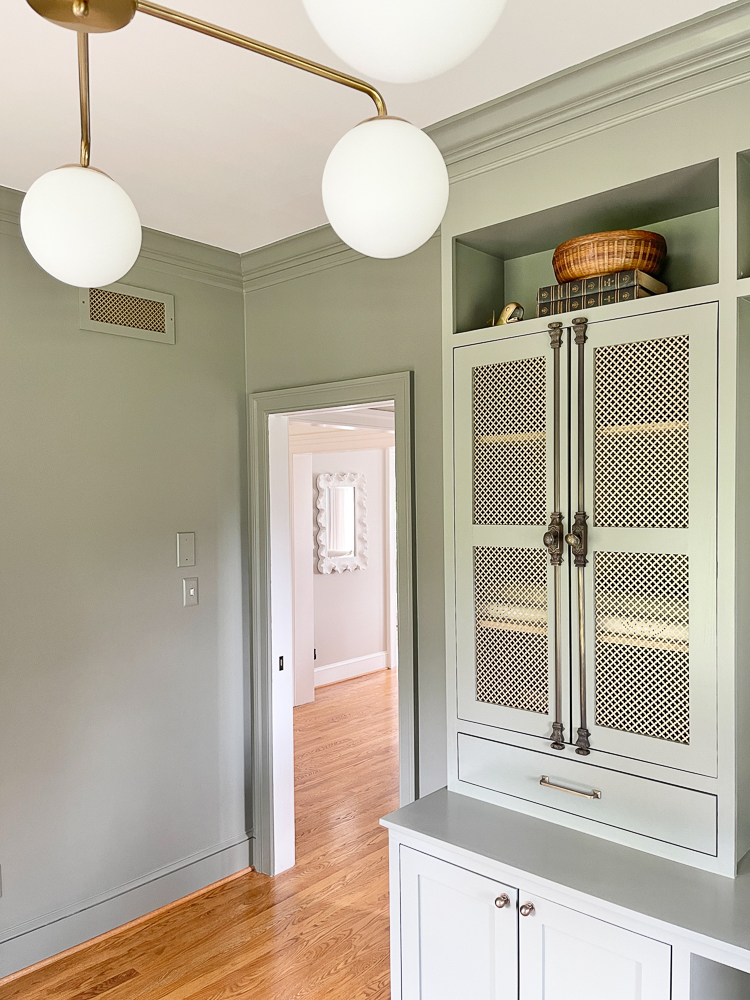
- Metal Mesh Sheets – inserts for the doors
- Table Saw – to cut the plywood sheets for cabinet sides
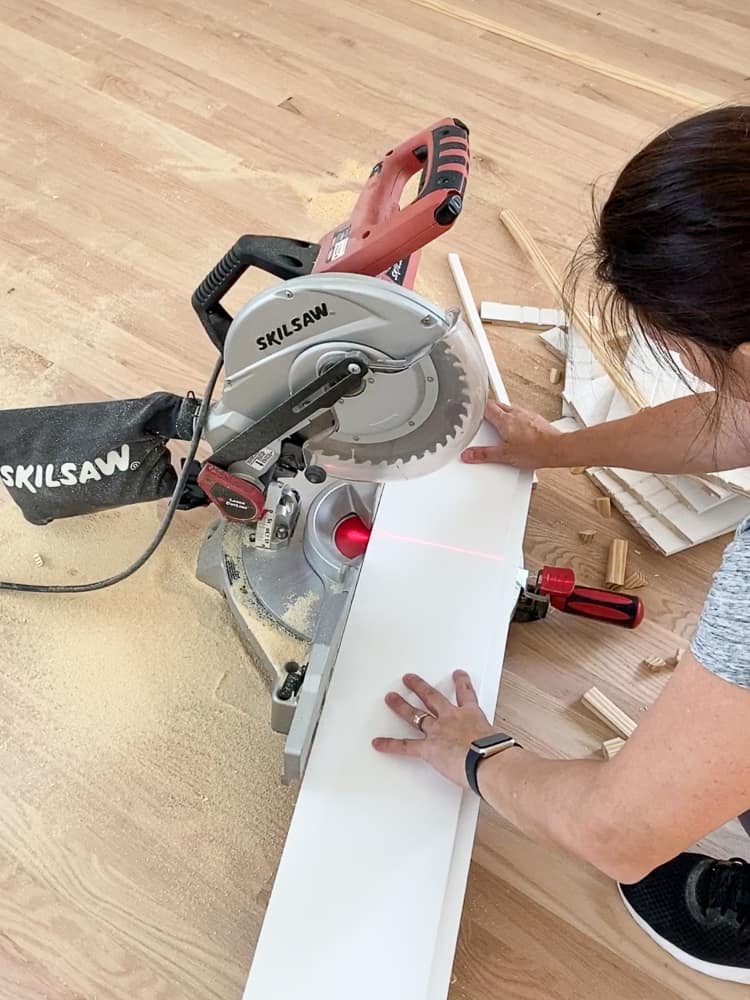
- Miter Saw – to cut the trim boards
- Pocket Hole Tool – to attach the plywood boards to one another at 90 degrees
- Drill or driver – for the pocket screws
- Nail Gun – to attach the trim front to the cabinet boxes
- Wood Glue – to reinforce connections
- Wood Filler – to cover nails holes and seams
- Orbital Sander – to sand everything before painting
Check out my comprehensive list of essential DIY tools I use for all my projects!
Simple Materials Guide
Get this FREE GUIDE to different types of trim and molding materials for your every DIY need – from wall molding to cabinetry!
How to construct the cabinets
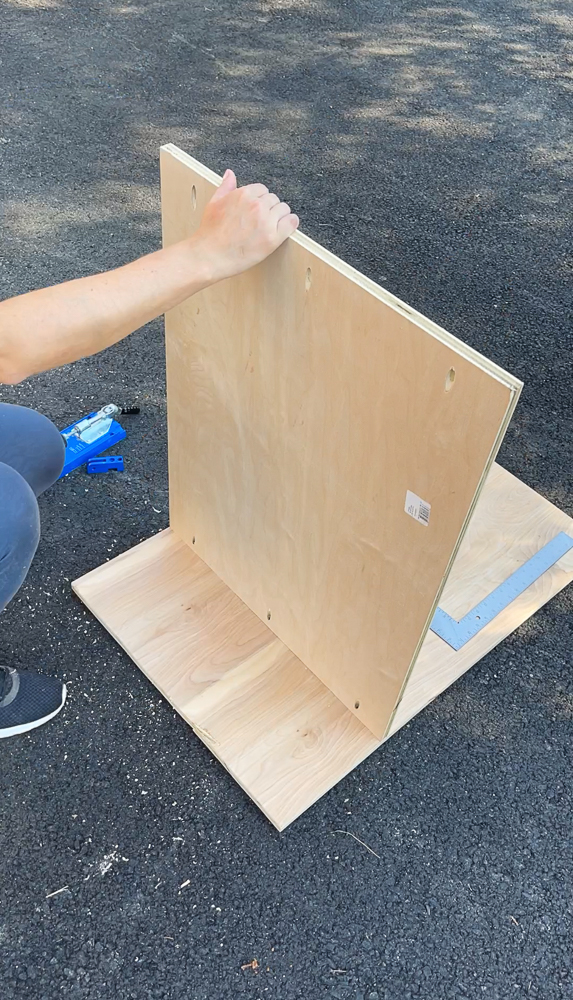
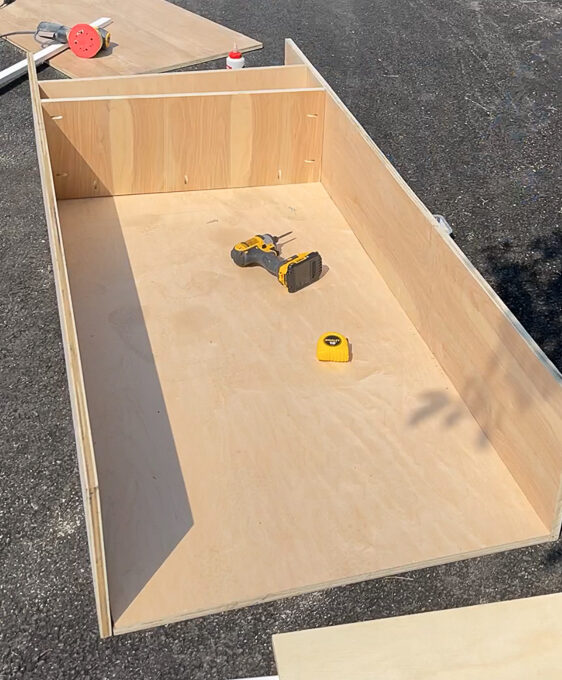
Constructing a plywood cabinet is really not hard at all. There are many different ways to do it but the basic idea is that you are creating a simple box. The hardest part is deciding how to attach the sides together. There are also other ways to do it and they all have their advantages and disadvantages that have to do with skill level and tool availability.
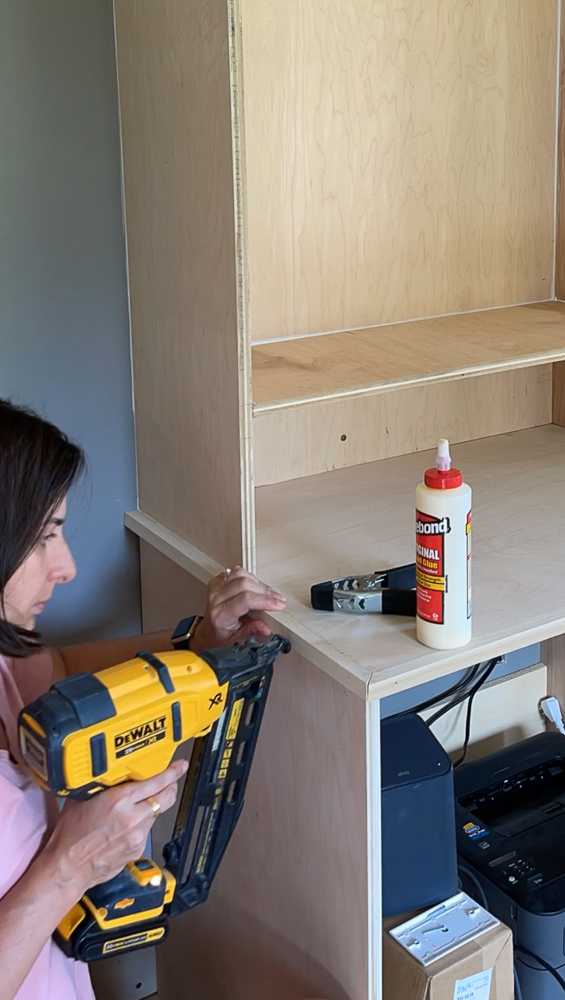
My favorite way to attach two pieces of plywood together at a 90-degree angle is by using pocket holes. The tool you need is very simple and inexpensive. The only thing you have to watch out for is to make the holes on the side of the cabinet that will be hidden from sight.
You also don’t need to add a full panel on the top or back because there will be a separate piece for the countertop. A couple of narrow planks will do the job of adding stability and save you money on plywood.
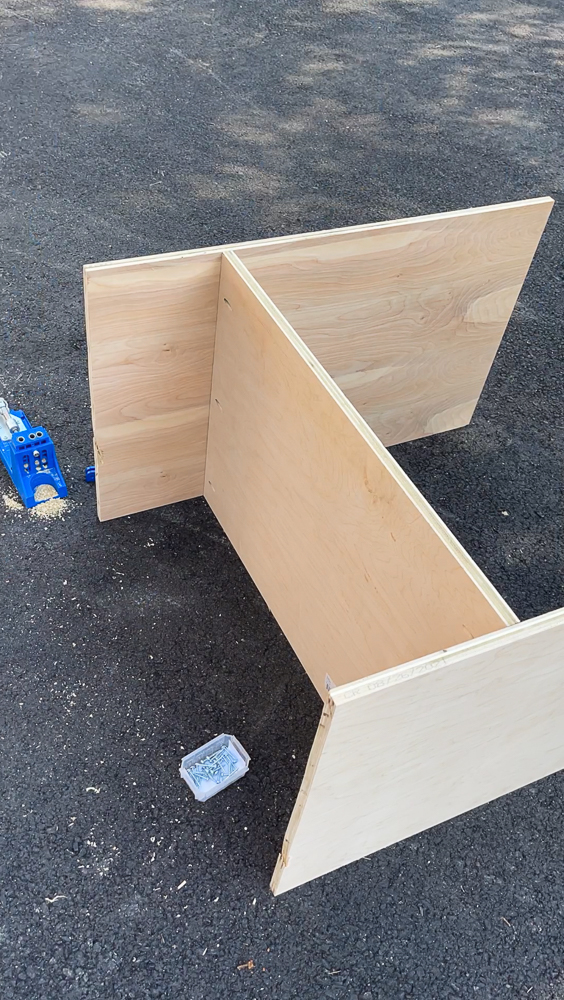
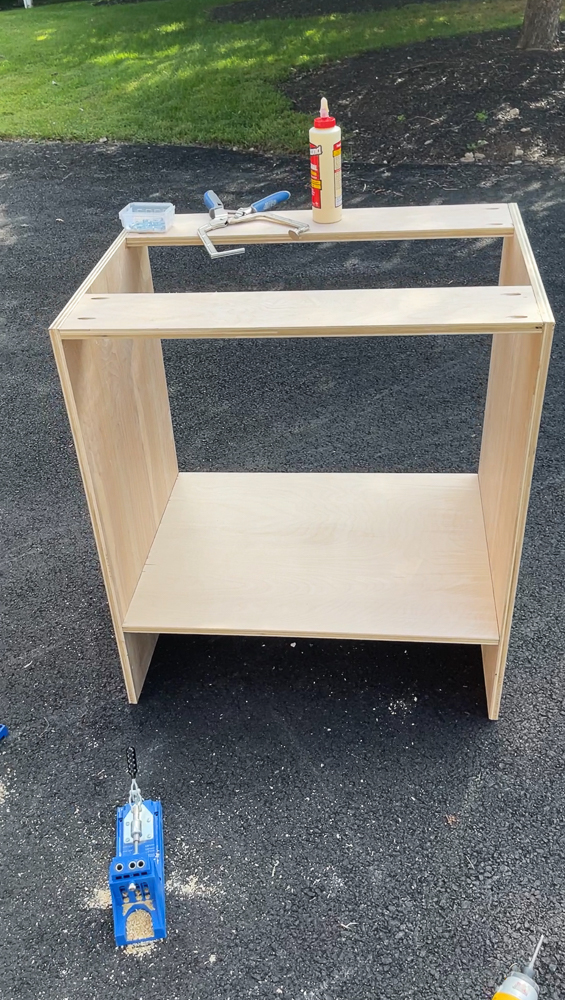
The upper cabinets are constructed in the same way. The pocket holes will be hidden inside the cabinet covered with doors. You can also fill them in wood dowels especially made for this.
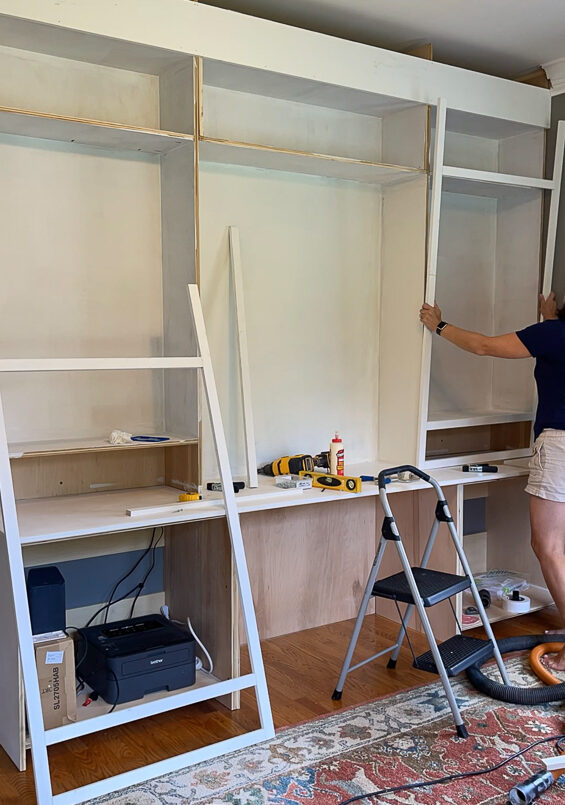
The characteristic of built-in cabinets that sets them apart from stand-alone furniture is that they are attached to the wall and integrated with the crown and base molding. That meant that I had to cut out the existing crown and base trim in order to attach the cabinets to the wall.
Trim out the built in cabinets
I covered the raw edge of the cabinet box with 1×2 primed pine trim boards. You can cut them to size and nail them directly on the face frame. I prefer to first attach the trim boards to one another with pocket holes/screws. That ensures that my opening is squared (very important when attaching the doors) and that there will be fewer joint cracks down the road. Any time you have a wood joint, you will likely experience cracks and separation in winter when the temperatures drop and the wood contracts. Attaching the frame diminishes those cracks.
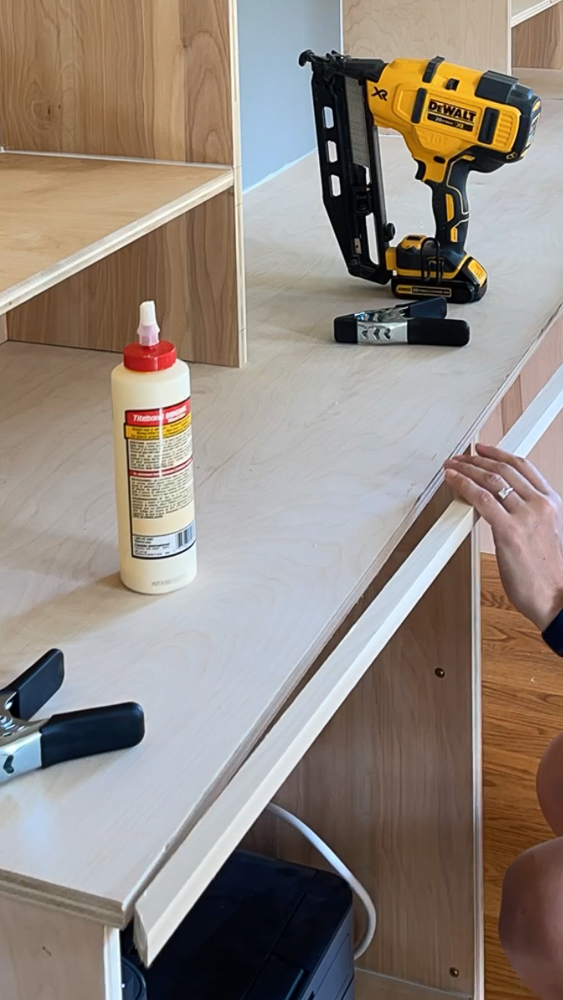
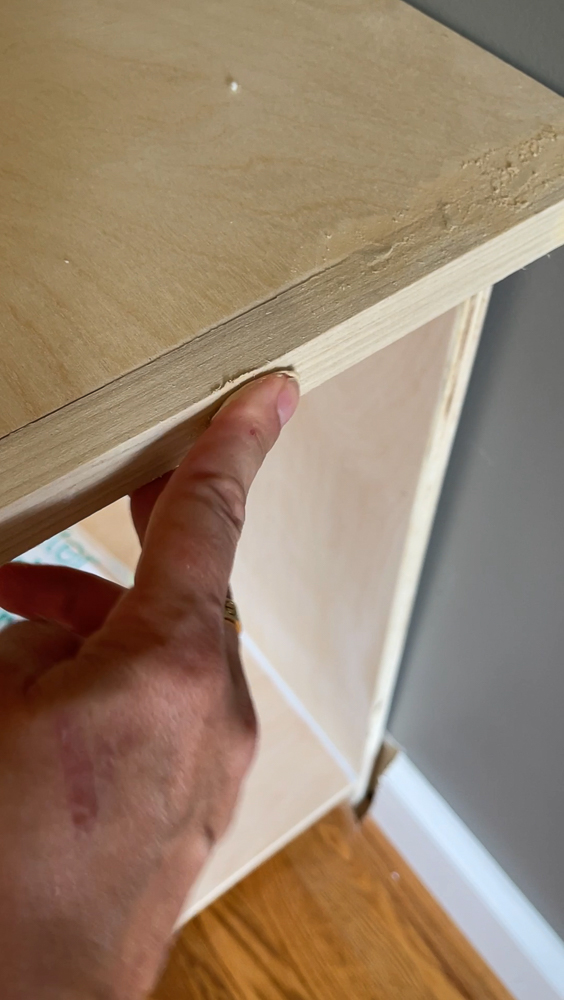
The desktop was constructed of two pieces of plywood. At the length of over 9ft, a single continuous plywood sheet wasn’t enough. I spliced the extra piece with pocket holes again and covered the seam with wood filler. You can use iron-on edge banding to cover the outside raw edge of the plywood but I always worry that it will peel off eventually. My preference is to trim it out using a 1×1 piece of wood trim. You can also use bullnose trim if you prefer a rounded look. I attached the trim using wood glue and nails and then filled the seam and holes with wood filler.
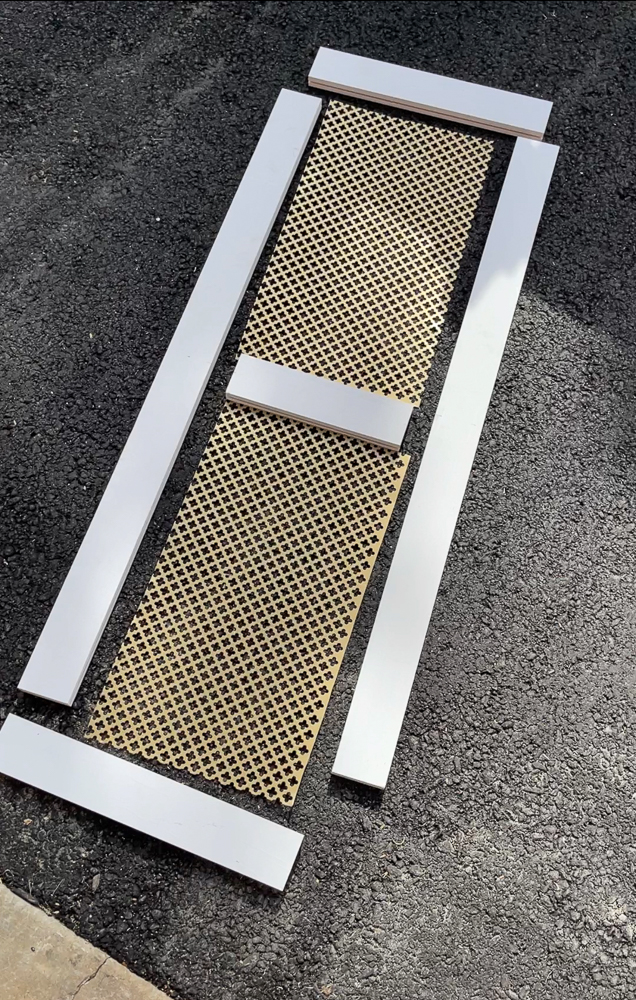
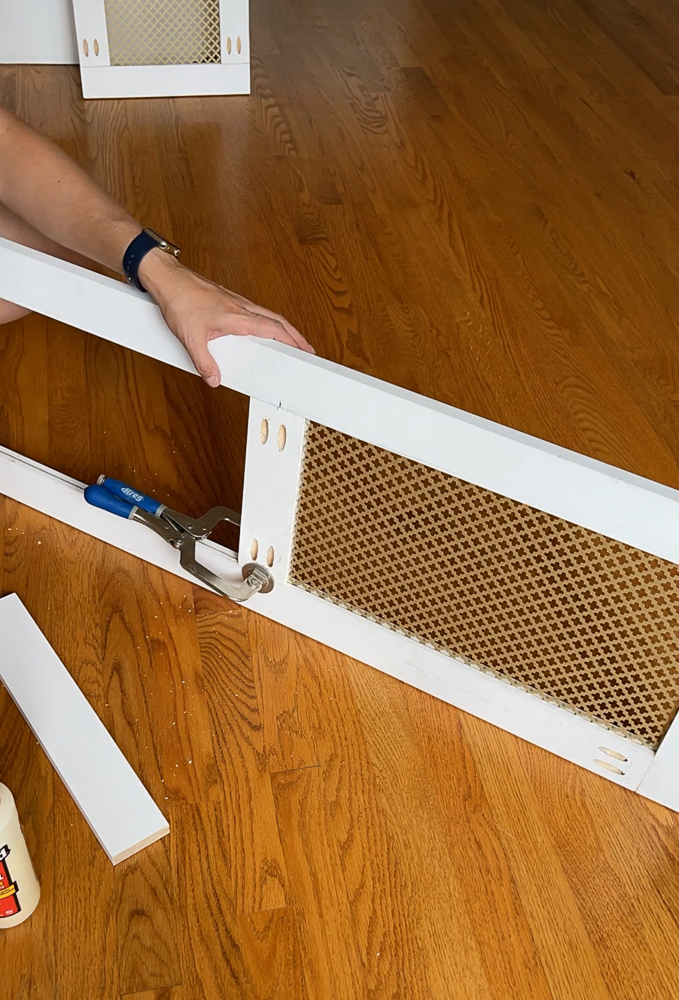
Metal mesh doors and solid doors
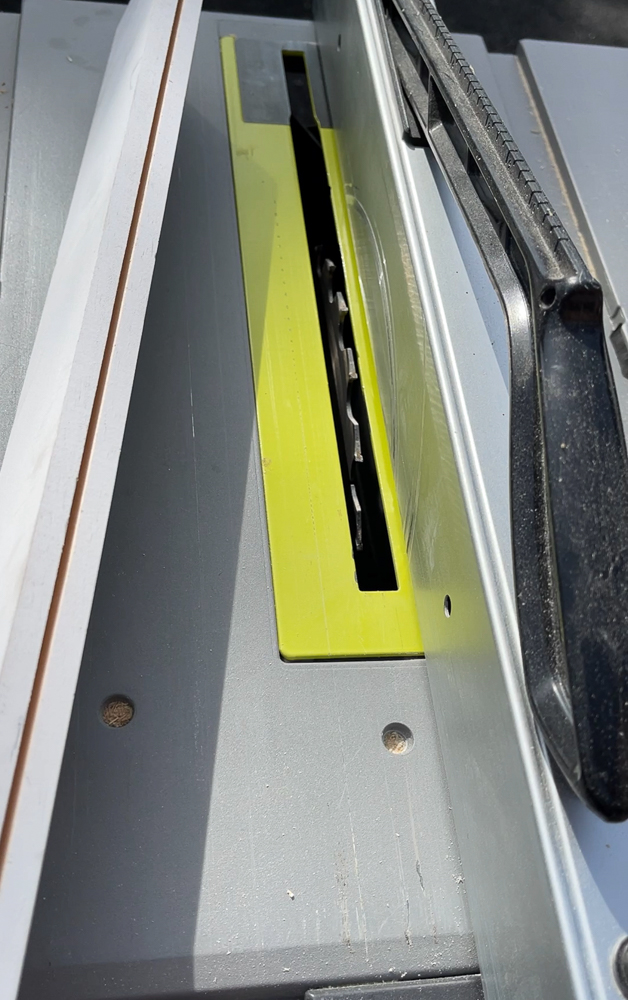
Because there were so many cabinets in the design, I decided to break up the solid look by incorporating metal mesh door inserts on the upper cabinets. I already used this material to replace the glass inserts on my kitchen cabinets. This time, I also constructed the door frames myself using 1×3 trim boards and pocket holes again. I created a channel on the inside of the boards before attaching them so I could insert the metal sheet in it. It was sufficient to use the regular blade which is 1/8″ thick and creates the perfect width channel for the metal sheet.
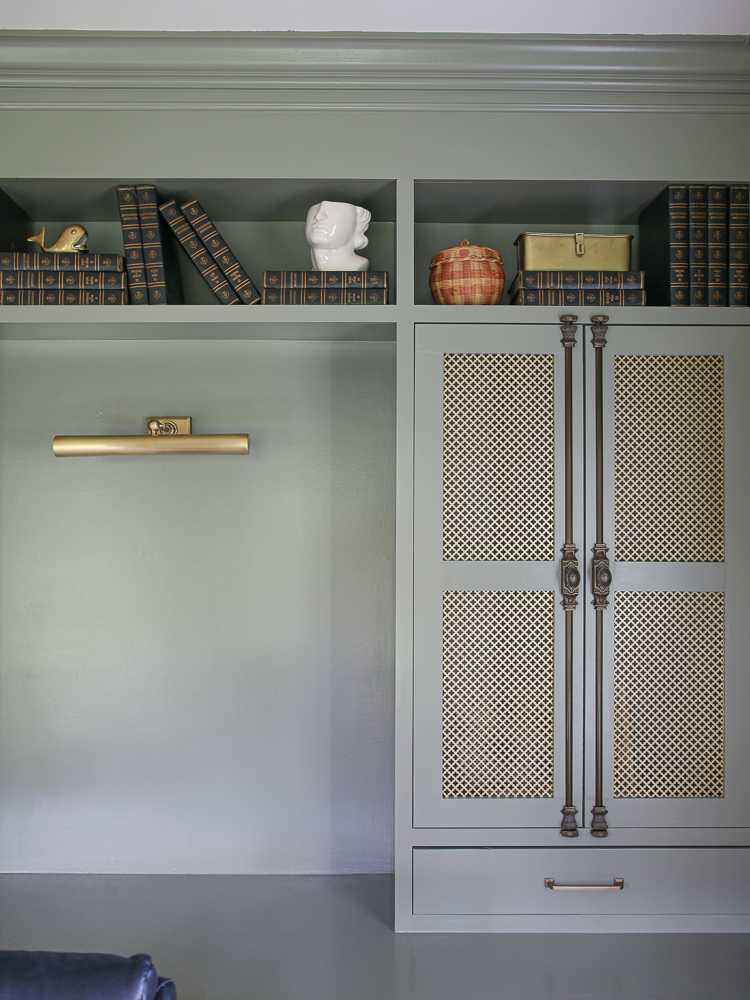
Picture light | Cremone bolt | Drawer pull
I also used the same material to create a custom air return cover that will blend with the wall color and tie in the design element of the metal mesh door inserts.
The base cabinets got solid doors to hide all the storage and my printer. I typically custom-order cabinet doors because I don’t have the skill level and tools to make them from scratch. The built in cabinet doors are the biggest visible surface so it’s important that they look perfect. My go-to for cabinet doors is Fast Cabinet Doors but there are plenty of retailers online that offer similar products.
Paint
Even though this built in cabinet project is large enough to warrant the use of a spray gun, I didn’t do that. To me, masking the whole room and suiting up to spray paint is more trouble and headache than the time it would save me. So I rolled the entire builtin and doors with a paint roller and brush to cut in the corners. I used my favorite cabinet paint – Sherwin Williams Emerald Urethane Trim Enamel in semi-gloss. (Paint color is BM Storm Cloud Gray). This type of self-leveling paint is a must if you want a professional-looking result that is smooth, without roll marks or brush strokes. The paint takes a few days to fully cure but when it does, you are left with a beautiful hard, and smooth finish. Just make sure you prepare your surface first by sanding it with 220-grit sandpaper. It’s important to make sure you have the right paint for each project. Read my post on how to paint stairs to see what is best for that area.
Design sources for the built in cabinets
A side by side of the before and after of the office. The built in cabinets create a high-end custom look. I also followed my own advice for hanging drapes which makes the window wall appear much more balanced than before. These windowpane drapes are from my exclusive collectio with Two Pages.
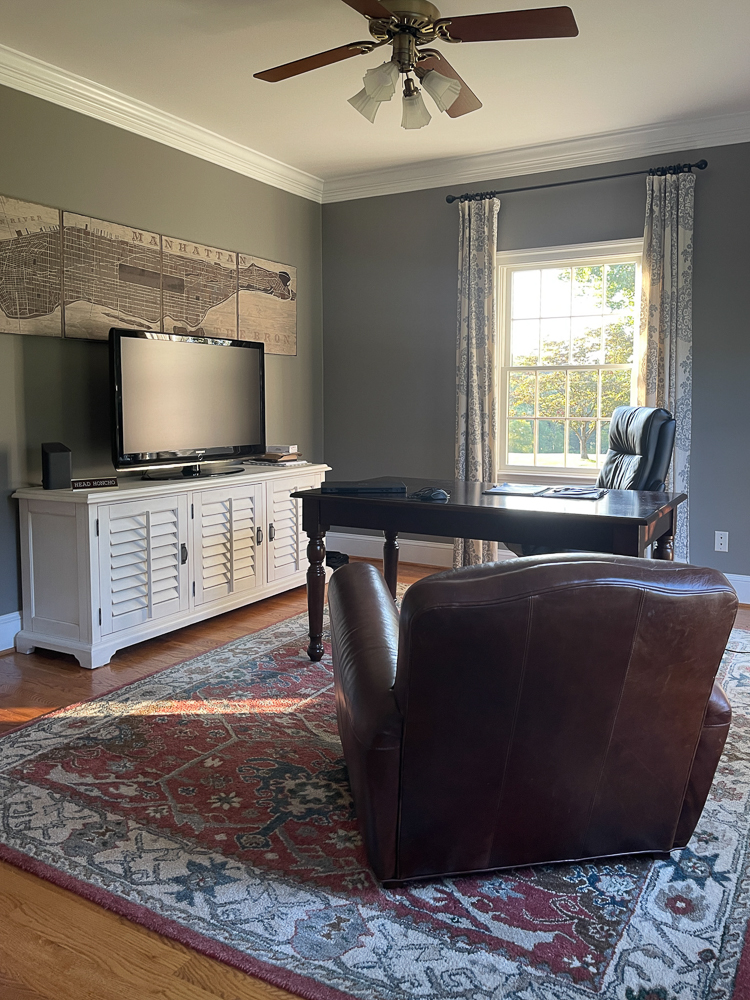
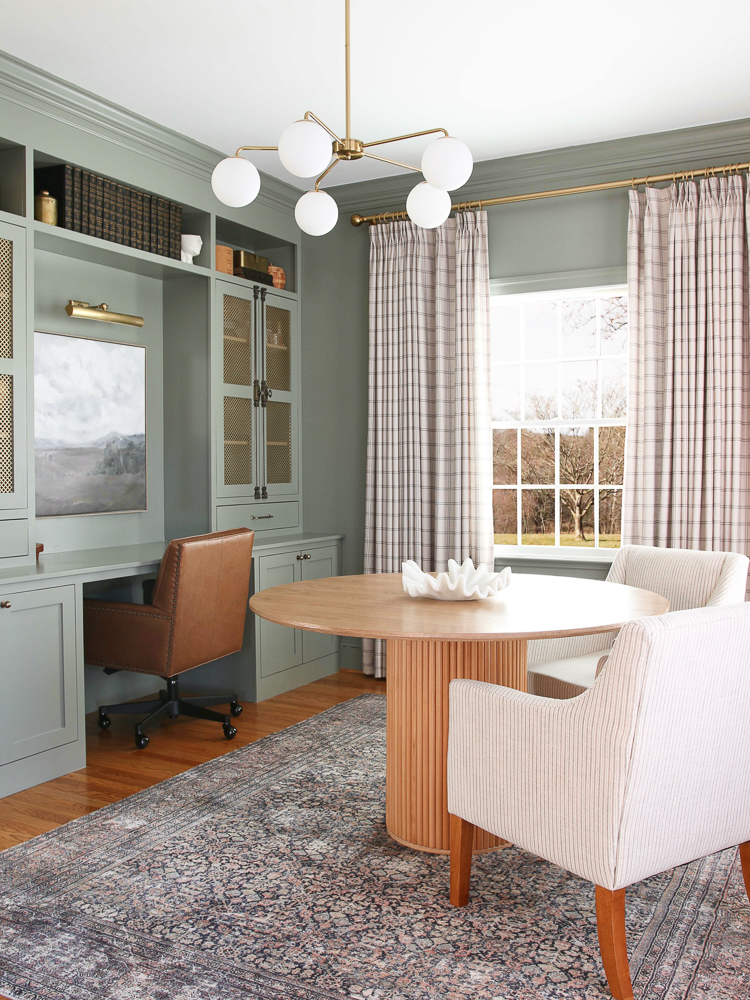
Table | Desk chair | Arm chairs | Rug | Drapes (color DWP Sepia) | Chandelier | Picture light | Wall art | Centerpiece | Cremone bolt | Knob | Pull | Drape rod | Drape rings