How to Install Hallway Molding
Disclosure: This post may contain affiliate links. As an Amazon Associate, I earn from qualifying purchases at no additional cost to you.
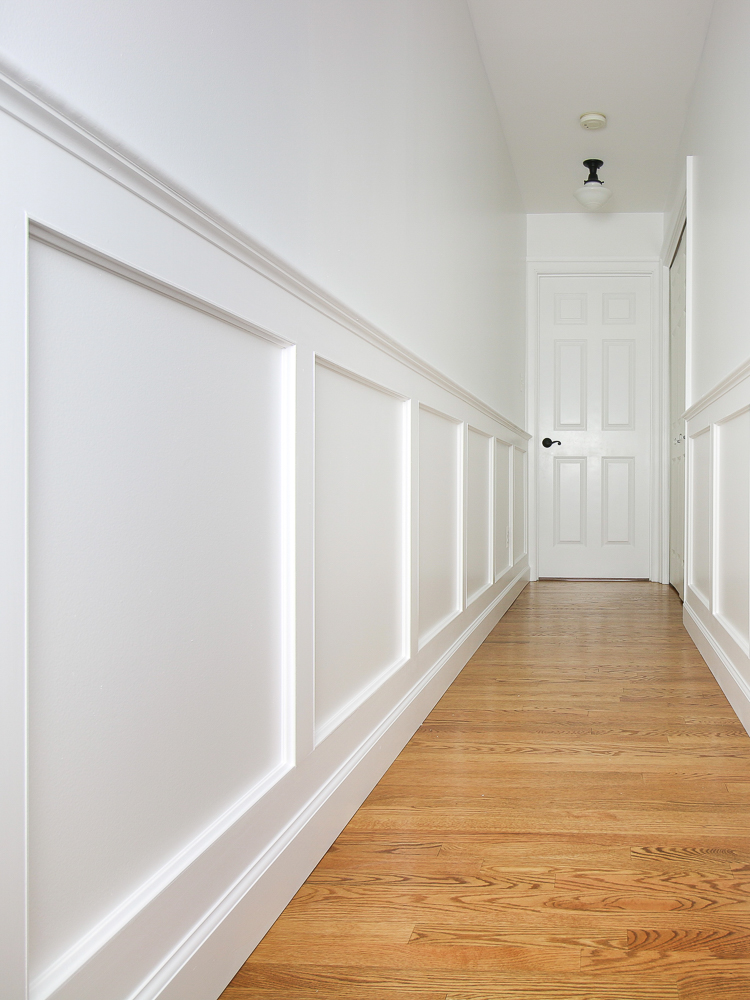
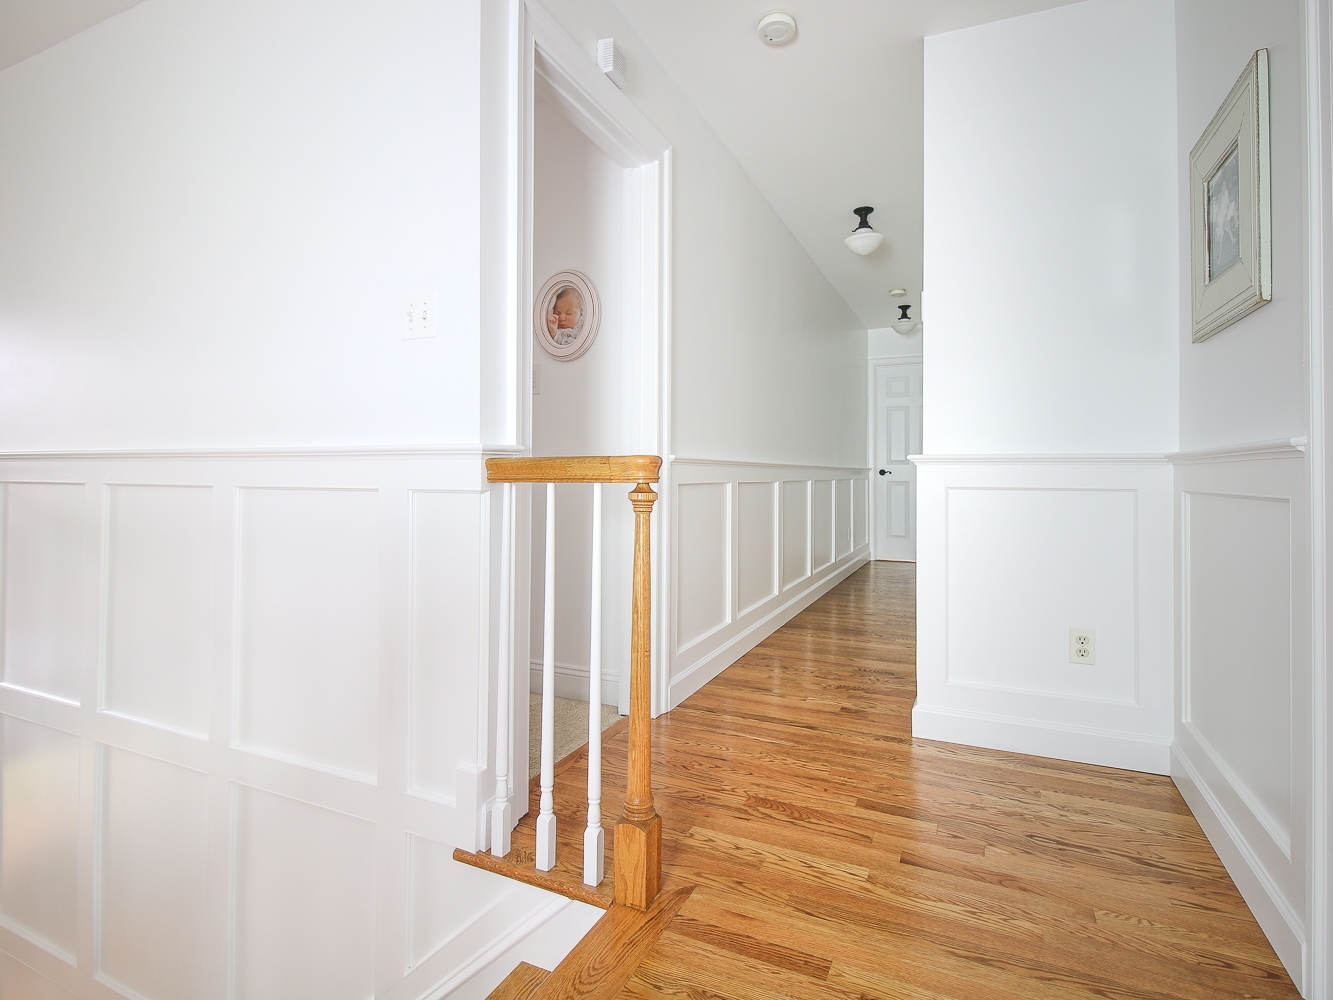
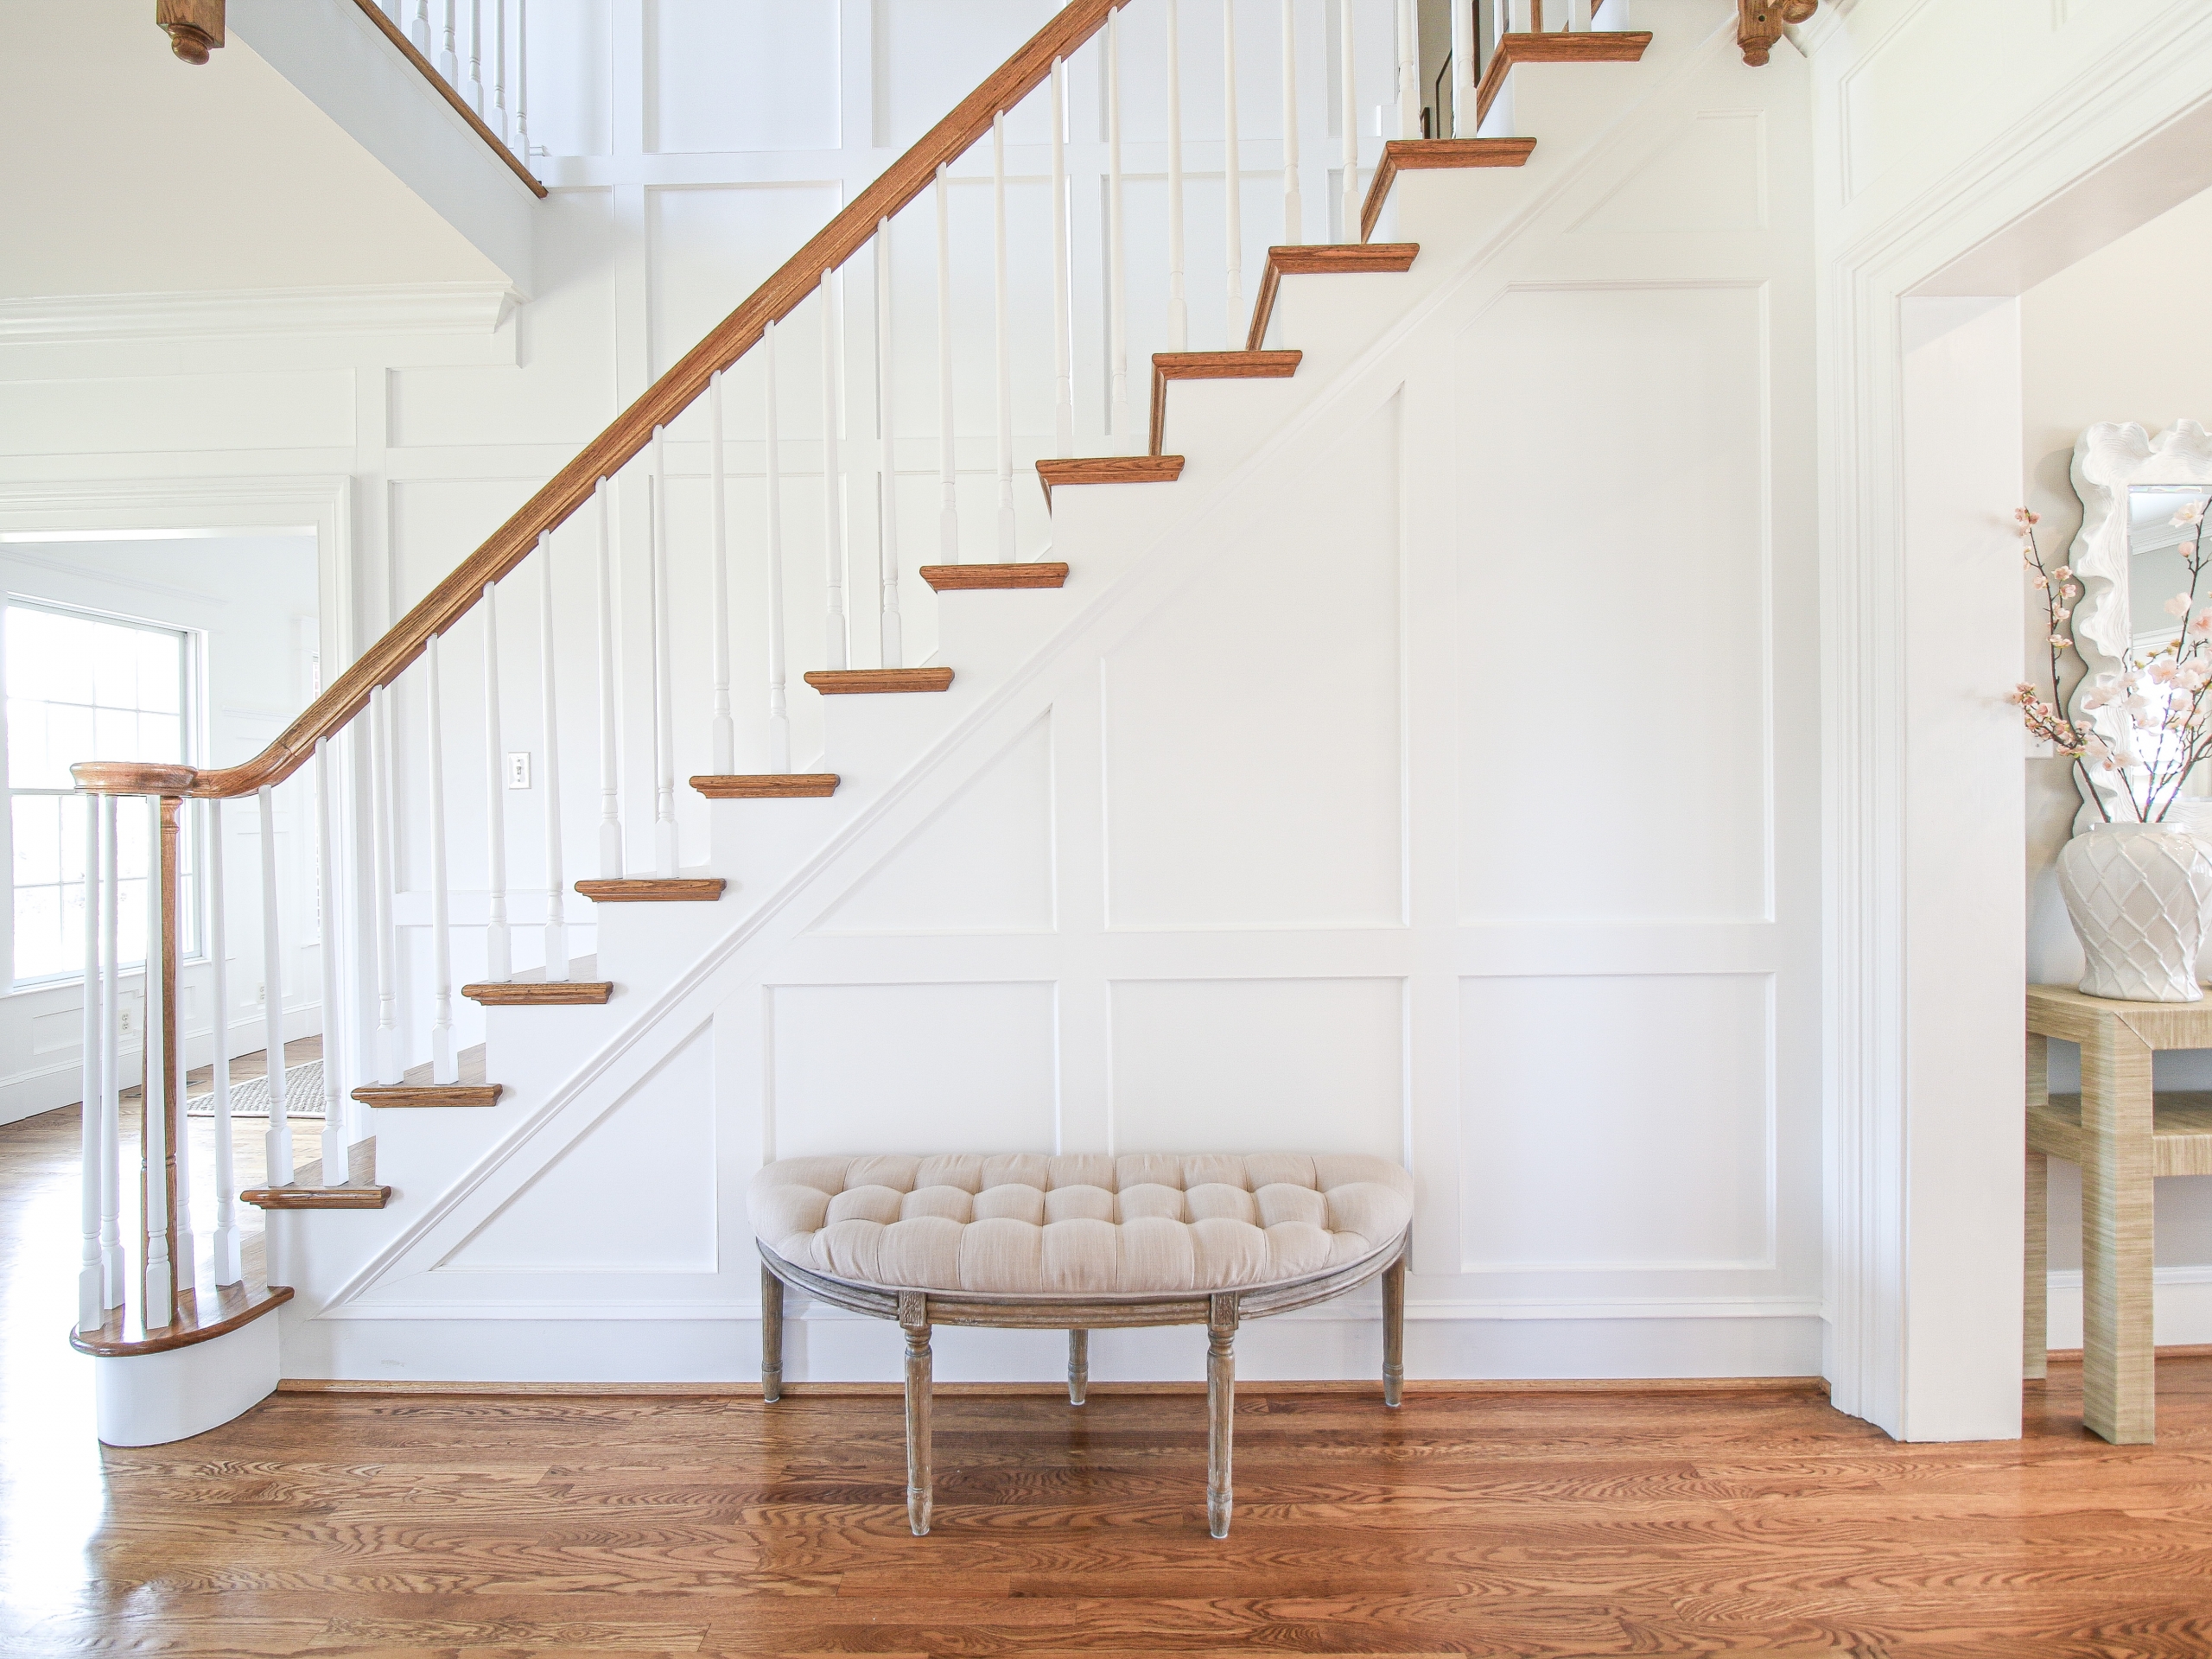
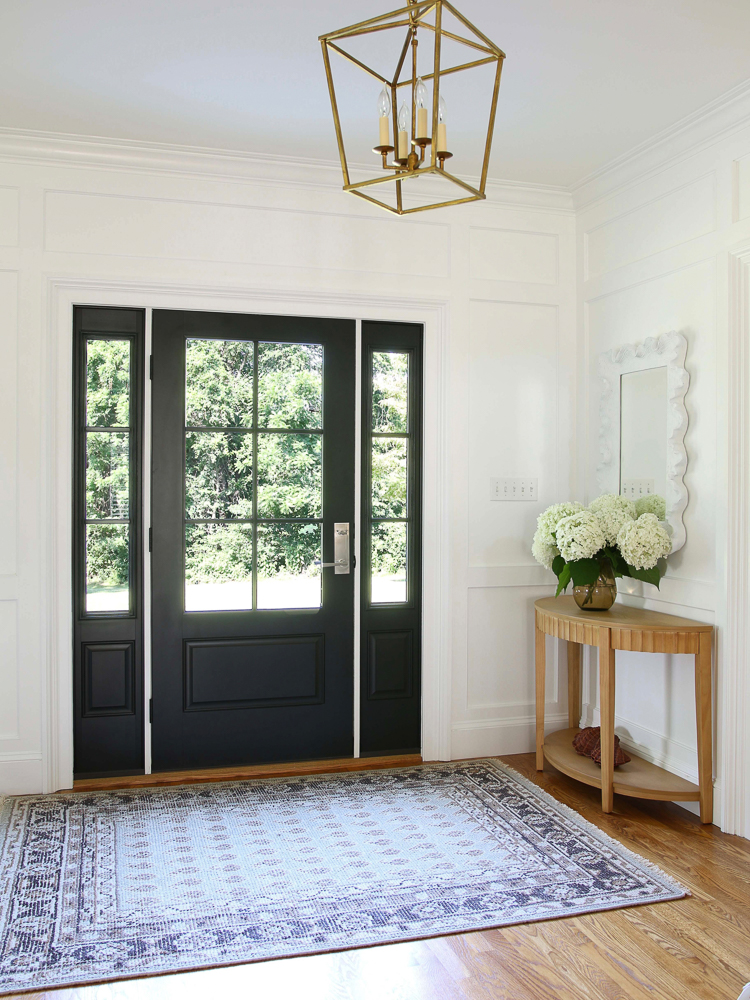
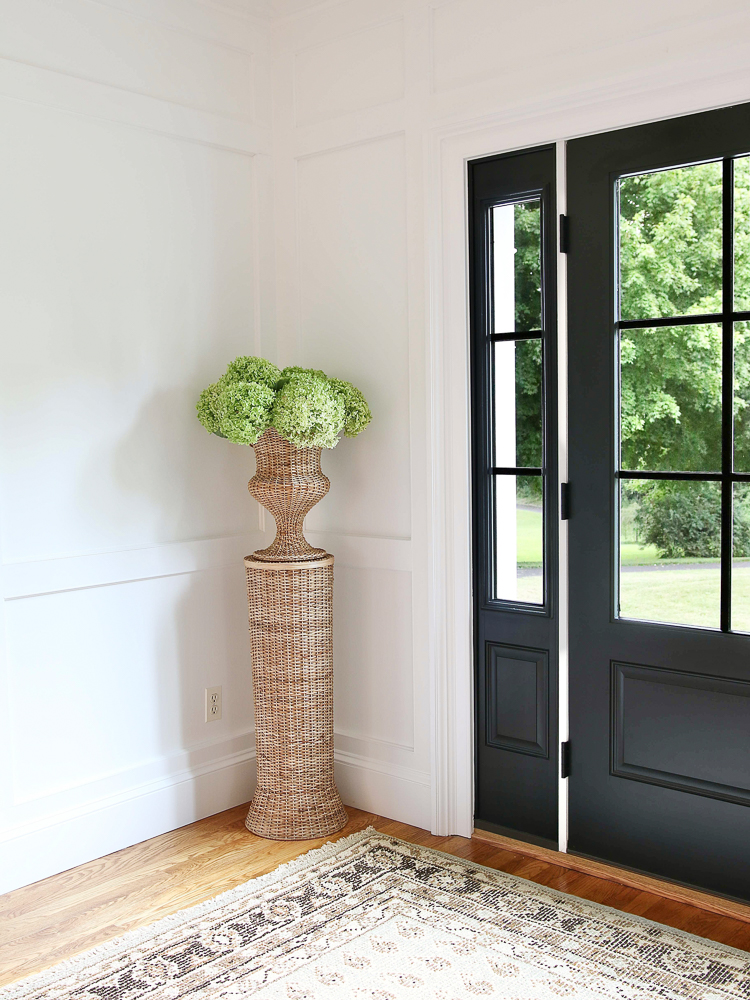
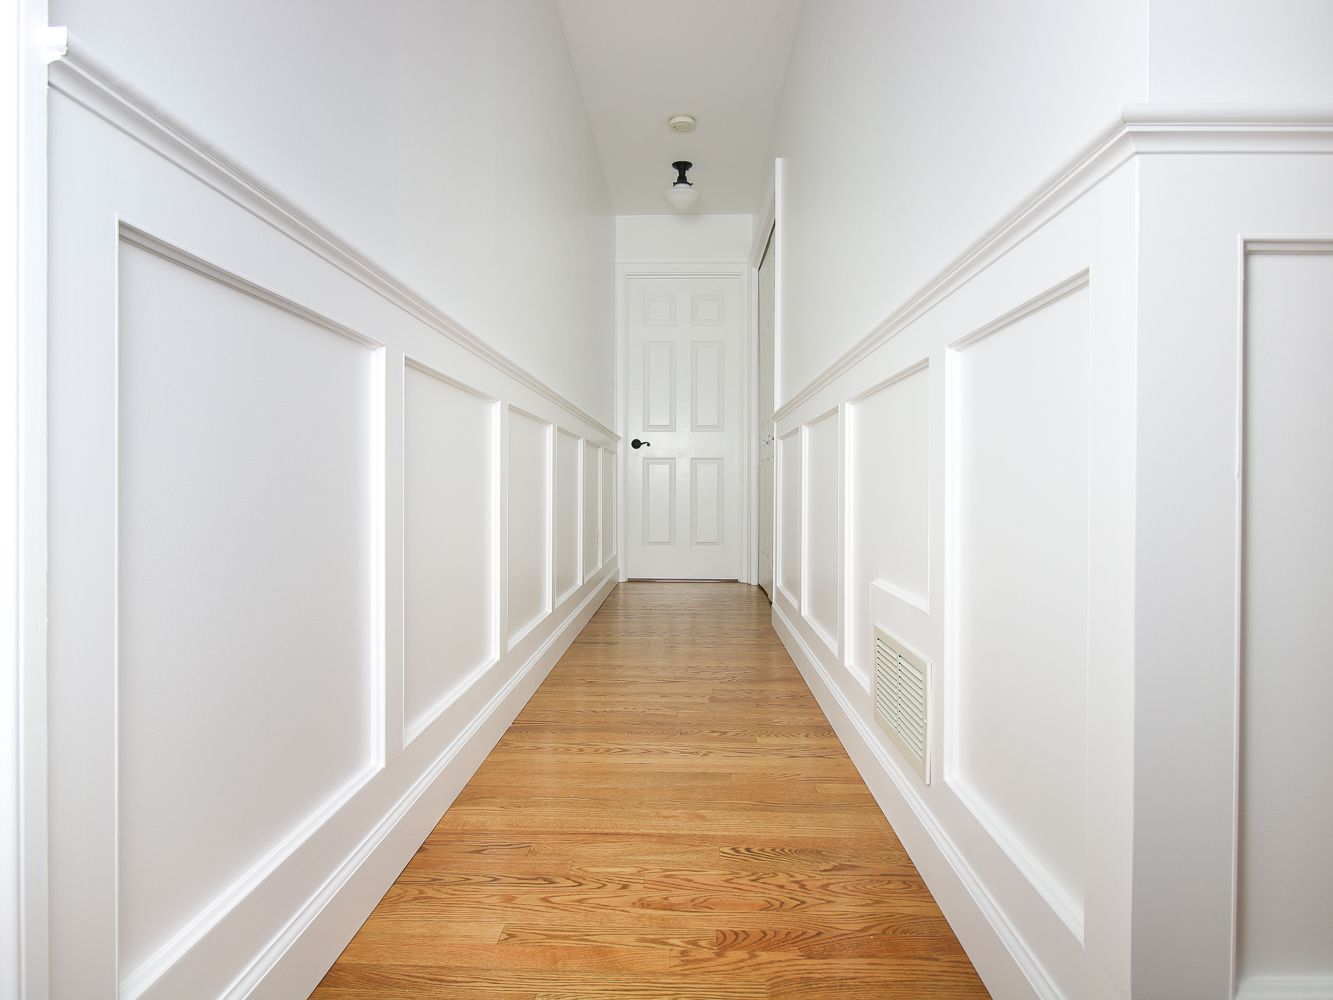
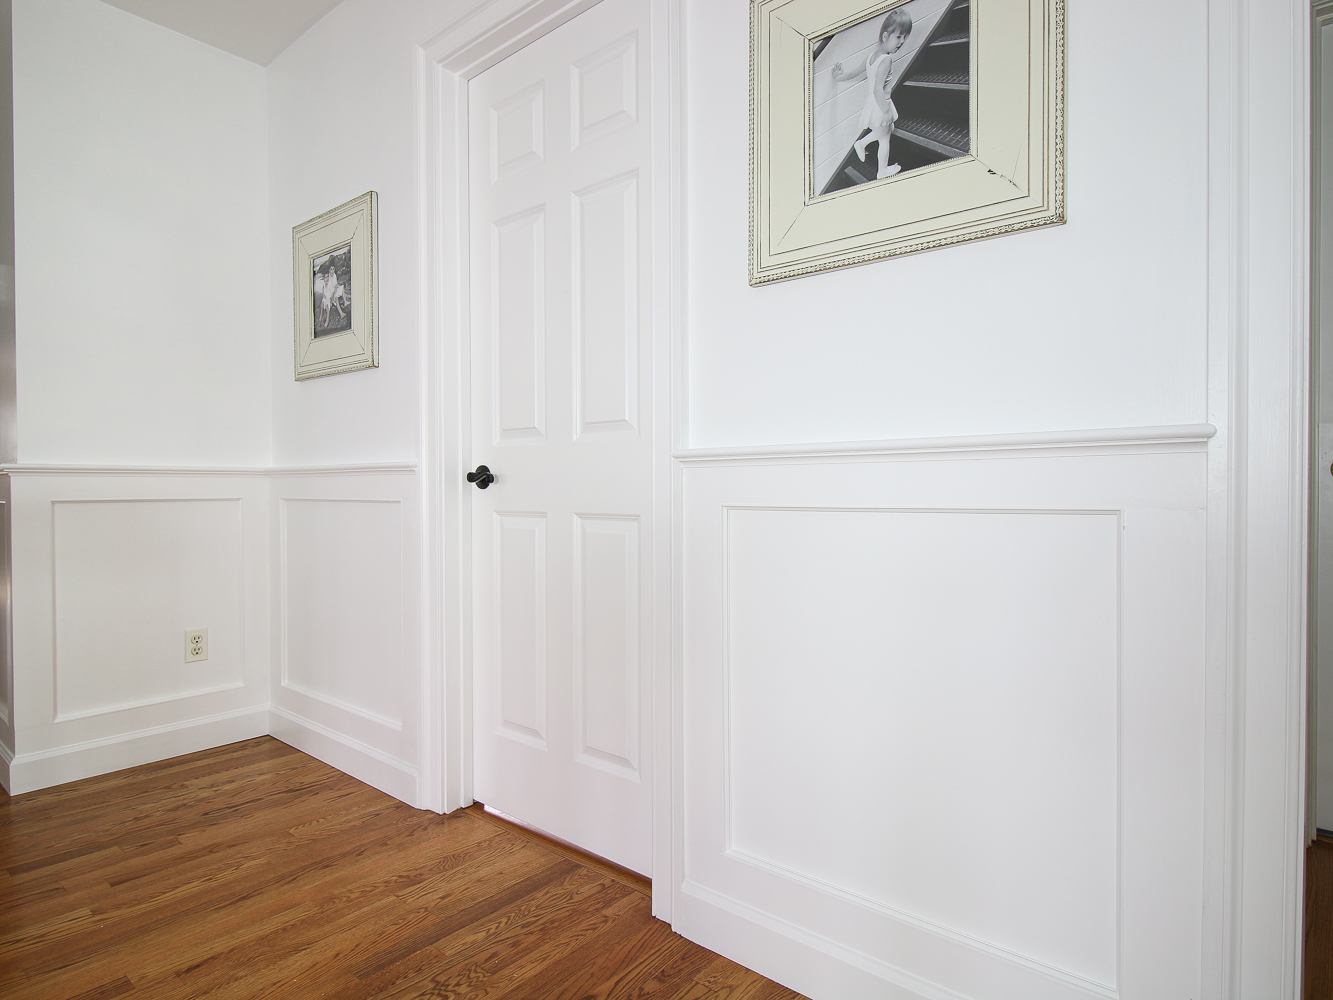
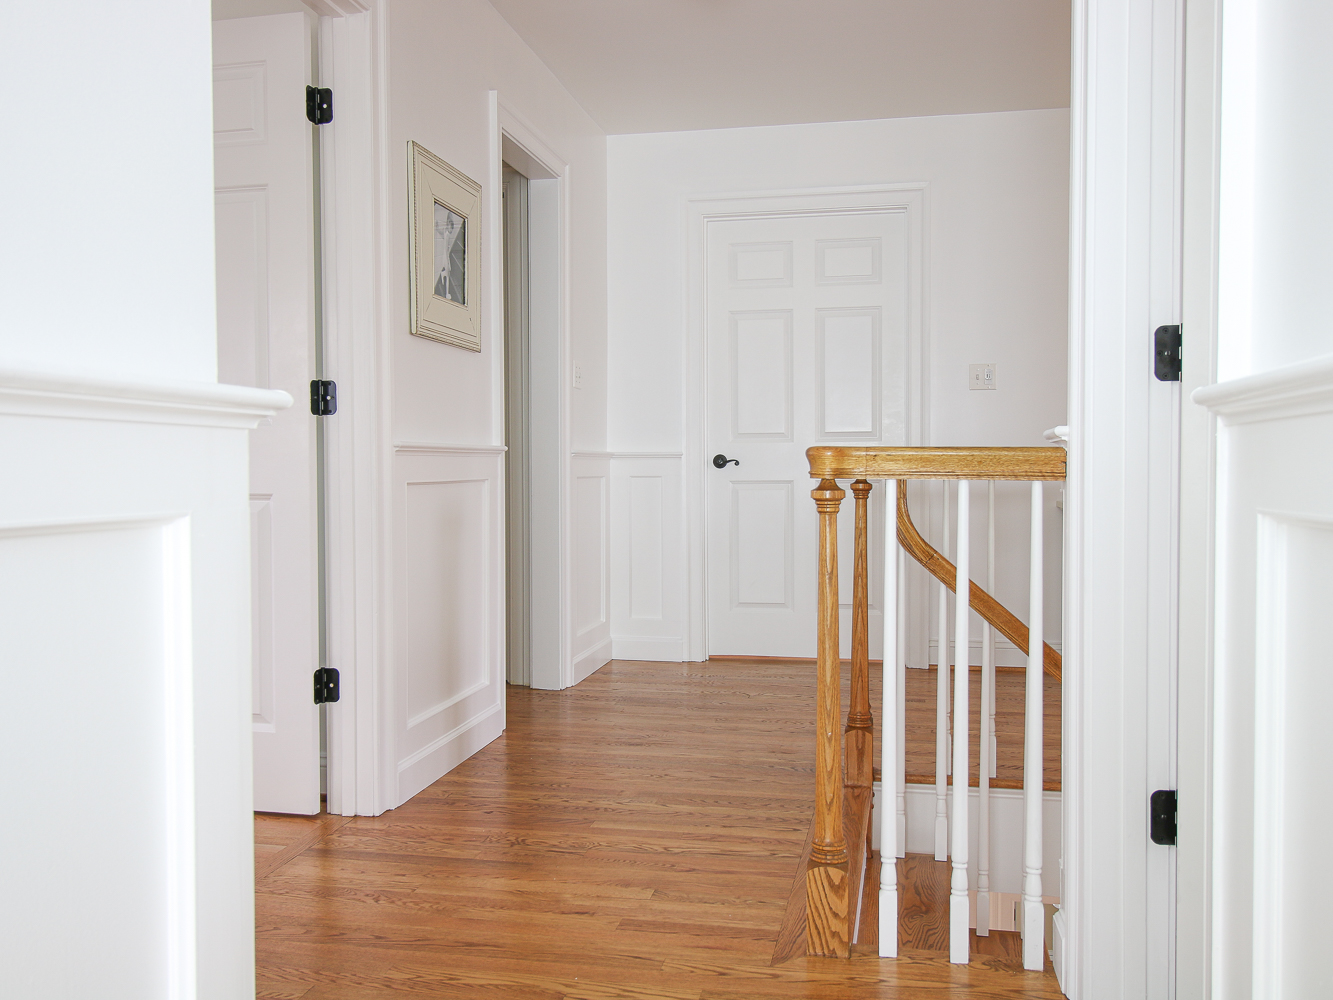
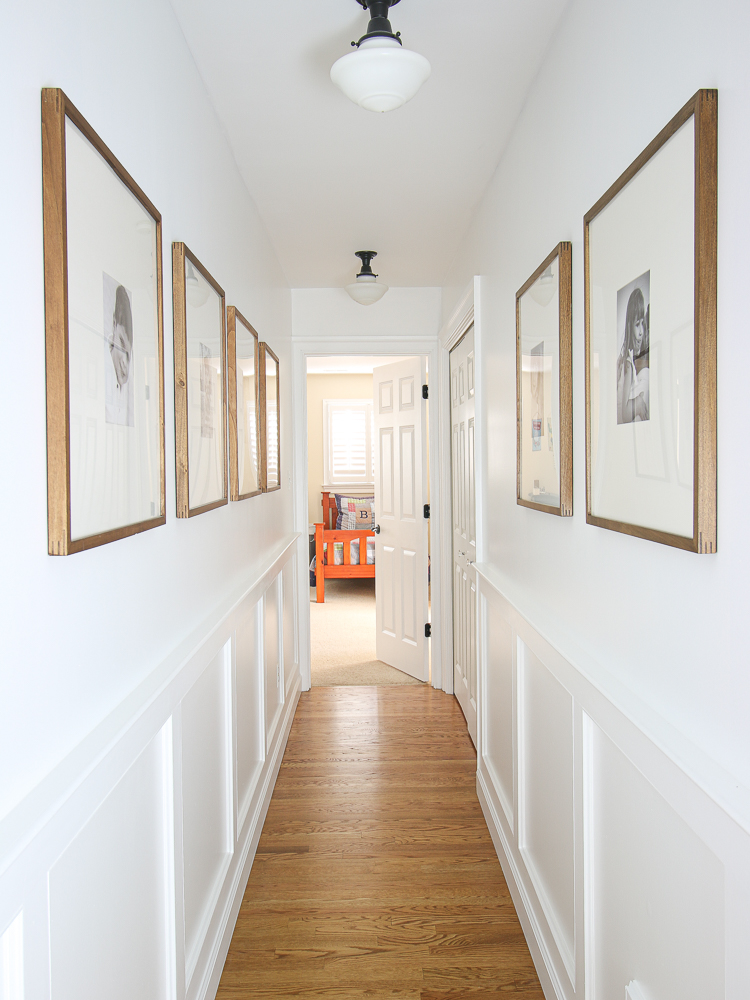
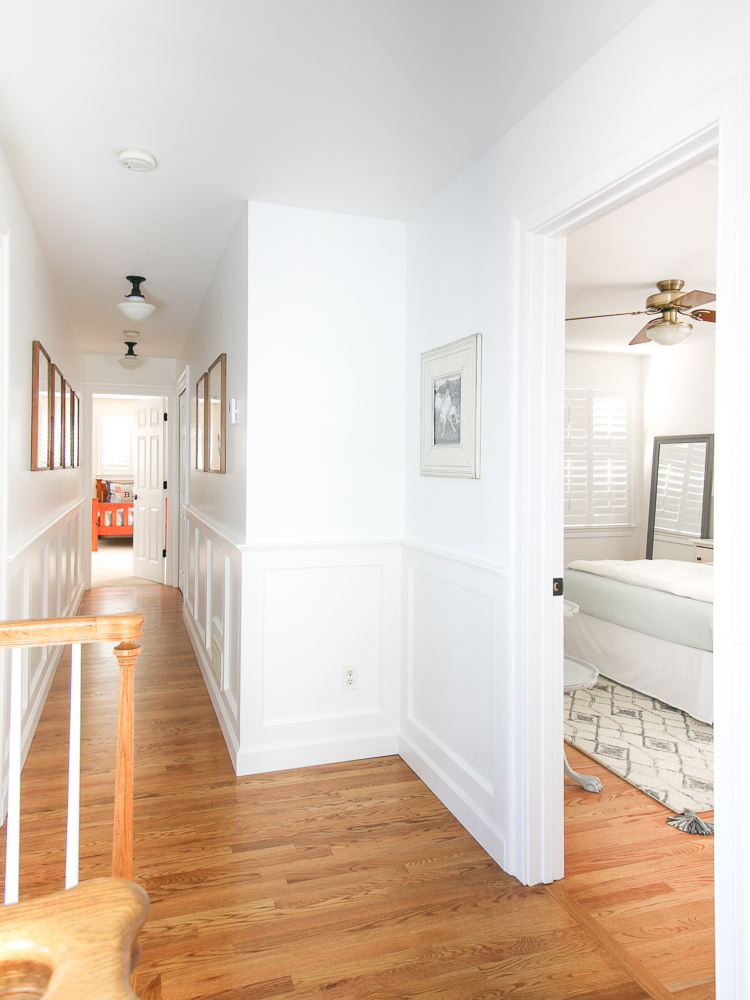
Hallway molding design
There are many different ways to add hallway molding. Picture frame molding using base cap trim is probably the most popular one because it is easy, inexpensive, and non-destructive. The style molding I chose instead requires the use of wood planks. You can then add base cap molding to the inside of the boxes. Picture frame molding uses only the inner base cap piece to create the shape of the boxes and leaves out the planks in between.
This tutorial covers the basics of the construction of this particular type of molding. I have used this design in my entryway, hallway, dining room, and bathroom.
Prep work for hallway molding
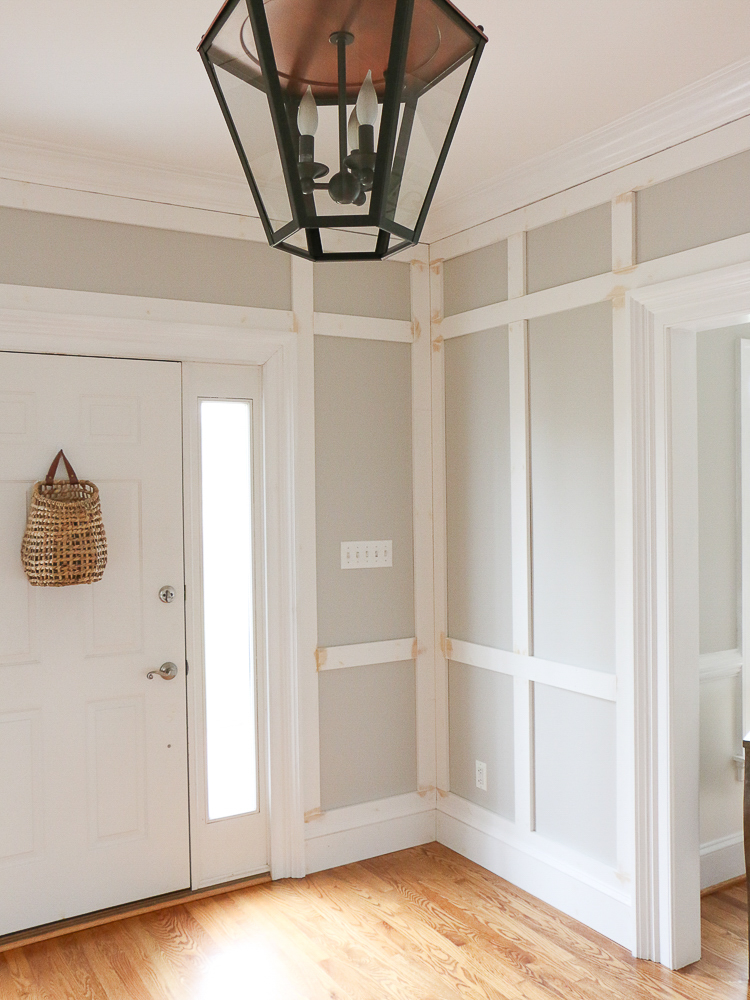
Regardless of the style of hallway molding you chose, painting your wall the desired color first will save you a lot of time in the end. It avoids having to cut in those inner corners and the result is smooth and professional looking. You will just need a final coat or two to paint the planks or other trim. I used my favorite white paint – Behr Ultra Pure White in Satin Enamel.
Simple Materials Guide
Get this FREE GUIDE to different types of trim and molding materials for your every DIY need – from wall molding to cabinetry!
I paint the molding parts and the wall the same finish. Traditionally, this type of wall treatment would be made up of wood panels attached to the wall and then wood planks on top of that covering the seams. My drywall is smooth so I didn’t need to use wood panels but the idea is to create the illusion that the wall boxes are the same material as the wood boards. If you have textured walls, I recommend using thin plywood panels to cover the texture and then adding the boards. This makes the project more involved and expensive.

Materials and tools
I’ve done picture frame molding and board and batten in the past. It was on a smaller scale and I don’t even know how I did it without a nail gun. I relied heavily on construction adhesive and drove nails with a hammer and then counter-sunk them with this tool. But that was in my old house.
For our current home, I wanted to do a more involved type of plank molding. I had been scheming about this for a long time and when hubby gifted me this bad boy of a nail gun for Christmas, he enabled me to turn my molding dreams into reality!
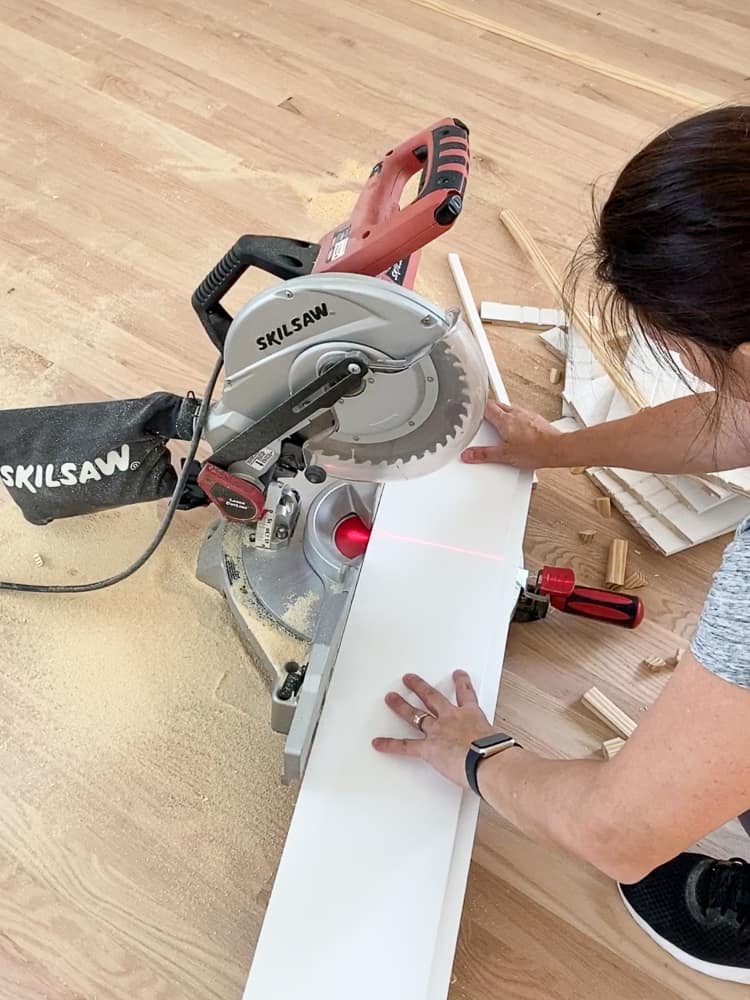
If you’re lucky and don’t have to use and cut large plywood boards, the only cutting tool you would need is a miter saw. I recently upgraded my miter saw to this Dewalt one with a larger blade and double bevel feature.
Check out my comprehensive list of essential DIY tools I use for all my projects!
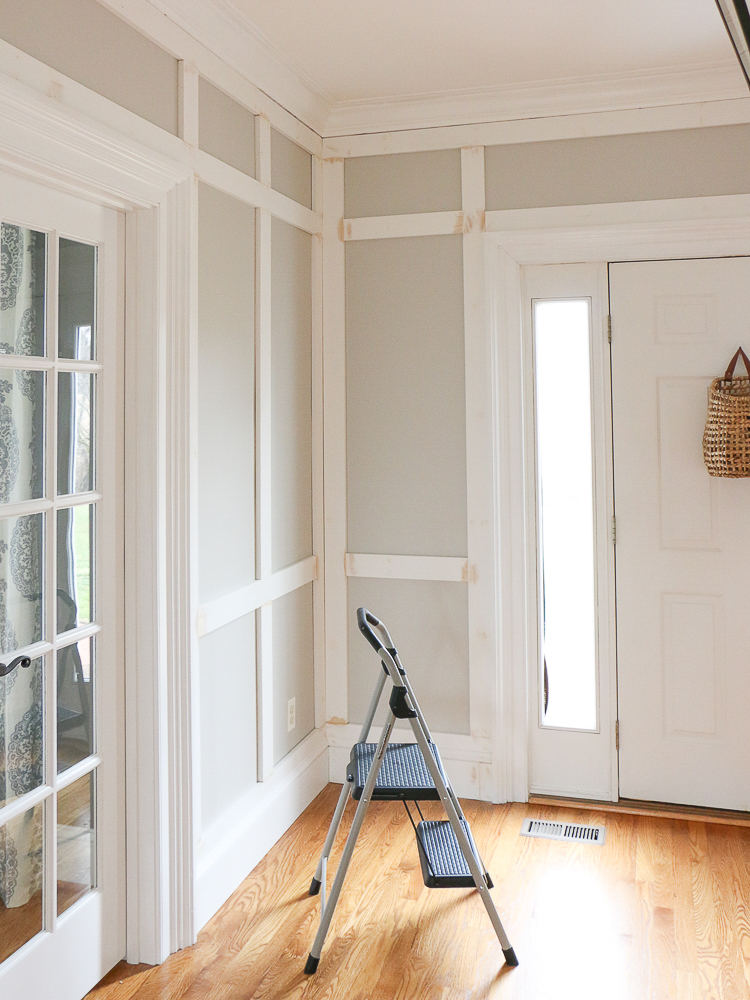
The Construction
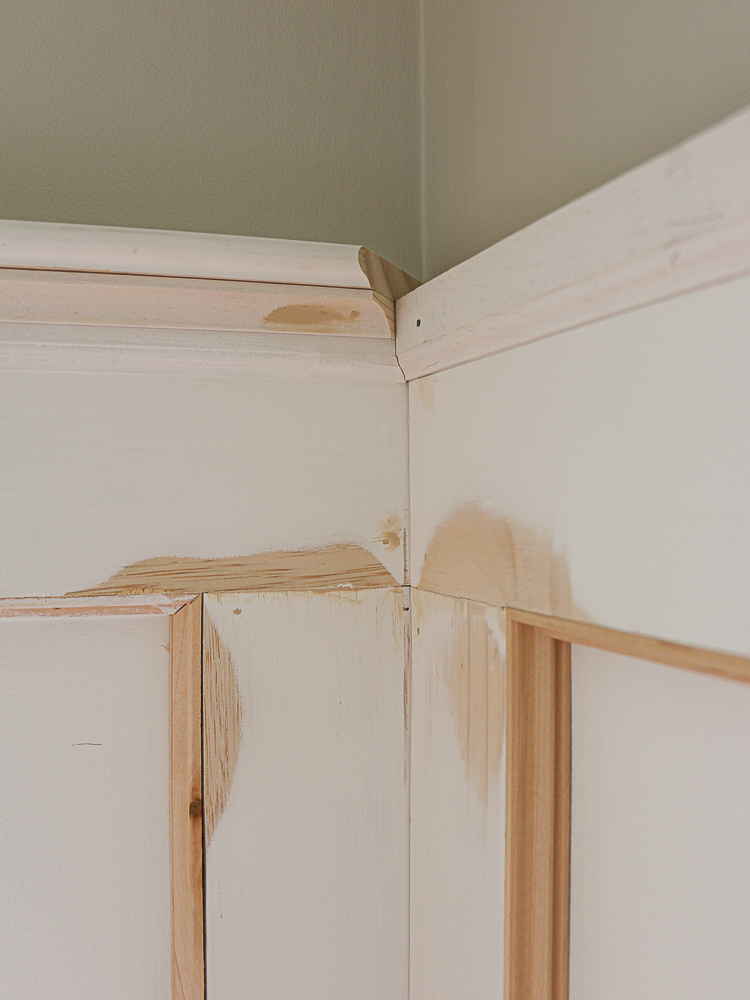
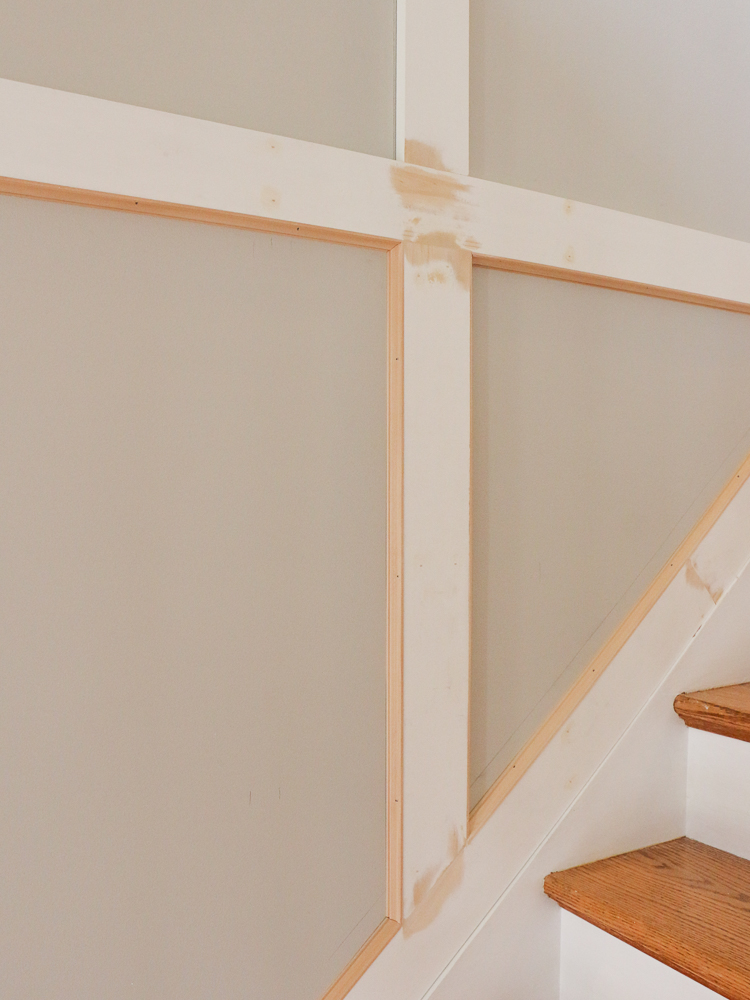
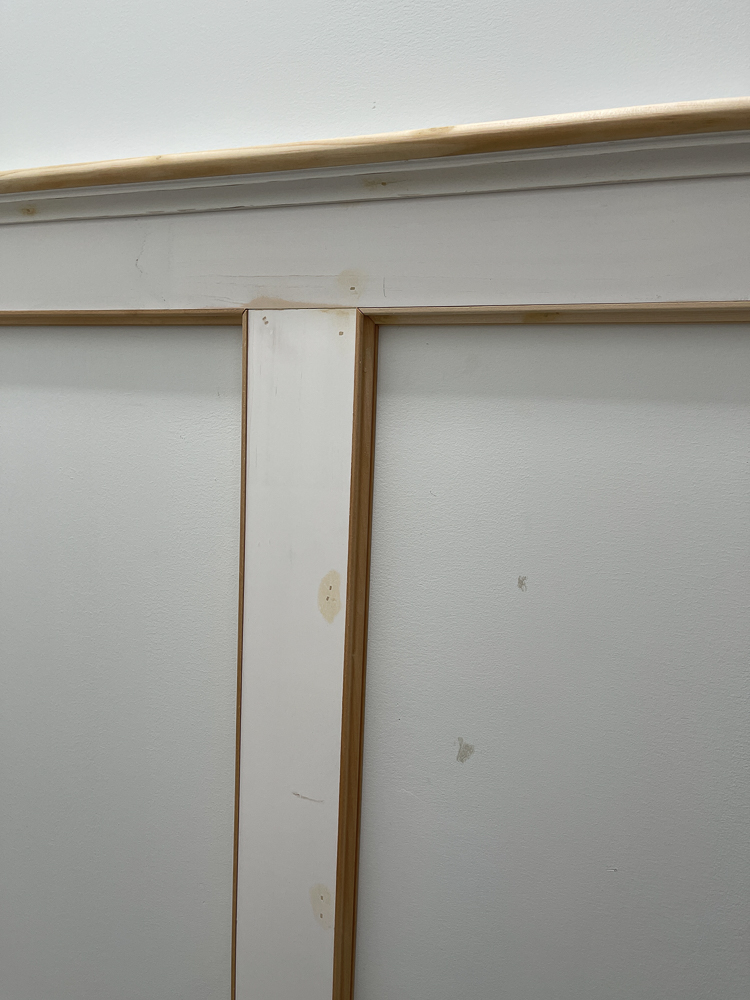
This molding design is made by using the drywall as a background (my walls are completely smooth) and then layering 1×4 primed pine boards with a mini base cap trim on the inside, and a baseboard on top of the bottom plank. The cap portion is made up of 1×2 primed pine board, half-round, and cove molding.

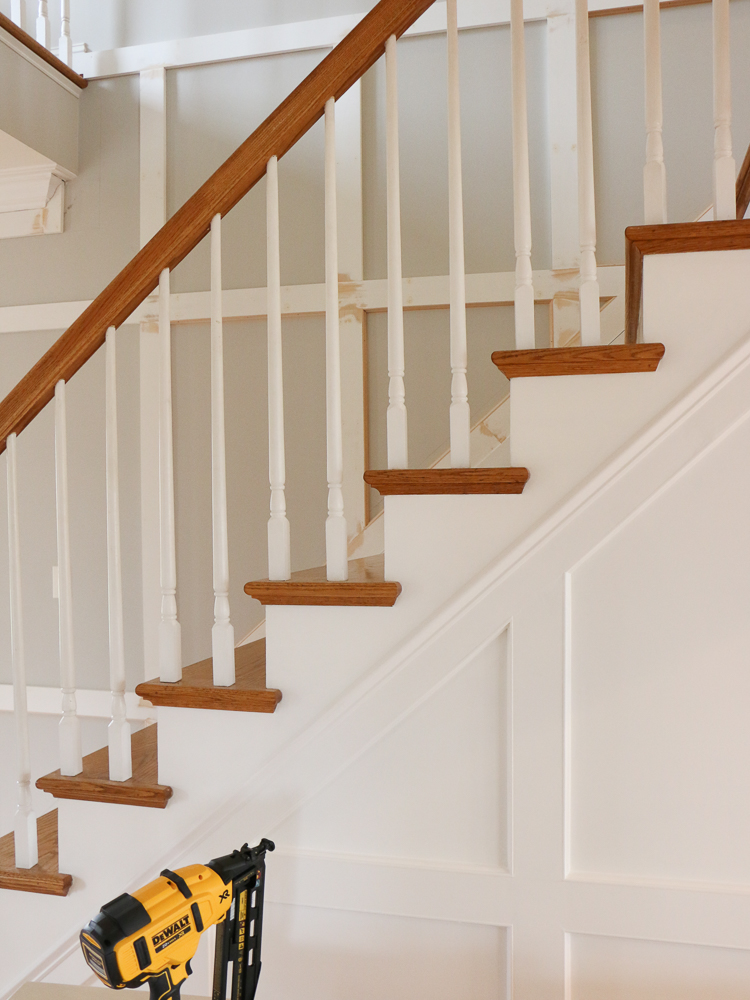
I attach the planks to the wall by nailing into the studs. If a vertical plank doesn’t have a stud behind it, I use the method of cross-nailing. I drive the nails at alternating angles instead of straight in. Between that, caulk, and paint, the planks will be solidly attached. This is what it looks like together before it’s painted. The paint I use for all of my hallways – above and below the chair rail – is Behr Ultra Pure White.
Remove the existing baseboards
I can’t stress enough how important it is to remove your existing baseboards before applying this wall treatment. If you are undertaking the process of cutting down wood planks and nailing them to your wall, you might as well do it right and remove the baseboards. It is really not as scary as it sounds. Score along the edge of the baseboard with a utility knife and then carefully pry the baseboards off the wall.
Baseboards are typically held down by a couple of nails every 16″ or so. If you are lucky and the baseboard comes off in one piece, you can reuse it. And if not, you’re only adding a little bit to your overall cost but getting a professional-looking result. Butting a wood plank up to the baseboard edge is a dead giveaway of an amateurish DIY.
The new baseboards will be layered over a thicker bottom plank (I used 1×8 primed pine) to reveal about the same width above the baseboards as the rest of the wood planks. See the previous photo.
For more photos and a different application, check out my post from when I installed this molding in the dining room.

Chair rail height and box width
I use the golden rule of thirds to determine the approximate height of the chair rail. You want it to be at about 1/3 of the way up the wall or if you are going higher, aim for 2/3 of the way up. Avoid placing the chair rail halfway up the wall. That cuts the walls in half visually and lowers the perceived height of the ceiling.
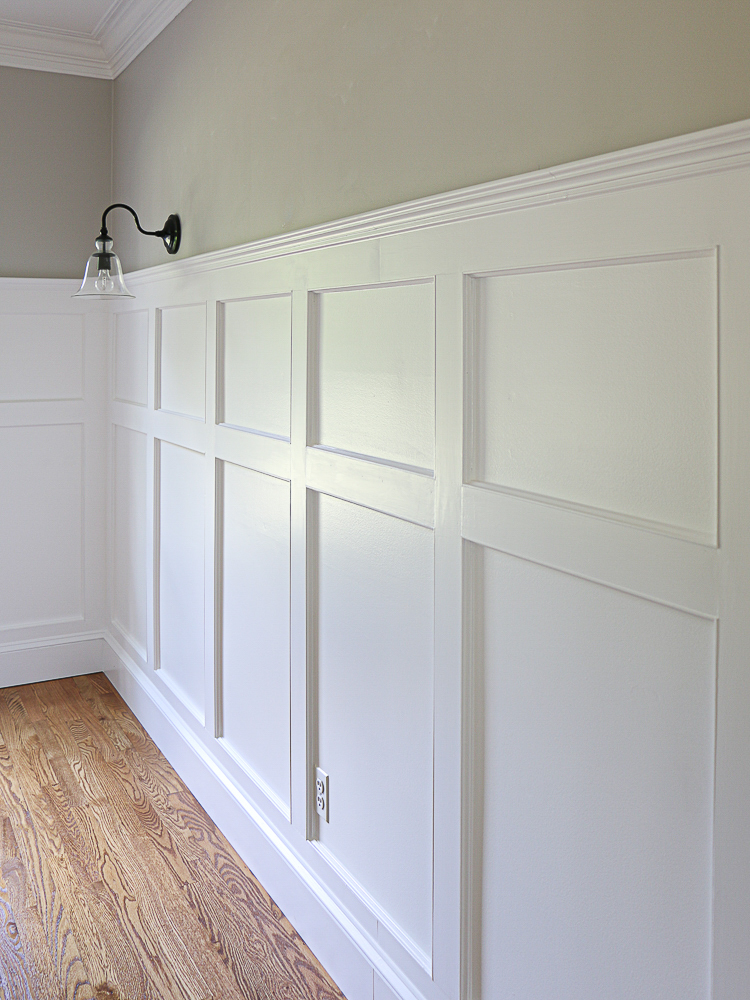
The width of the boxes depends on the total width of each wall segment. You want to divide each wall segment into equal-width boxes. This means that their width may not be the same from one wall segment to another. They should be roughly the same but not exact. Mine are all around 20-30″.
Post-installation work and paint
Once the pieces are attached to the wall, you need to fill the nail holes and joints with wood filler and sand down to a smooth finish before you paint. The nail holes and any flat seams get filled with wood filler. Corner seams (between molding and wall or inside corners) get filled with caulk. After the wood filler dries, sand all the boards with 220-grit sandpaper. Don’t skip this step or the paint will highlight the imperfections in the woods and show the nail holes and seams.
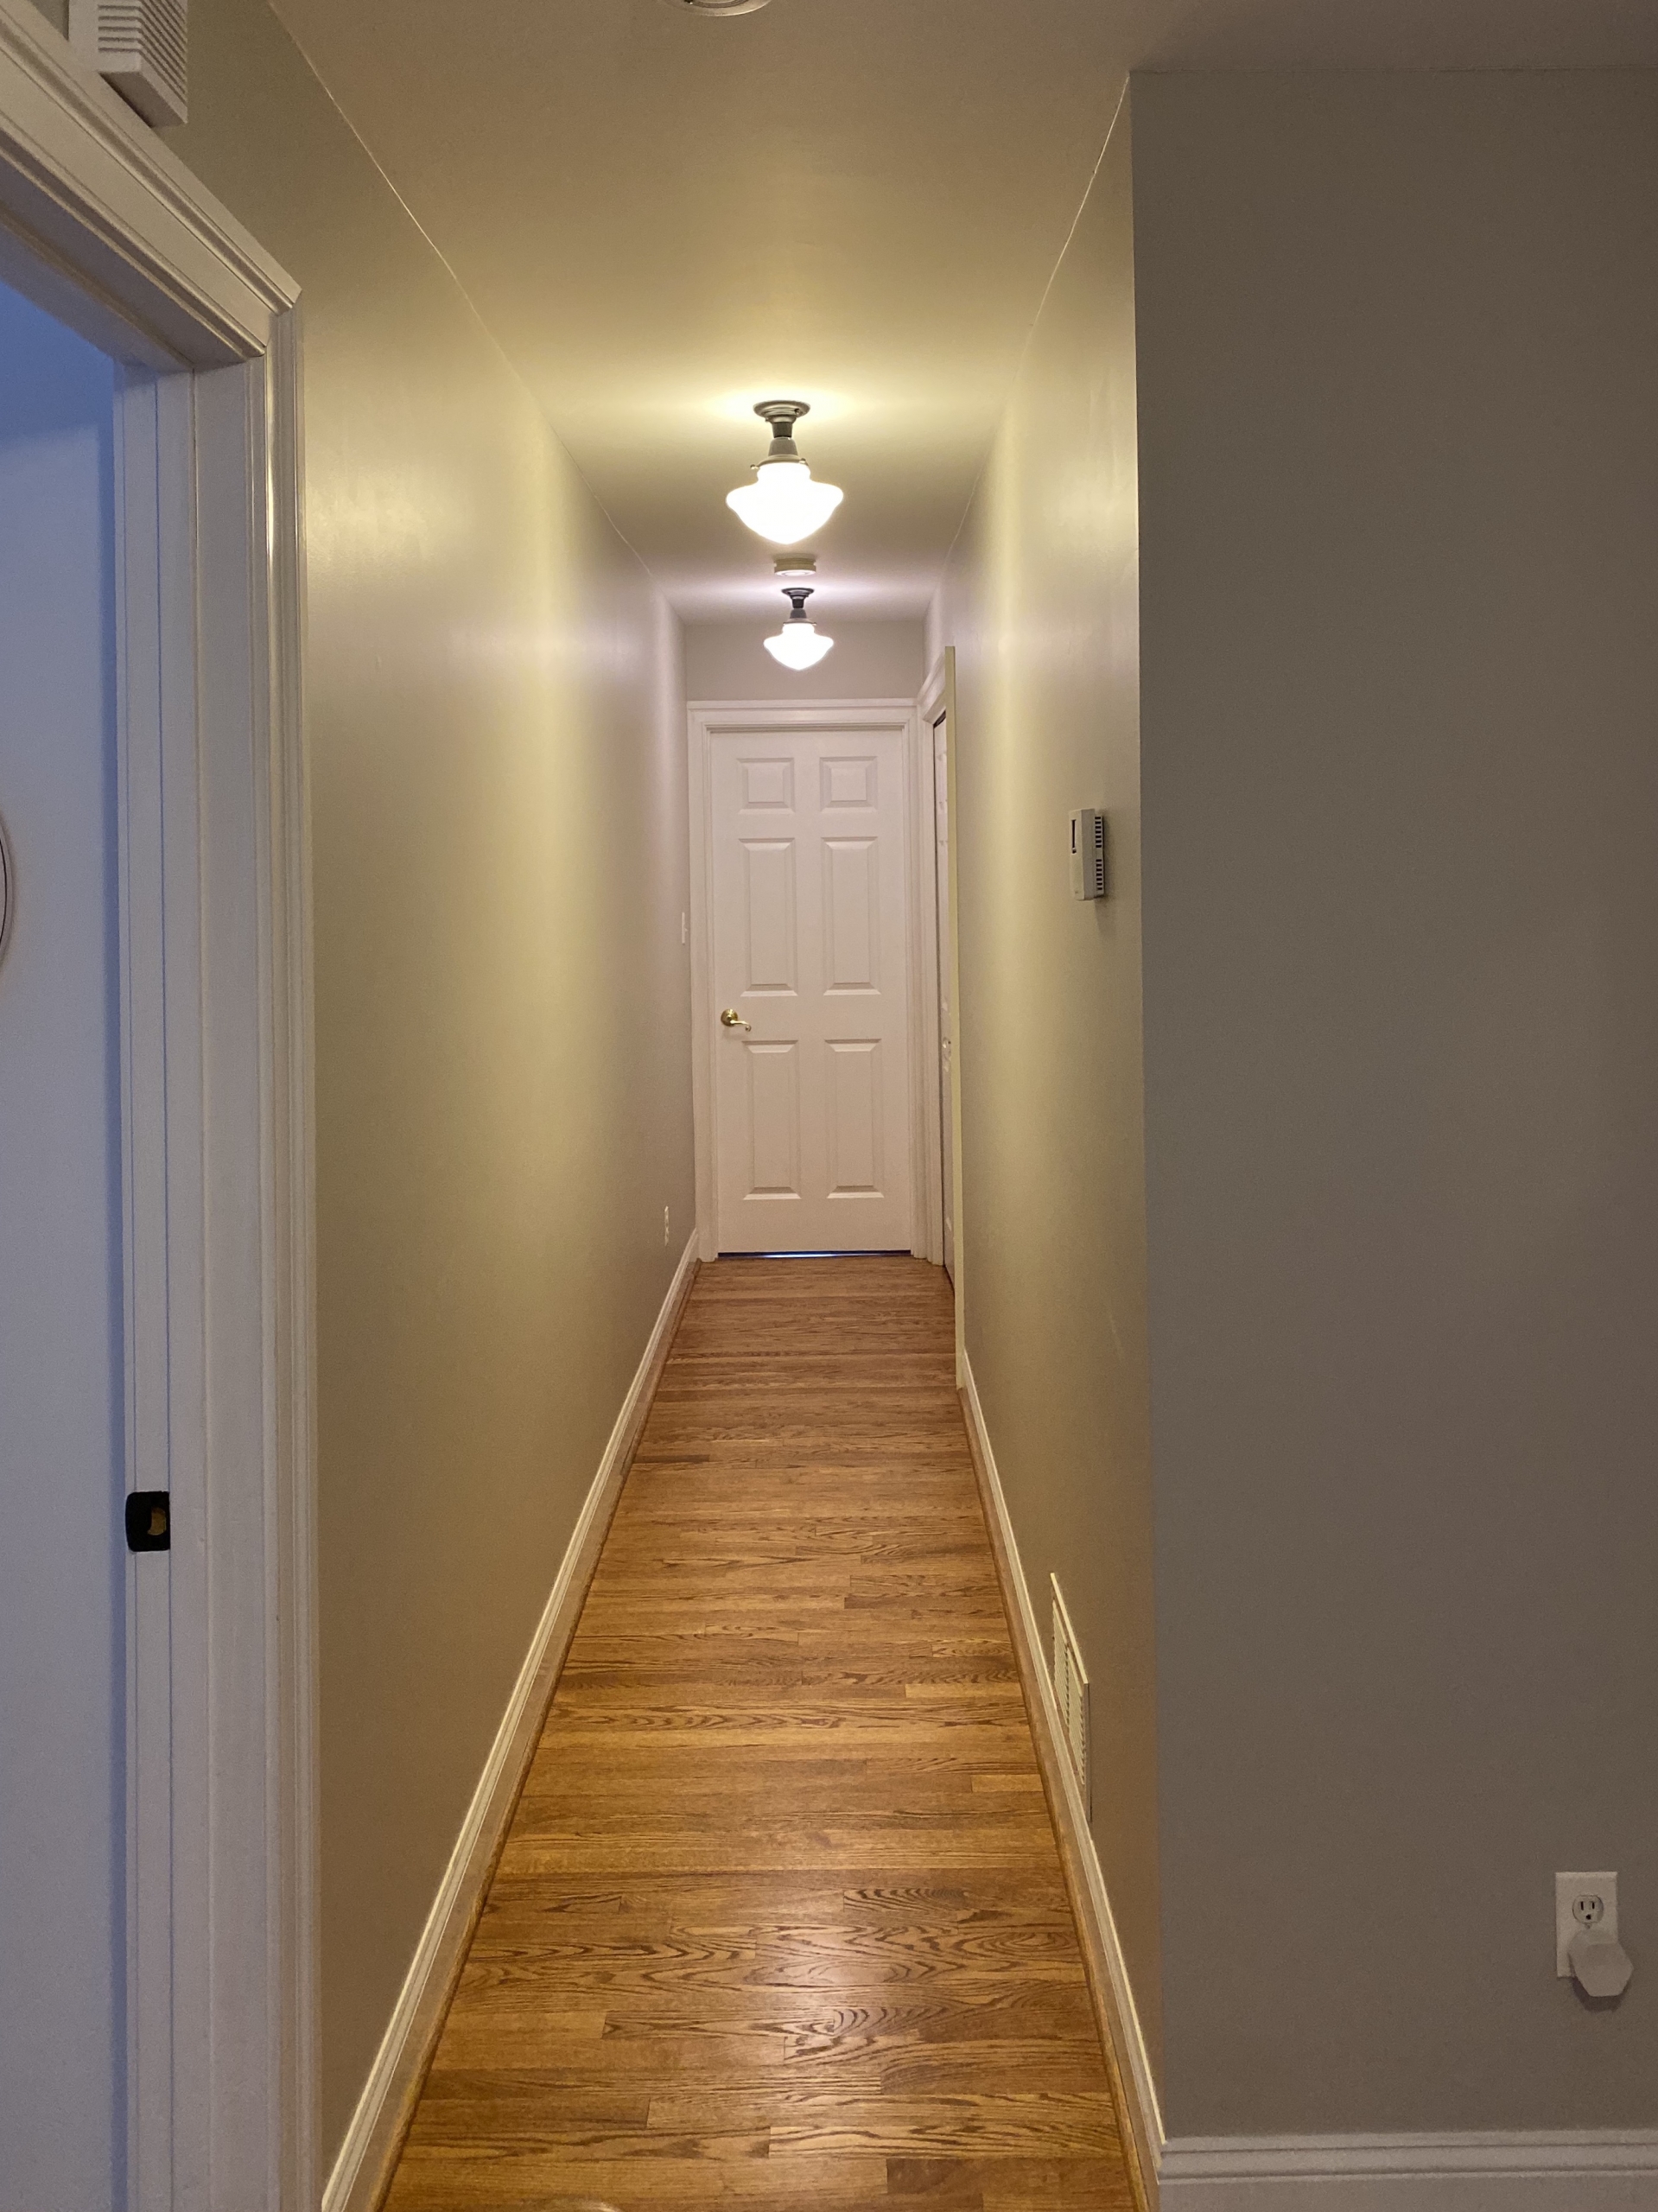
Hallway Molding Reveal
The end result made all the difference I was hoping for – from a dark and dingy hallway to white and bright with lots of visual interest and architectural details. Here are some before and afters that I know everyone enjoys:
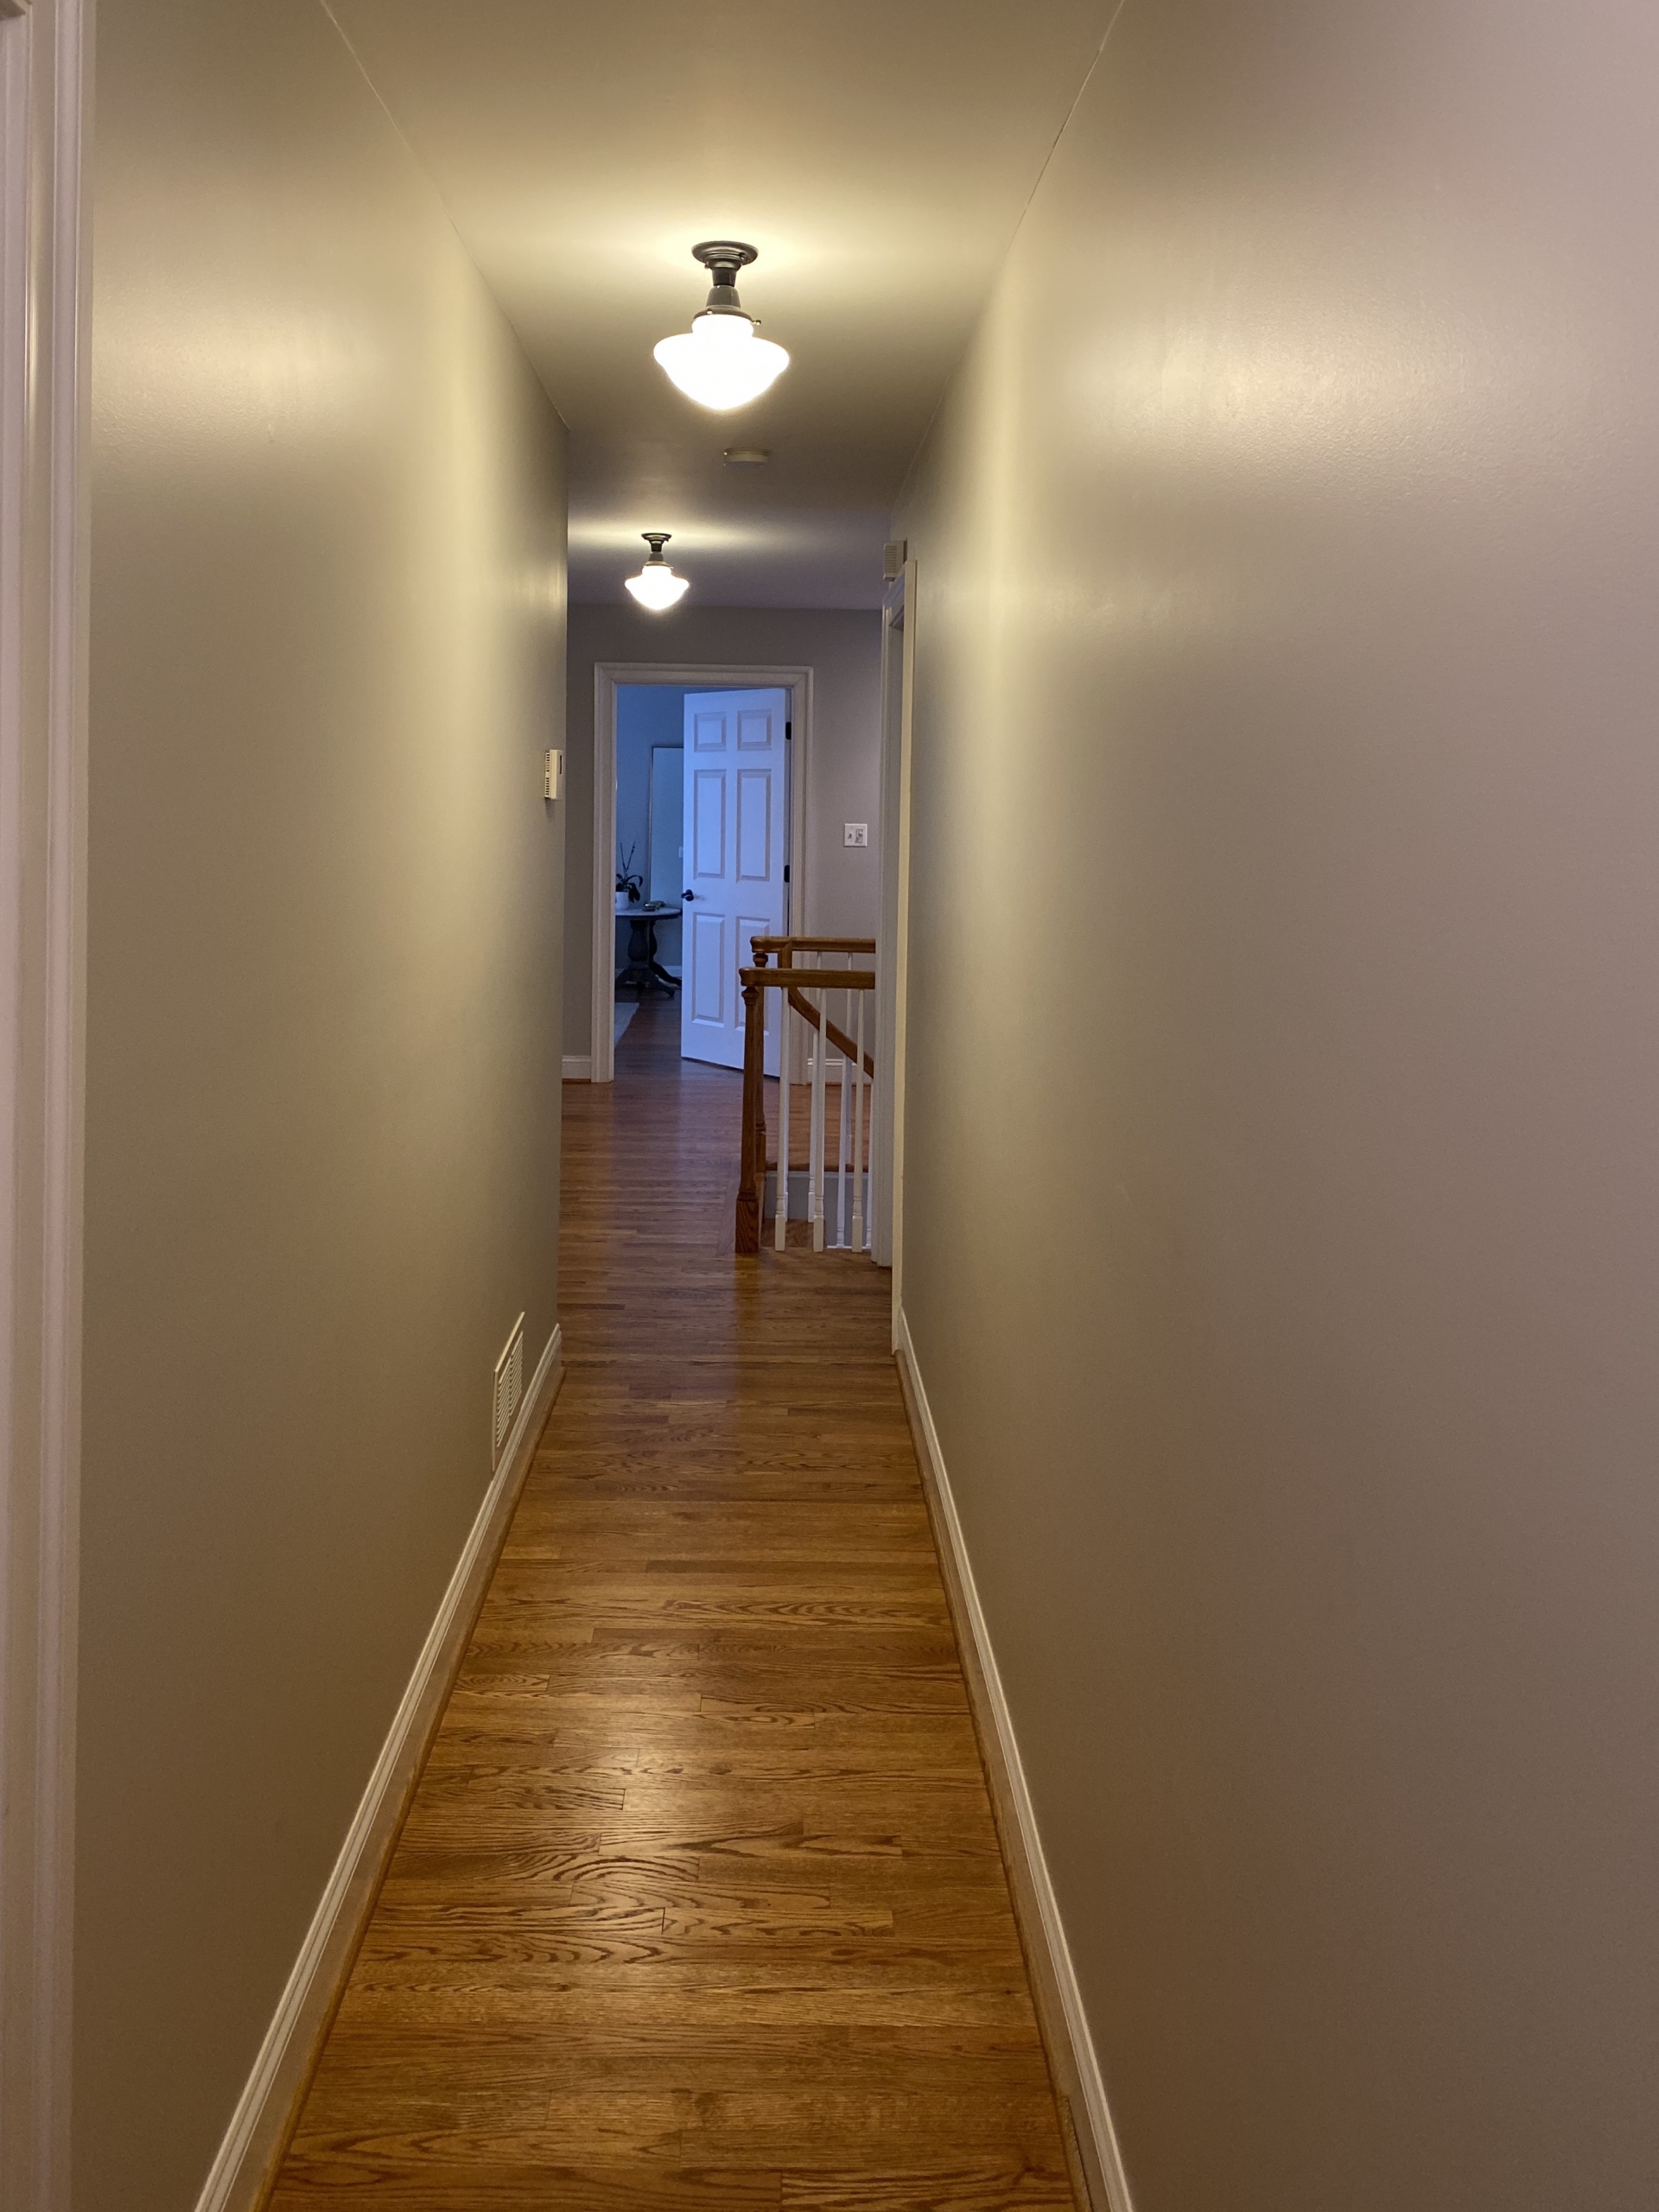
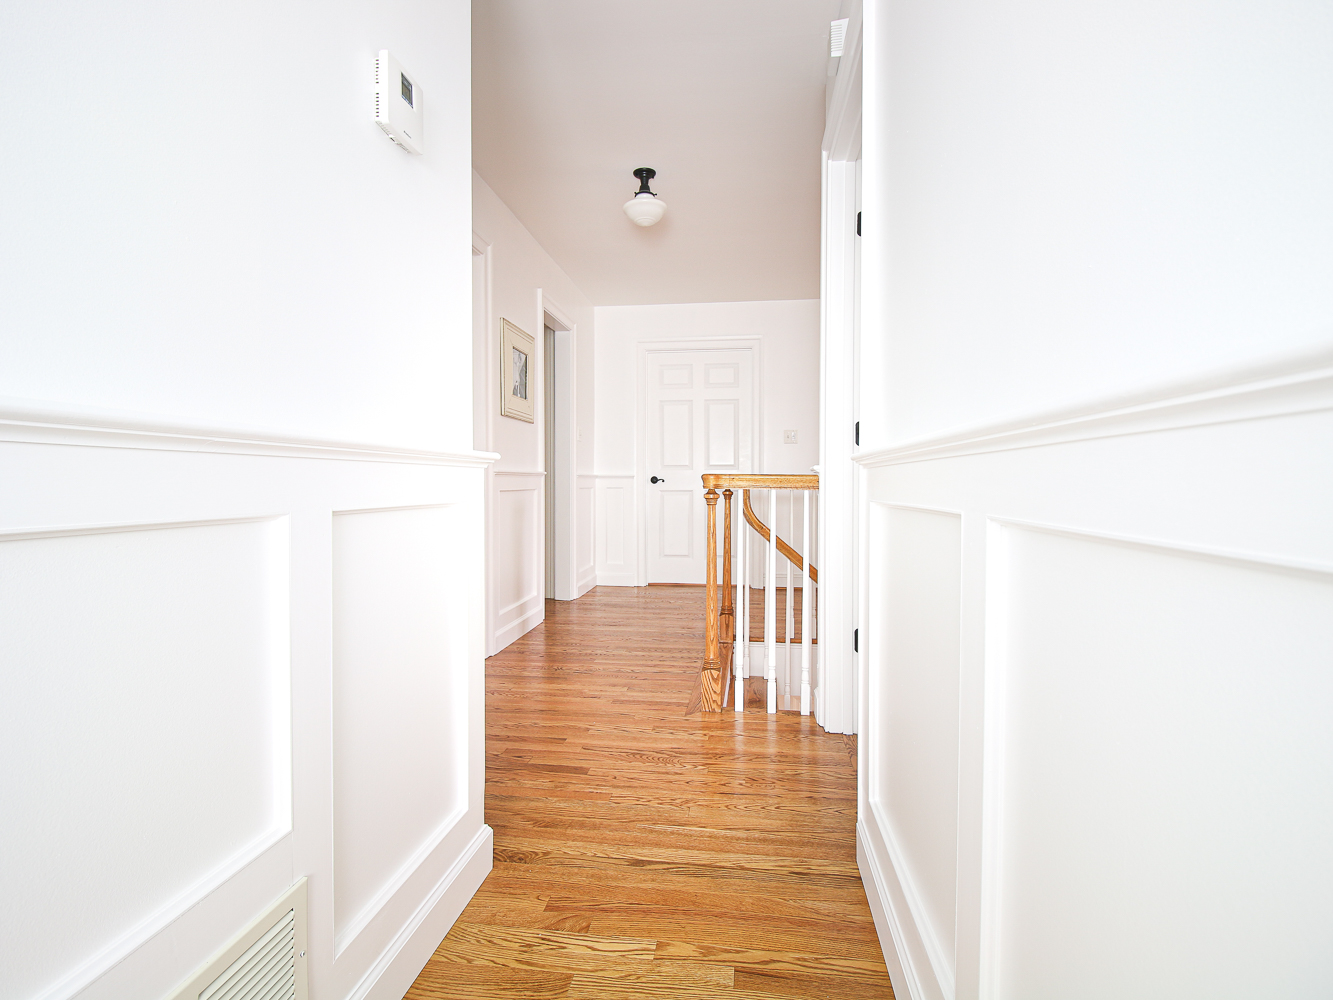
I used the blank walls as the perfect white backdrop for a gallery wall. These are my favorite Oversized Mat Frames from Pottery Barn. I like how the wood finish brings out the hardwood floors. I have plans for continuing those hardwood floors into the bedroom at the end of the hallway.
This came out beautiful. Can you share the details of the materials that you used (ie: the depth of the trim boards, the height of chair rail and the spacing of the battens)?
Thank you! I use primed finger joint pine boards from Home Depot. They’re 1×4 inches – nominal. In reality the exact measurement is 0.75×3.5 inches. The height of the chair rail is usually between 30-35 inches. In my case, I wanted it to run behind the banister so that’s what determined the exact height. The spacing of the vertical boards is determined by the length of the wall. Smaller walls just get framed along the corner and door casing. For the larger wall, I divide the space so that the boxes are more or less even width knowing that I want them to be in the 24″ – 34″ range.